🛠️ Quick Prep Summary: repotting a Monstera deliciosa
Knowing how and when to repot a Monstera deliciosa takes one unhurried session. The root ball decides the timing, not the calendar or a date you circled. Monstera deliciosa, an Araceae aroid, rarely needs more than a small step up in pot size.
- Tools: clean sharp scissors, a pot with drainage holes, sterile fresh mix
- Pot size: step up one to two inches, never several sizes at once
- Timing gate: repot when roots push out through the drainage holes
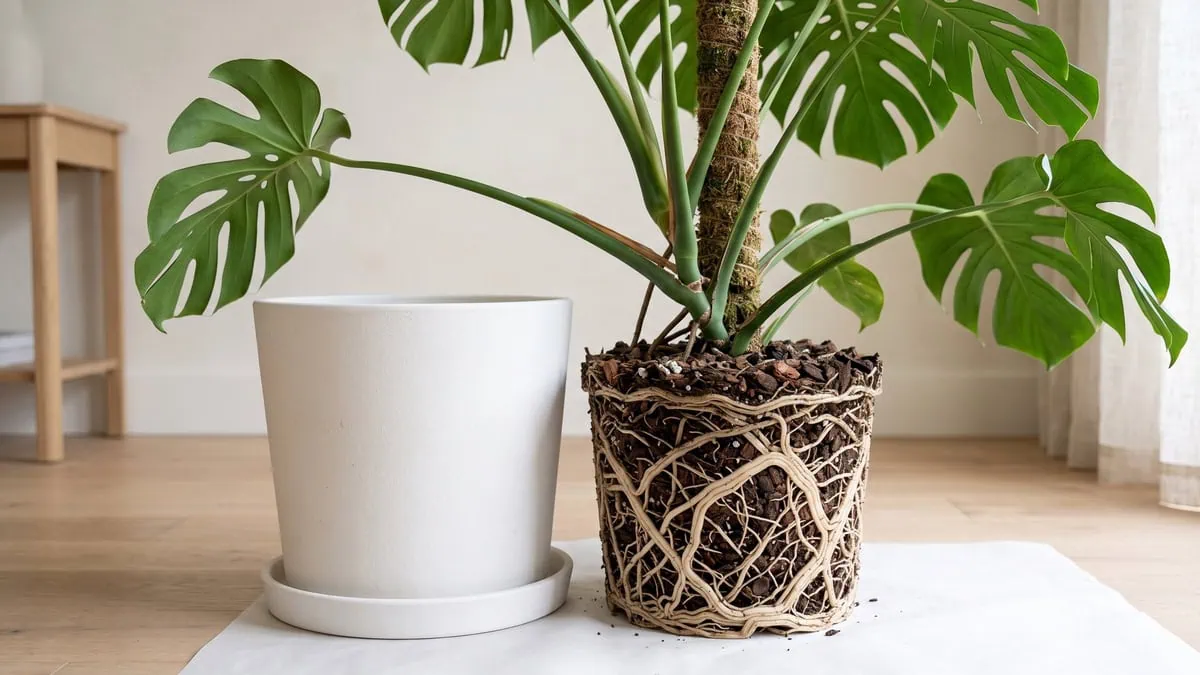
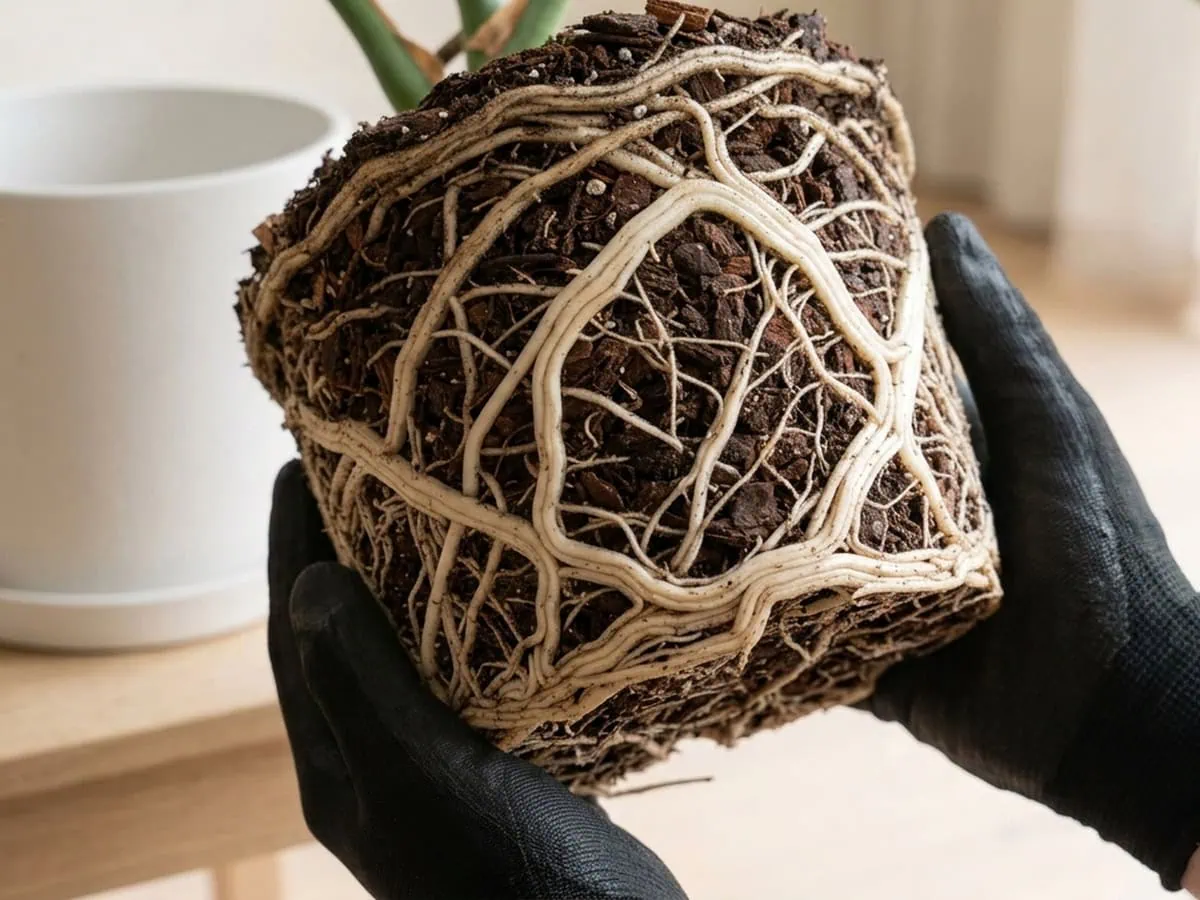
The root ball slid out still holding the shape of the pot, pale circling roots wound tight around the outside. Two Monstera deliciosa died on me across seven years that way (trust me on this), each one repotted on a date rather than because it was root bound. Both went limp within two weeks and never firmed up.
Seven years of repotting failure forced me to learn to repot on a schedule. Honestly, that’s not quite right… the schedule is what lost me both plants, because this plant banks no water in its stem and its fine feeder roots are the whole supply line that a repot destroys.
Slide it out and the ball sits cool against your palm, cooler than the sunlit face of the pot. Repot when roots push through the drainage holes, and step up one to two inches. Start with the full indoor routine for this climbing aroid if you want the wider context.
There is no rush on any of this. Every number the job needs waits in the card below, and the times in it are estimates rather than guarantees.
How and when to repot a Monstera deliciosa: quick specs
| Monstera specs | Quick specs |
|---|---|
| Repot interval | Every 1-2 years, judged by the root ball rather than by a date |
| Best time to repot | Early spring, as visible growth restarts (hemisphere-dependent) |
| Pot step-up, diameter | 1-2 inches larger than the current pot |
| Growing medium | A chunky aroid mix of equal parts fine pine bark, sphagnum peat and perlite, top-dressed with a thin layer of coarse horticultural grit |
| Sterile blade and clean container required? | Yes – 1 part household bleach to 9 parts water, then dried |
| Repot a newly bought plant straight away? | No – wait for the root-ball signal |
Tap the button below to get more plant fixes in your Google Search results

Table of Contents
Before you start: timing, the root-ball check and the kit
Everything that decides this repot happens before the plant leaves its pot. Check the root ball. Size the new pot, then lay out a clean kit.
The following sections take those three in order.
Is it actually root bound? The lift-out check
Roots at the drainage holes are a cue to look. They are not proof. Five signals say a pot is outgrown.
Roots through the holes. Roots also surface on the mix. A soil mass solid with roots, new leaves arriving smaller, and wilting between normal waterings.
But the headline sign can lie. One owner report shows roots pushing out of the holes simply because they were running toward a water source, on a plant that did not need moving at all.
So take the plant out and look. If the whole root ball lifts clear as one solid mass, still holding the shape of the pot, it is time. Type “signs a Monstera deliciosa is root bound” into a search bar and you get sign lists.
The lift-out is the check that decides. Read the roots while they are in your hands. Firm and white with fine feeder roots is healthy.
Brown, soft or sour is not. That is rescuing a root system that has already failed, which is a different job. The ball comes out cool against the palm, cooler than the pot wall that has been standing in the light.
Deep pot or wide pot, and how much bigger
Go deeper rather than wider. Step up only 1-2 inches in diameter. Indoors this plant reaches seven to eight feet on a totem.
Its leaves run up to three feet across, on petioles just as long. That weight has to stand in something that will not tip.
| What changes | Deeper against wider |
|---|---|
| Stability under a top-heavy crown | Depth wins; it also takes the totem |
| Root room gained per inch | Roughly equal on a small step-up |
| Wet mix left after watering | Either shape holds it if the jump is large |
Verdict: Choose the deeper pot when the plant already leans. Crown weight is what topples it, not root direction.
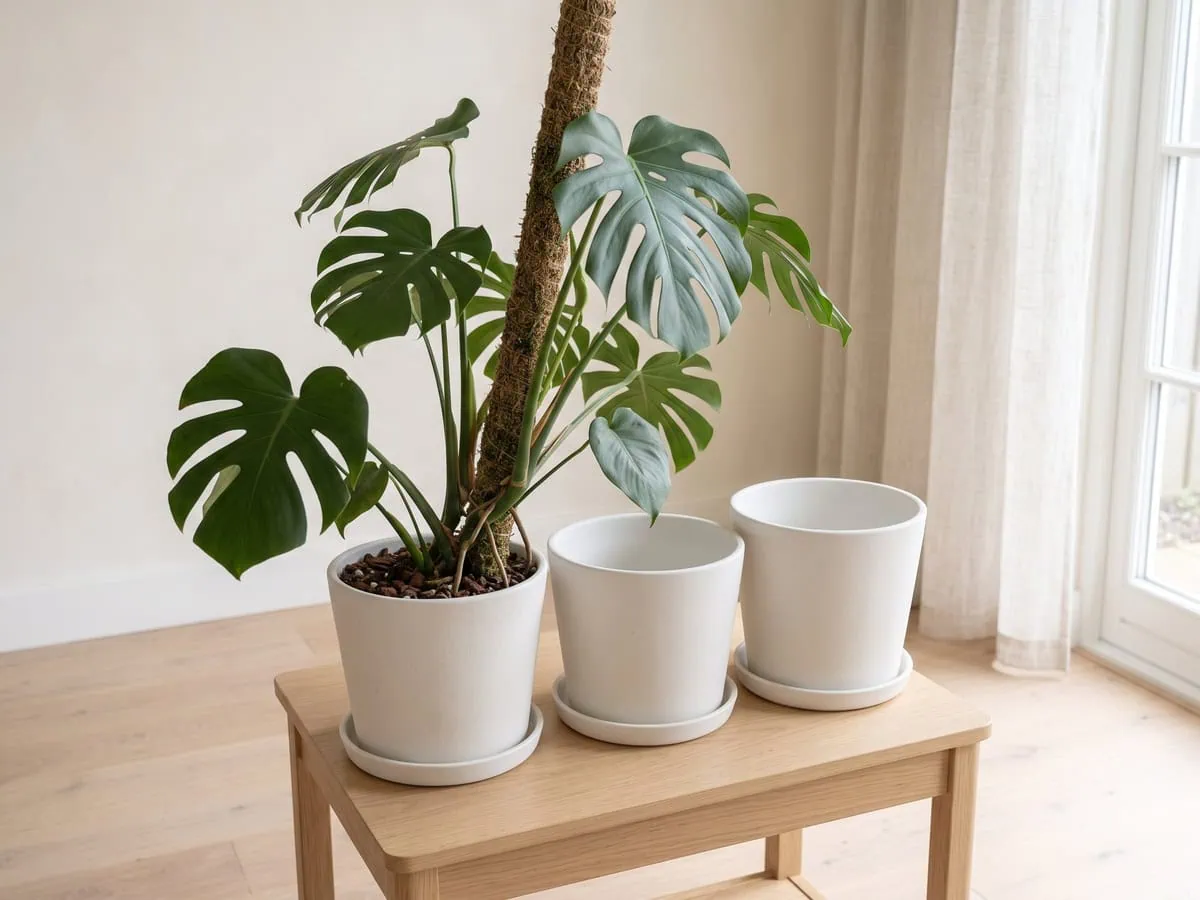
The honest answer to “what size pot does a Monstera deliciosa need” is the smallest jump that still buys room. Published advice runs from under half an inch to three inches. Pick the small end and repot sooner.
Does this plant like being root bound?
Root crowding is tolerated here, not preferred. One extension service records that this plant dislikes root crowding. It wants repotting a little more often than the average houseplant.
Another notes that aroids as a group do well slightly pot-bound. My working theory is that both are describing one plant at two different stages.
Watch two things instead of picking a side. New leaves arriving smaller. A pot that dries faster every week.
Search “do Monstera deliciosa like to be root bound” and you will meet both answers on the same afternoon.
Tools, pot hygiene and a second pair of hands
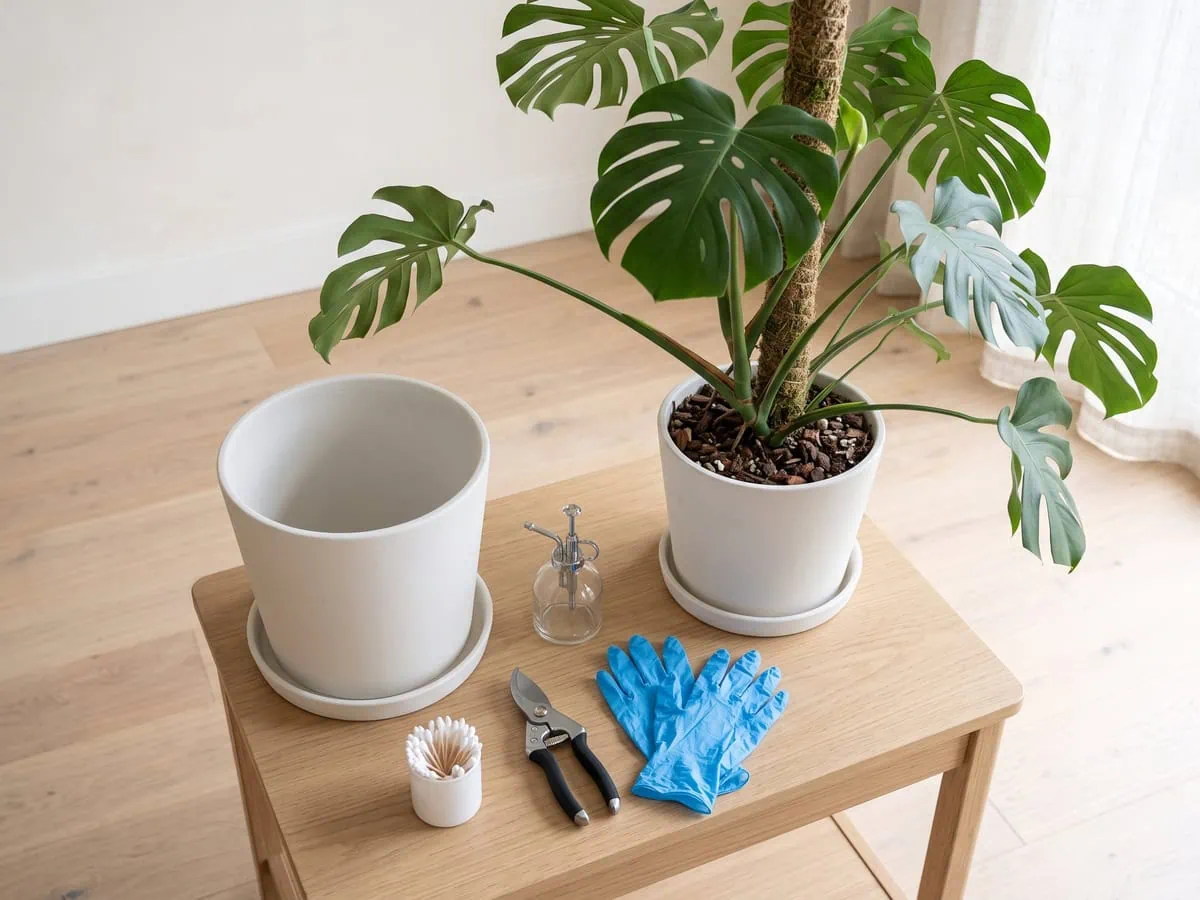
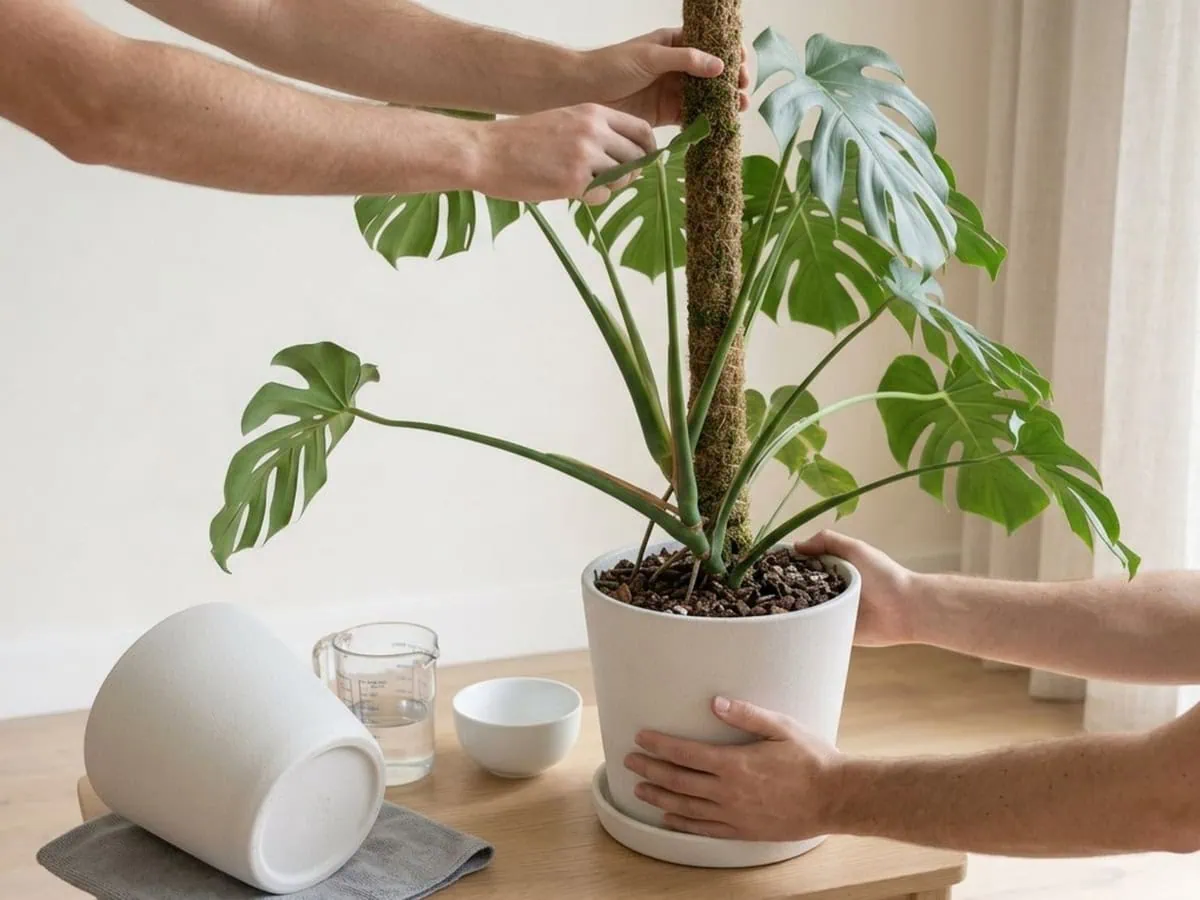
Lay out sharp clean scissors, gloves and the new pot. Add the chunky aroid mix this plant roots into. Cut and broken tissue leaks sap carrying needle-shaped crystals.
They redden and irritate skin on contact. Gloves are not optional here. Wipe the blade with rubbing alcohol between cuts.
Clean a reused pot with 1 part household bleach to 9 parts water. Dry it before the plant goes in. Soak until the mix is wet through rather than to a clock.
Then plan the lift. A full-grown specimen is a floor plant with a heavy crown, and its totem has to be held and re-seated as the pot comes off, so a very tall plant needs a second person on the top while you work the root ball free.
Tap the button below to get more plant fixes in your Google Search results

Repot it step by step, start to finish
Six steps move a Monstera deliciosa into its new pot in one sitting. Type “how to repot a Monstera deliciosa without transplant shock” into a search bar and every answer lands on one organ: the fine feeder roots. They are set out here in the order they happen.
Step 1: Water it one to two days ahead
Water it thoroughly one to two days out. A damp ball lifts whole. A bone-dry one crumbles.
Use water that has stood in the room. Straight off the cold tap it arrives at pipe temperature, several degrees under the leaf it lands on, so the dry-down check is the same one how often the pot should be watered turns on: the top two inches.
Step 2: Fill the new pot one third
Fill the new pot one third full first. The medium is a chunky aroid mix of equal parts fine pine bark, sphagnum peat and perlite, top-dressed with a thin layer of coarse horticultural grit.
Bark out of the bag is dry and cool against the palm. Skip rocks in the base. A gravel layer does not improve drainage, and extension guidance says so outright.
Step 3: Ease it out and read the roots
Tip the pot sideways. Slide the plant out rather than hauling it by the stem. Gloves first, because cut tissue leaks sap carrying needle-shaped crystals that redden and irritate skin on contact.
Read the ball in your hands. Firm and white with fine feeder roots is sound. Brown, soft or sour is not.
The core runs colder than the crust, because a two-day-old watering is still sitting in the middle, and in my testing across repot after repot, the leaf spots that surface a fortnight later trace back to these thirty seconds.
- Gloves: nitrile or thick gardening gloves for all handling that contacts sap.
- Cold-water rinse: if sap reaches skin, rinse under cold running water for at least 60 seconds.
If a severe skin reaction develops (blistering or intense burning), seek medical attention immediately. For chemical exposure, you can also contact Poison Control (1-800-222-1222 in the US).
Step 4: Loosen only the circling roots
Break up only what wraps the outside face. Leave the interior packed. Illinois Extension states the target plainly: break up any pot-bound or circling roots so a dense mat no longer sits on the outside of the root ball. Through the glove the outer mat reads cool and slack, cooler than the warm crown you have just been steadying.
Never rinse the ball. Never swap out the old medium. Removing that soil tears away the tiny root hairs doing most of the work, which owner reports call often fatal, and one reported loss followed a garden center instructing exactly that.
Step 5: Set it at its old soil line
Stand it so the old soil line sits where it sat before. The published instruction is narrow. Add just enough medium to barely cover an exposed root, without burying it deeply.
Re-seat the totem now, while the pot is open. Moss is what the aerial roots grip, so training the stem up a moss totem begins here, and the fresh mix goes in at room temperature, warmer to the hand than the ball that stood all week in a cool corner.
Step 6: Backfill, leave headroom and water through
Fill around the ball, then stop roughly one inch below the rim so poured water has somewhere to sit. Water well so excess drains out. Then repeat many times, especially where the mix carries peat.
That repetition is the settling step. It collapses the air pockets the lift-out opened. The runoff comes through the holes cool, a shade under the mix it just fell past.
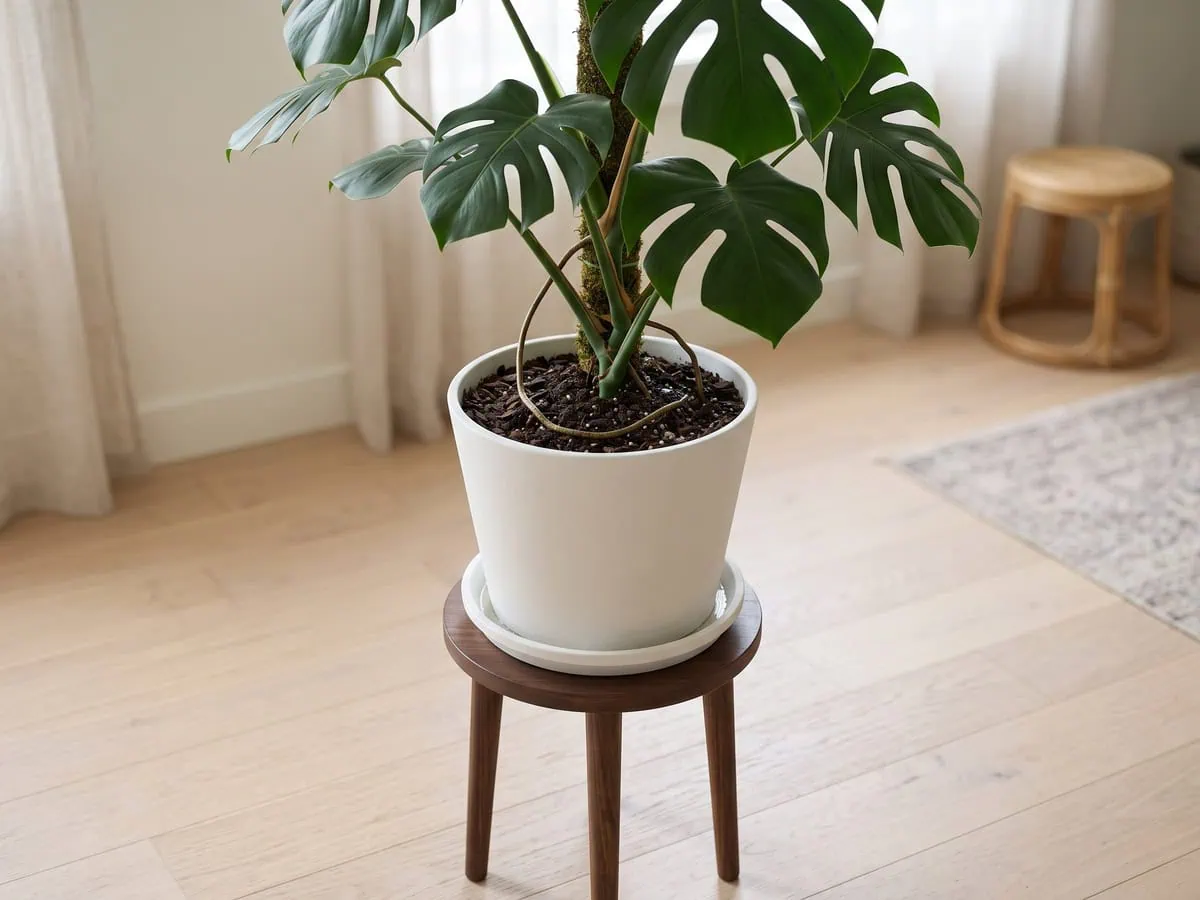
Steer any long aerial root down into the mix as you fill; steering the aerial roots into the pot is the published move straight after a repot.
After the repot: what is normal and what is not
A repotted plant sulks before it grows, and the sulk is the normal part. Sorting it from the failure it imitates takes three checks, set out here.
The first two weeks: drooping, light and water
Expect drooping. Disturbed roots stop moving water for a while, and extension guidance names that state transplant shock.
Watch the direction, not the droop. A plant that sits equally limp day after day is inside the normal window; one that looks worse each morning is telling you something else went wrong in the pot. That difference is visible without touching anything.
Across both plants I lost, the droop deepened; the ones that recovered simply held still for a fortnight and then pushed a root, unremarkably.
Recovery is root-first, not leaf-first. New roots form before anything happens above the mix, so the honest marker is a fully unfurled new leaf, on a timescale of months rather than weeks.
Water with more care than usual, not less often. The plant is not used to that much medium around its roots. Over-watering it now walks it into the failure the repot was meant to head off.
Wait until the top one to two inches are dry. Then water until it drains.
Leave the light where it was. Any change goes gradually in either direction, and some yellowing after a light drop is adjustment rather than damage.
Hold the feed until growth restarts, and why
Hold the feed. The published rule is not a clock at all: wait until the plant is actively growing again.
A root system that is still rebuilding cannot take up what you apply. The unused salts stay in the mix, and excess feeding builds exactly the buildup that browns leaf tips and margins later.
The fix, if that happens, is mechanical. Leach the pot with at least three times its own volume of clear water. Let it drain right through.
Yellow leaves after a repot: wait or act?
Read which leaf, not the color. A single bottom leaf giving up on its own is ordinary shedding.
Yellowing that climbs into new growth is the root-zone case, and that one needs action. Sink a slim skewer into the mix before you decide; damp medium clings to it, dry medium comes away clean, and the surface inch tells you nothing about the root zone.
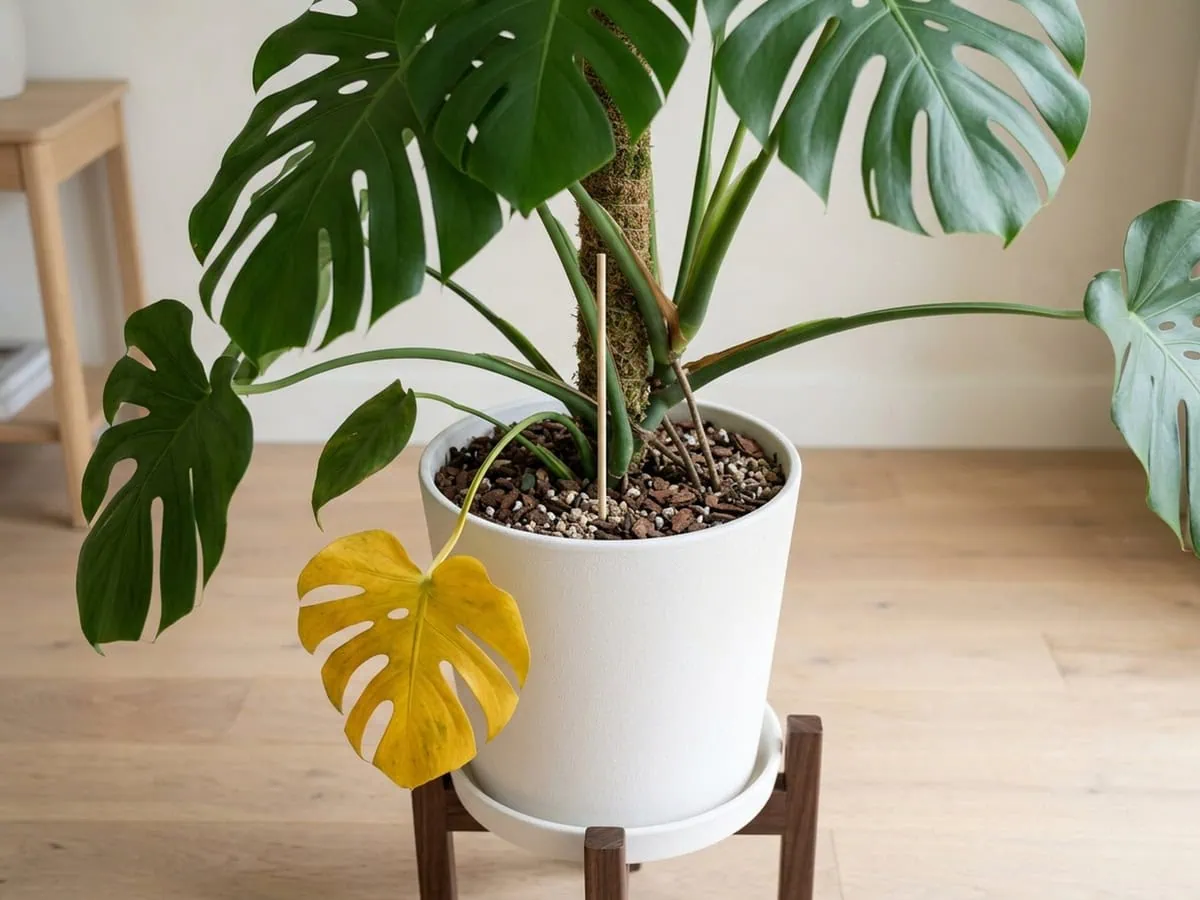
Search “Monstera deliciosa yellow leaves after repotting” and both answers arrive together.
The split held under testing here. Pale new leaves meant the roots. A single old leaf meant nothing at all.
The mix that came out of the bag cool now sits warm to the fingertip, two weeks into the room.
Frequently asked questions about repotting
Do Monsteras like deep pots or wide pots?
Depth wins for this plant, because crown weight rather than root direction is what topples it. A mature indoor specimen reaches seven to eight feet on a totem, carrying blades up to three feet across on petioles just as long.
That load needs a pot it cannot lever itself out of, and a deeper container also holds the totem more securely. Either shape is acceptable so long as the step-up stays at one to two inches of diameter.
Do Monsteras go into shock after repotting?
Yes. Extension guidance names it directly: disturbed roots produce transplant shock, and drooping in the first fortnight is the ordinary form of it.
Recovery runs root-first. New roots form before anything visible happens above the mix, so the honest success marker is a fully unfurled new leaf on a timescale of months. Watering carefully through that window matters more than anything else you can do, because the plant now sits in more medium than its reduced root system can use.
Do Monsteras like being repotted?
This plant tolerates repotting rather than enjoying it. An extension service records that it dislikes root crowding and wants repotting a little more often than the average houseplant.
The operation itself still takes something from the plant. Repotting-inflicted root damage is a distinct cause of decline in its own right, separate from ordinary over-watering, and one recorded case lost its feeder roots to three repots inside a single year. Repot on the root-ball signal, then leave the plant alone until the signal returns.
What month should I repot my Monstera?
No month governs it. The observable that governs is visible growth restarting, which is the physical event a calendar date only approximates.
Most readers will meet that restart in early spring, and that window is hemisphere-dependent rather than fixed. Most care guides hand out a season word with no physical threshold attached, which is why the growth restart governs instead. Pair the timing signal with the root-ball check before you commit to the operation.
What happens if you don’t repot a Monstera?
The pot reports it before the plant does, and the five outgrown signals arrive in a recognizable order. Roots push through the drainage holes or surface on the mix, the soil mass turns solid with roots, new leaves come in smaller than the last, and the plant wilts between waterings that used to hold it.
Roots at the holes on their own settle nothing. One documented case had roots running toward a water source on a plant that needed no move at all.
Do Monsteras like to be crowded?
No, and this species is the exception to the rule of thumb that aroids enjoy a snug pot. Illinois Extension records that it dislikes a lot of root crowding and needs repotting a little more often than other houseplants.
The clearest tell is the watering interval collapsing. A pot that held moisture for days and now needs water almost daily has roots that have outrun their medium, and smaller new leaves usually arrive alongside it.
Rescue the root ball, revive the plant, repeat only when it asks
Between you and me — the hardest part of this job is not the lifting. Not the mix, either. It is the waiting.
The root ball answers what the calendar cannot. Lift it clear. Read it in your hands, step up one to two inches, and leave the rest alone.
You feel the finish before you see it. The fresh mix comes up to room temperature, top and bottom alike.
Once that first leaf unfurls, the next question is what the stem wants to climb. The aerial roots answer it before the pot does.
Knowing how and when to repot a Monstera deliciosa (and I have tested this the slow way) comes down to one habit: read the ball, not the date. Two weeks after a good repot the plant does nothing at all, and that stillness is the confirmation you are waiting for.
Tap the button below to get more plant fixes in your Google Search results