🛠️ Quick Prep Summary: propagating a ZZ plant
How to propagate a ZZ plant from cuttings breaks into three proven routes. You take a stem cutting, a single leaflet, or you divide the rhizome. Zamioculcas zamiifolia banks energy in that rhizome first, so roots follow months later; gather this kit before you cut.
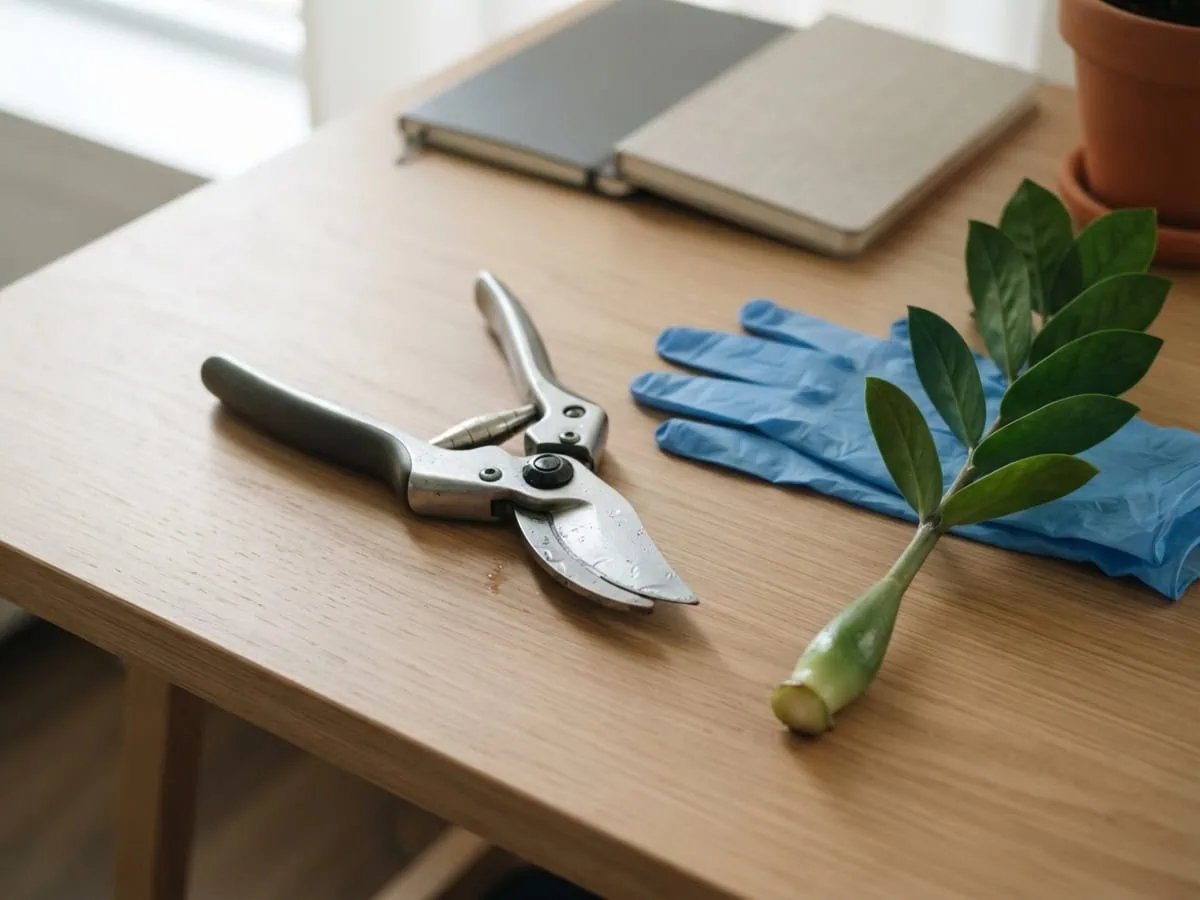
- Sterile blade: bypass shears wiped with 70% isopropyl alcohol before every cut
- Nitrile gloves: the cut sap carries needle-shaped crystals that irritate bare skin
- Warmth, not a month: substrate held near 76-90F roots every route measurably faster
Six ZZ stem cuttings sat in a jar on my desk for a year, and not one grew a root.
Honestly? I threw all six out. Only later did I find the pale, bulbous swellings already forming at the cut bases (I’ll explain in a sec).
Conventional cutting advice nearly lost me every ZZ I tried to multiply: count the nodes, dip the cut end in rooting hormone, and start over if no roots show by week six. The real fix is knowing what Zamioculcas zamiifolia builds first. It is a geophyte, a plant that banks its reserves underground, so a cutting spends months growing a rhizome — the fat storage stem — before it grows roots.
The timeline below is not a delay. It is the plant working. Three routes get you there, and one skips most of the wait.
For the day-to-day care picture behind all of it, start with caring for a ZZ plant day to day.
Take a breath — nothing about this needs rushing. The following table lays out every spec you need before the first cut.
How to propagate a ZZ plant from cuttings: quick specs
| ZZ plant specs | Requirement |
|---|---|
| Easiest method | Rhizome division (beginner) |
| Difficulty | Low to medium, beginner-friendly |
| Time to take a cutting | 10-20 minutes |
| Time to root (rhizome forms first) | ~3-4 weeks (short stem in water); ~8+ months (single leaf) |
| Sterile blade required? | Yes |
| Rooting hormone required? | No (optional) |
Tap the button below to get more plant fixes in your Google Search results

Table of Contents
Before you cut: tools, timing, and what to expect
Three things decide whether a ZZ cutting takes: a clean blade, a warm spot, and patience. Plenty of guides will tell you a single leaf cannot root at all, and that you need a stem carrying two or three leaflets. Let me reframe that.
Single leaflets root fine. They are just the slowest and least reliable route — a very different claim. The sections below cover the kit, the timing, and the biology behind the wait.
The propagation toolkit and a sterile blade
Sterilize the blade before every cut. Wipe or dip bypass shears in 70% isopropyl alcohol, which needs no long soak, or soak them in one part household bleach to nine parts water for at least 10 minutes and rinse. A dirty blade is how a clean cut becomes a rotting one.
Add nitrile gloves, plus a clear glass jar or a small pot of gritty mix. The same medium that suits a grown plant suits a cutting: the best soil mix for a ZZ plant is a fast-draining gritty mix of roughly 2 parts coco coir to 1 part pumice, top-dressed with a thin layer of coarse pumice grit.
It sheds water fast, so a fresh cut never sits wet. Rooting hormone is optional. Skip it and nothing breaks — and if you do reach for an IBA or NAA powder, dust the cut end lightly, because too much can slow root formation.
When to take cuttings: warmth beats the calendar
No month is too late indoors. Rooting rate tracks substrate warmth and light, not the date. Hold cuttings between 65-75F in bright indirect light for four to six hours a day, and they root on their own schedule whatever the month.
Warmth is the one dial that genuinely moves the timeline. Hold the substrate near 76-90F — bottom heat from a seed-starting mat — and every route roots faster.
This plant’s fastest overall growth sits in that same band, so warmth pays twice. Always follow the manufacturer’s instructions and applicable safety standards for any electrical equipment.
Below 65F, everything simply idles.
Why ZZ propagation is slow: rhizome first, roots second
A ZZ cutting builds its storage organ before it builds roots. That is why it takes months where most houseplant cuttings root in three to six weeks. Zamioculcas zamiifolia evolved in a seasonally dry tropical biome, surviving drought on a tough, woody underground rhizome — roughly 1.2-1.6 inches across, often more — plus the swollen base of every leaf stalk.
Cut a stalk or a leaflet loose and it inherits that priority. Stored carbohydrate goes into a new rhizome first, because without a bank the plantlet cannot ride out its own first drought. Roots come second, and the shoot comes last.
So a cutting with no roots at week six has not failed. It is busy underground, out of sight. That fact would have saved my six.
Tap the button below to get more plant fixes in your Google Search results

The 3 proven ZZ propagation methods, step by step
The three proven routes are a stem cutting, a single leaflet, and rhizome division. They differ only in what you cut and how long you wait. The steps below run in the order most growers try them; the last is fastest.
Wear nitrile or thick gardening gloves for every cut in this section. ZZ sap carries raphides — microscopic, needle-shaped calcium oxalate crystals — and they cause immediate mechanical irritation, burning and swelling where they meet bare skin. If sap reaches your skin, rinse it under cold running water for at least 60 seconds, and keep your hands away from your eyes until you have washed them. If a severe skin reaction develops (blistering, intense burning, or photosensitivity), seek medical attention immediately. For chemical exposure, you can also contact Poison Control (1-800-222-1222 in the US).
Method 1: stem cuttings in water or soil
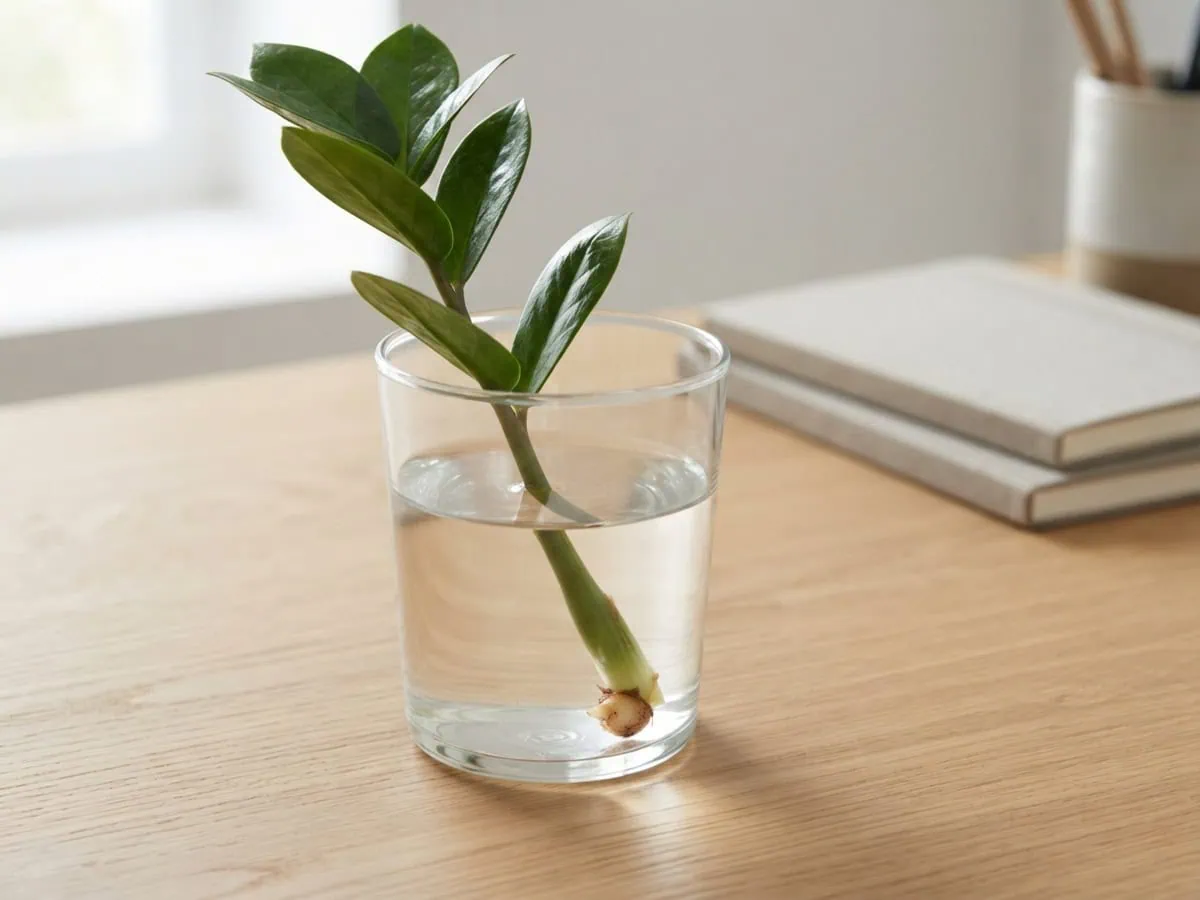
Most growers want to know how to propagate a ZZ plant in water first, because a glass jar lets you watch it happen. Cut a whole leaf stalk off at its base with the sterile blade.
For a shorter piece, take a section of the rachis — the fleshy stalk. Give it at least two nodes and three to six inches of length, the standard Iowa State University Extension sets out in the stem-tip cutting method for houseplants. Strip the lowest leaflets so nothing green sits under the water line.
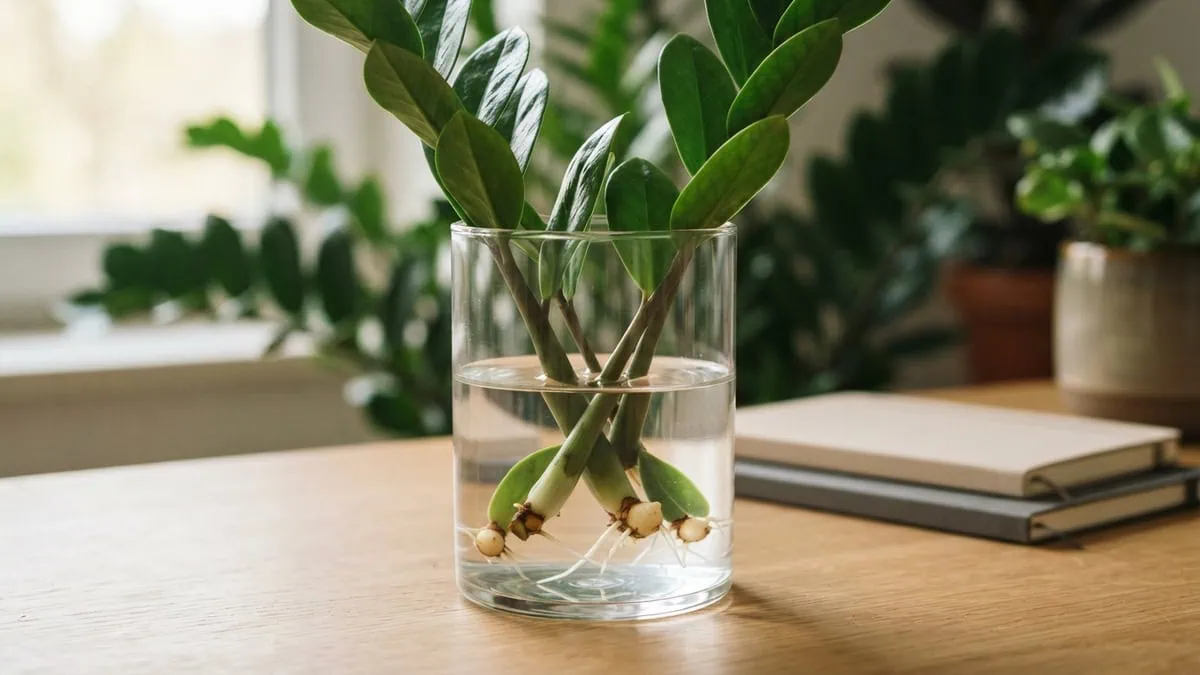
For water, stand the bare cut end in a clean glass and refresh it every 1 week, because changing it replenishes the oxygen the cut base needs and stale water is exactly where rooting stalls.
Within a few weeks a pale, pea-sized swelling appears at the cut end, the color of a peeled potato. That is the rhizome, long before any root.
For soil, let the cut face dry and callus over for a few hours first. Callus formation gives the cut a hard, sealed face before it meets damp mix.
Then push it an inch into the gritty mix. Water once. Then leave it.
Method 2: single-leaf (leaflet) cuttings
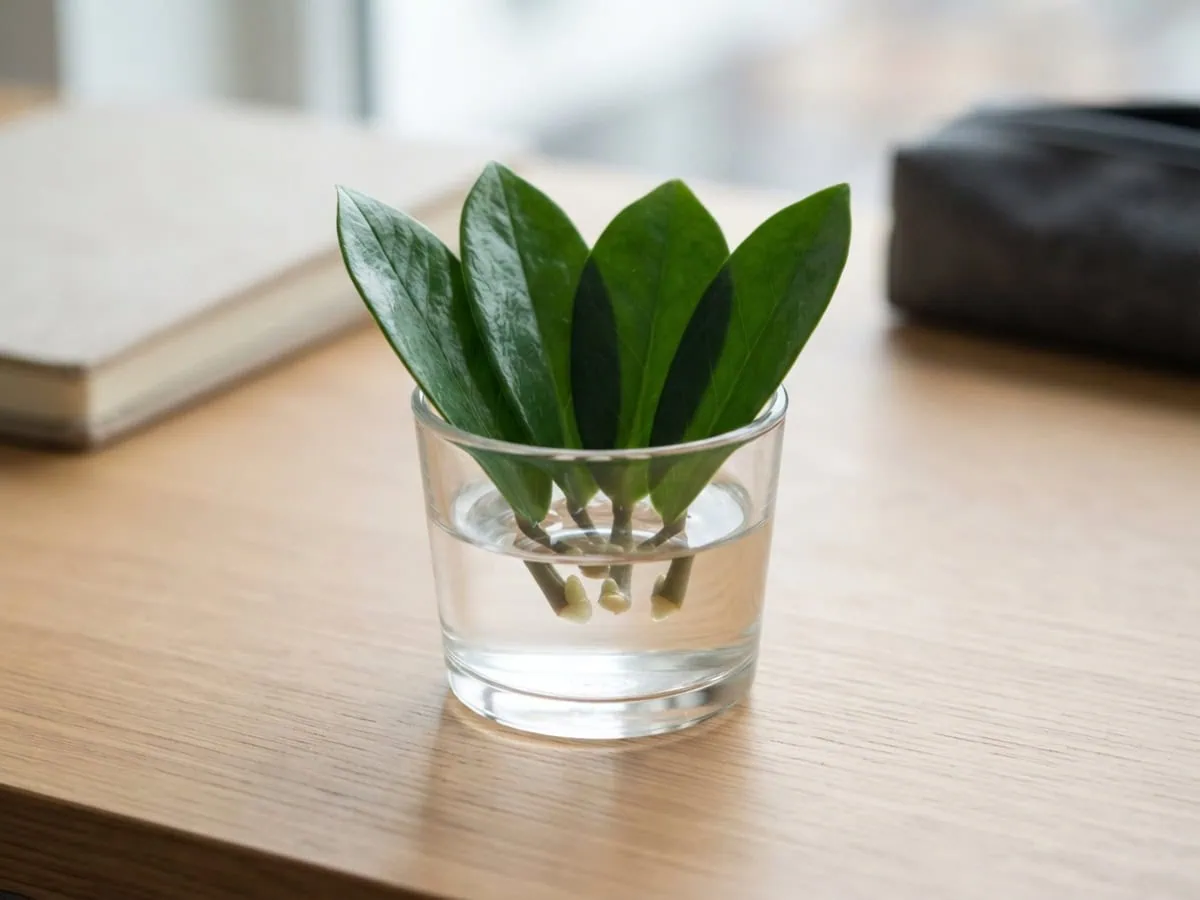
Pull, do not cut, a leaflet from the stalk. It has to come away with the small basal nub at its base intact, because every bud that builds a rhizome sits in that nub. A leaflet snipped across the blade is dead weight.
Take three to five at once. Nobody publishes a defensible ZZ plant leaf propagation success rate, and any figure quoted online was invented — so hedge with numbers instead of hope.
Skip the callusing step here. That rule is for thick stem cuttings going into soil. A thin leaflet has almost no cut face to seal, and drying it only drains reserves it needs.
Stand the nubs in a shallow glass of water, or press them a half inch into damp gritty mix under a loosely vented bag. Then leave them alone. The source leaflet will yellow and shrivel to paper around the six-month mark — that is the plant emptying it into the new rhizome, not the cutting dying.
Method 3: dividing the rhizome
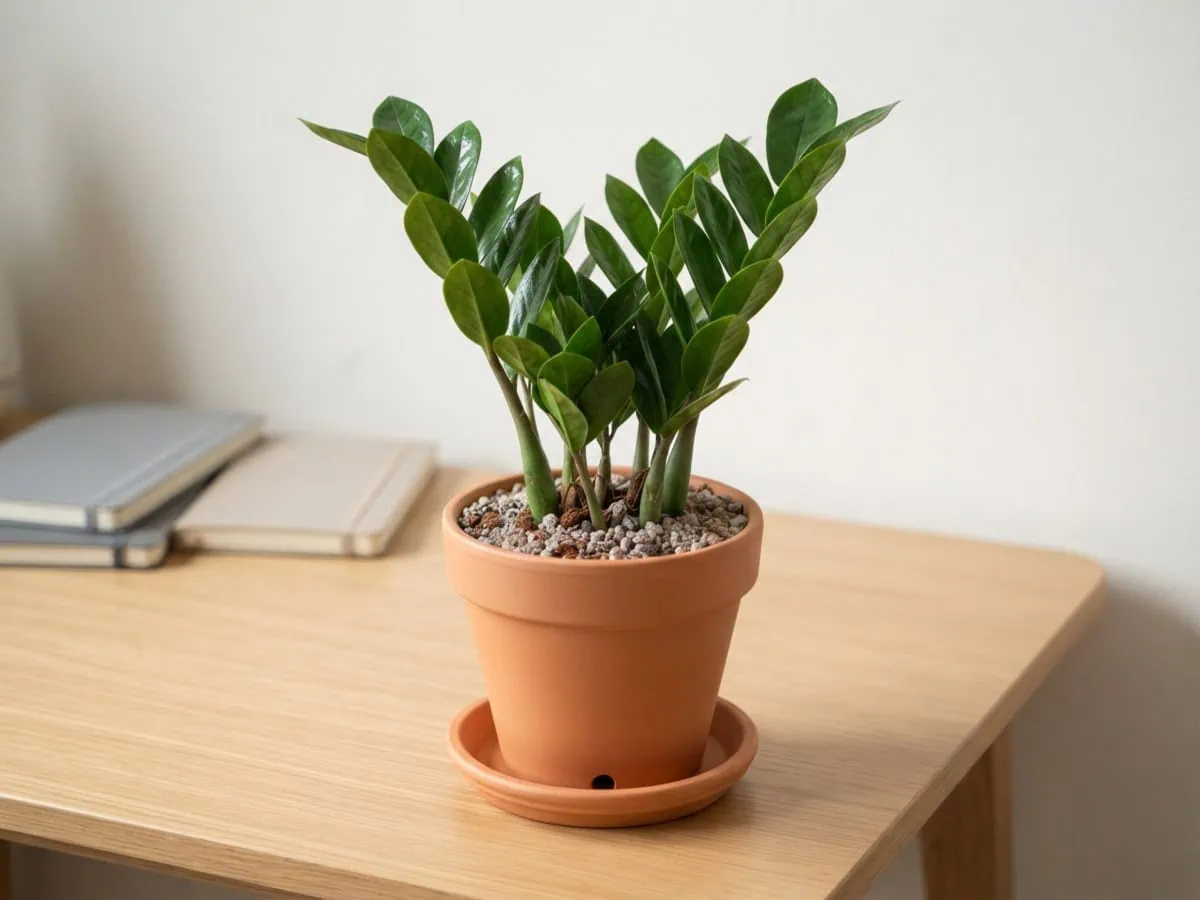
Division is the only route that skips the wait. It is the one to reach for first. Every stalk on a mature clump already owns its own rhizome, so a division is not a cutting at all — it is a finished plant you are lifting out.
Most of how to divide a ZZ plant rhizome is just looking before you pull. Slide the root ball out and shake the gritty mix off until you can see where the fat, tan, potato-like rhizomes join. Part them with your thumbs wherever they separate naturally, and bring the blade in only where they refuse.
Every new section needs one thing: at least one intact stalk still attached to a firm rhizome with roots. No stalk, no plant. A loose rhizome alone stalls for months, and a stalk snapped off its rhizome is just a cutting again.
Pot each division snugly. Water once. Then handle it like the established plant it already is — the mechanics match repotting a ZZ without transplant shock, because that is exactly what this is.
After the cut: timeline, transplanting, and fixing stalls
The cut is the easy part. Patience does the rest, because everything that decides the outcome happens in the months after it, underground and out of sight. The sections below cover the wait, the handoff into soil, and the stalls worth acting on.
How long rooting takes, method by method
Anyone asking how long do ZZ plant cuttings take to root wants one number, and there isn’t one. The honest answer is a range that swings by method and by stalk thickness.
A short stem in water often shows roots in about 3-4 weeks. A thick, long stalk can sit for seven months with nothing at all to show for it, which is exactly the point where most growers give up and bin a cutting that was still working.
A single leaflet builds its rhizome in roughly two months but may not push a usable plantlet for eight months or more. Division skips all of it.
In my experience — though n=1 — the spread comes down almost entirely to warmth and to how much stalk you asked to support the cut. A ZZ roots on its own clock, and the figures that circulate contradict each other badly enough that any single number would mislead you.
Moving a water-rooted cutting into soil
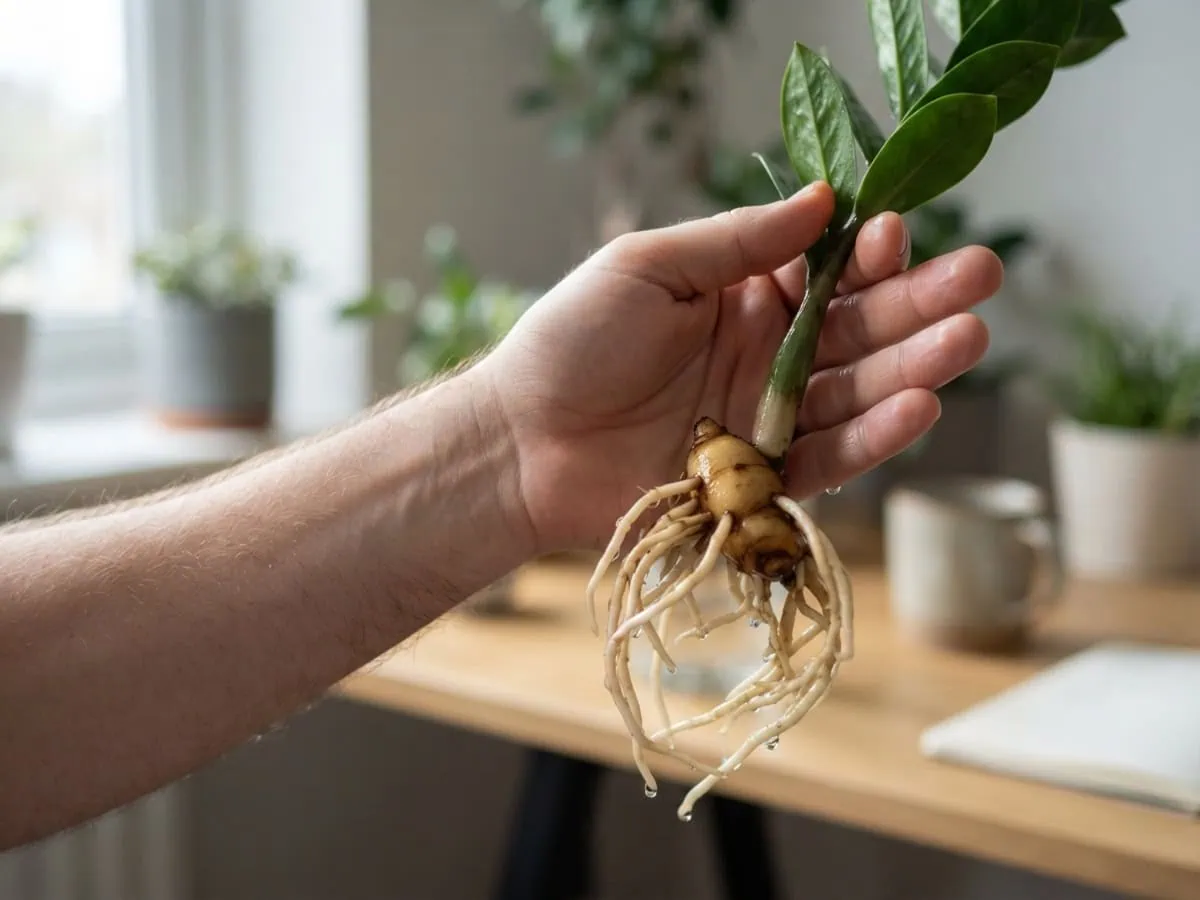
Move it once roots reach 1-2 inches. Do not wait for a large rhizome, and do not leave it floating for months — a cutting parked too long in water yellows and rots.
Water-formed roots are coarser and more brittle than soil-formed ones, so they arrive expecting a wetter world than the pot gives them. Keep the mix slightly moister than a grown ZZ would ever tolerate for the first few weeks, then taper to the normal dry-down.
That taper matters. Once the plant is established, revert to how often to water a ZZ plant and never look back — the acclimation window is temporary, and a permanently damp pot is how a young rhizome dies.
Why your cuttings aren’t rooting
Work through this list before you throw anything out. Why are my ZZ plant cuttings not rooting usually resolves to one of four things, and only the last is fatal.
- It is too early. Under eight months, a leaflet showing nothing is on schedule, not failing.
- It is too cold. Below 65F, initiation crawls. Move it somewhere warm and wait again.
- The water went stale. Cloudy water starves the cut of oxygen and feeds bacteria. Refresh weekly, keep the glass clean, and keep leaves above the water line.
- The base has gone soft. A cut base that stays mushy and dark for months is finished. Discard it and start again.
That last one is the only genuine loss, and it is the same wet-tissue failure behind rescuing a ZZ plant from root rot in an established pot. A firm base with no roots is still working. A soft one is not.
Frequently asked questions about propagating a ZZ plant
Is it better to propagate a ZZ plant in water or soil?
Neither wins outright — water is easier to monitor, soil skips the transplant step. A glass lets you watch the rhizome form, which matters when the wait runs to months. The trade-off: water-formed roots are coarser and need an acclimation period once potted.
Soil hides all progress but grows sturdier roots and saves a move. For a first attempt, use water.
What is the fastest way to propagate a ZZ plant?
Rhizome division, by a wide margin — it is the only route that skips the rhizome-building wait entirely. Every stalk on a mature clump already carries its own finished rhizome, so a division re-establishes in weeks.
Stem cuttings come second, at roughly three to four weeks for roots on a short piece in water. Single leaflets are last, often eight months or more.
Is October too late to take cuttings?
No month is too late for an indoor cutting, because rooting tracks warmth and light, not the calendar. Seasons only bind outdoors.
Inside, a cutting taken in a cool, dim month simply roots more slowly than one taken in a warm, bright one. Hold the jar between 65-75F, add a seed-starting mat if the room runs cold, and the month stops mattering.
Can ZZ plants be grown from cuttings?
Yes. A ZZ plant grows from a stem cutting, from a single leaflet, or from a rhizome division, and all three are documented.
The catch is the timeline, not the feasibility: a cutting builds an underground storage rhizome before it grows roots or a shoot, so the visible payoff trails by months. Division is the exception, because each piece already owns a mature rhizome.
How long do zz cuttings take to root?
Roughly 3-4 weeks for a short stem in water, and up to eight months or more for a single leaflet. Thick, long stalks are the slowest and can sit rootless for seven months.
The range is that wide because a ZZ builds its rhizome first and its roots second, so the clock you are watching is the wrong one. Warmth near 76-90F shortens every version.
What helps cuttings root faster?
Warmth helps most — a substrate held near 76-90F speeds every route measurably. A seed-starting mat under the jar is the single highest-return change you can make. Bright indirect light for four to six hours a day comes second.
Clean, weekly-refreshed water is third, because oxygen keeps the cut base firm. Rooting hormone is optional; dust it lightly, since too much slows root formation.
Are zz plants illegal to propagate?
No — propagating a ZZ plant for your own shelf is unrestricted, and the plain species carries no patent. Named cultivars are the exception. The near-black Zamioculcas ‘Dowon’, sold as the Raven ZZ, is covered by plant patent USPP30,035 P3, which reserves asexual reproduction to the patent holder for the patent’s term.
Propagate one at home and nobody minds; sell it commercially and you need a license. If you are weighing the two, see the Raven ZZ versus the regular ZZ.
What are common mistakes to avoid when propagating by cuttings?
The biggest mistake is throwing out a cutting that has not failed. A ZZ builds its rhizome before its roots, so nothing visible for months is normal, not dead. After that: snipping a leaflet across the blade instead of pulling it away with its basal nub; callusing a thin leaflet that never needed it; setting a wet stem cut straight into soil; and dividing off a rhizome with no stalk.
Your next step: from a single stalk to a shelf that fills itself
Every method ends at the same place. Whichever you pick, the storage organ forms first, out of sight and on its own schedule.
Only then does it spend anything above the soil. That is why patience is not a virtue here — it is the technique, and the only one that actually matters (note to self: mark the jar with the date you cut it, not the date you expect roots).
Once your division or rooted cutting is potted and settled, one question decides whether it survives its first year. The answer is how often you water it. Get that right and the copies stay copies.
Master how to propagate a ZZ plant from cuttings and one plant is only ever the start.
May every cutting reward your patience with a firm new rhizome, and one glossy ZZ plant multiply into the whole shelf you imagined.
Tap the button below to get more plant fixes in your Google Search results