
🛠️ Quick prep summary: separating a keiki
How to propagate a Phalaenopsis orchid from a keiki comes down to one rule: separate only a baby plantlet that has already grown its own roots and leaves, never a leaf or stem cutting. Confirm the keiki is truly ready, then make a single clean cut.
- Keiki readiness: at least 3 leaves plus its own 2-3 inch roots
- Clean cut kit: a sterile single-edge blade and ground cinnamon
- A tiny pot: roughly 4 inches, of fine fir bark or sphagnum moss
Quick aside: a keiki is your moth orchid cloning itself on the spike, and coaxing one is half the fun. Getting it off the mother is where I kept slipping.
Over four years I rushed three of these plantlets off the flowering stalk, and each went soft and limp between my fingers within weeks (yes, this sounds fussy — bear with me). They felt like wet paper, not firm little leaves.
Instead of cutting at the first pair of leaves, I realized the keiki’s own velamen roots must run two to three inches first. Only then can they drink for it. That wait is everything.
A keiki is asexual propagation the plant does for you: a latent bud on a spike node waking into a clone that blooms true to the mother. Get the timing right, and one orchid becomes two.
For the full picture of where these plantlets come from, start with the moth orchid grower’s guide.
Before you reach for a blade, the following table lays out every number that decides whether a separated keiki lives on its own or quietly fails.
How to propagate a Phalaenopsis orchid from a keiki — quick specs
| Moth orchid specs | Recommended care |
|---|---|
| Difficulty | Medium to advanced; an advanced-collector skill, not a beginner task |
| Time needed | About 15 to 30 minutes for the separation itself |
| Only home method | Keiki only: natural, or cytokinin paste on a spike node |
| Readiness gate | At least 3 leaves AND its own roots 2 to 3 inches long |
| The cut | Sterile blade; dust the cut surface with ground cinnamon |
| Pot up | Fine fir bark or sphagnum; about a 4-inch pot; high humidity; hold fertilizer |
| Can a moth orchid grow from a leaf or stem cutting? | No: it is monopodial, so a keiki is the only route |
| Does a loose leaf or spike root in water? | No: only a node-bearing spike forms a keiki |
Table of Contents
Before you separate: what a keiki is and when it is ready
Laboratory work on in-vitro orchid propagation grows whole new plantlets from spike-node tissue. A keiki is that same cloning, happening on your windowsill instead of in a flask. No lab required.
A keiki is a clone, not a cutting
A keiki is a clone, not a cutting: a baby plantlet the mother grows from a dormant bud, carrying her exact genetics. Phalaenopsis, a member of the orchid family (Orchidaceae), is monopodial. It grows upward from a single tip, with no rhizome to split and no spare growing points to root.
That single-axis design is why a loose leaf or chopped stem never becomes a plant. Neither holds the meristem needed to build one. So skip the cutting fantasy.
The keiki is the lone exception. It forms at a node that already carries a living bud. Think of it as the plant’s own finished baby, not raw material you cut and hope over.
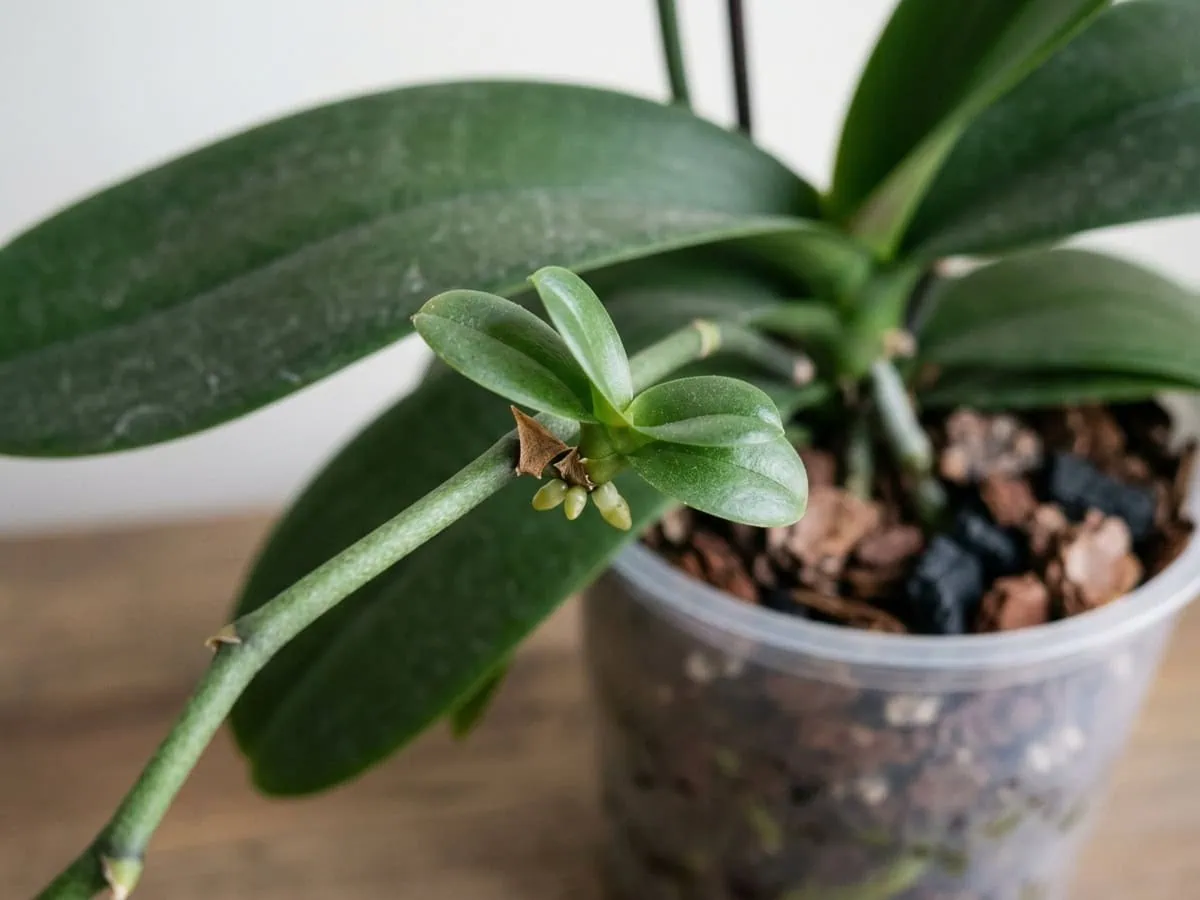
Ready: 3 leaves and its own 2-3 inch roots
When is a Phalaenopsis keiki ready to be separated from the mother? Only once it meets three marks at the same time:
- Leaves: at least three of its own, not just the first pair it unfurled
- Roots: its own, running 2 to 3 inches long, ideally tipped bright green
- Drive: those green tips show the velamen is actively drinking for itself
Patience pays here. Cut at the “roots just starting” stage some guides accept, and you strand a plantlet that can’t pull water on its own. Its survival odds drop hard. Over the following weeks, watch the roots lengthen rather than the leaves, and let that be your go signal.
Encouraging a keiki: paste on a node
If your plant has not thrown one on its own, here is how to encourage a Phalaenopsis to grow a keiki on its spike. Once the last flower fades and the plant returns to leafy growth, peel back the dry bract over a node and dab a scant smear of cytokinin paste onto that latent bud.
A few rules keep it from backfiring:
- Node choice: count 2, 3, or 4 up from the base; the lowest rarely responds, and the fifth tends to branch
- One bud only: a single dab, so you do not over-tax the mother
- Patience: results stay hit-and-miss, so count a keiki as a bonus, not a guarantee
It all rides on the flower spike a keiki grows from, so a healthy spike comes first.
Step by step: cut, pot up, and settle the keiki
These three moves take a ready keiki from the mother’s spike to its own pot.
Sterilize the blade with 70% isopropyl alcohol before every cut, and dust each cut surface with ground cinnamon as an antifungal seal. Never put hydrogen peroxide on living roots, crown, or leaves — keep it for empty pots and tools only. Try any new method on one cut first, and results may vary with your own conditions.
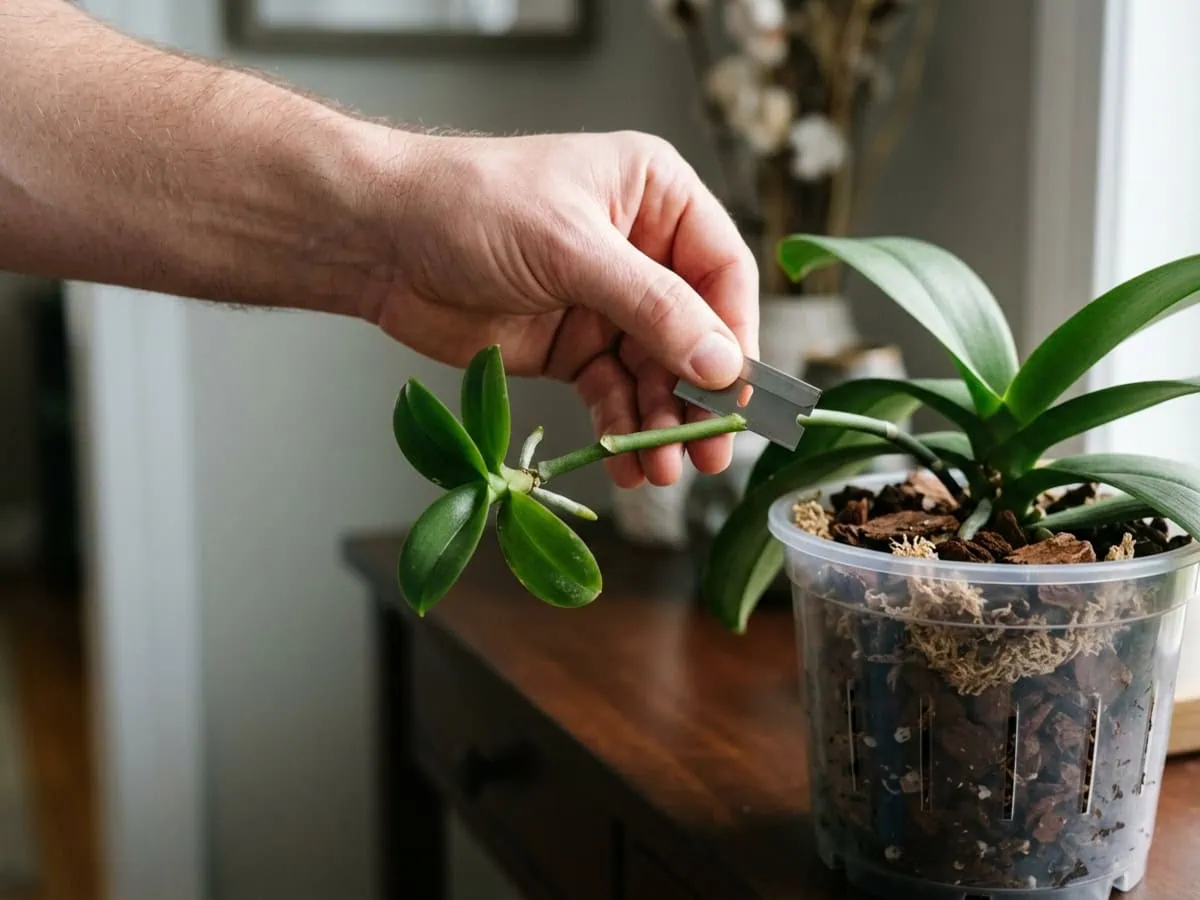
Step 1: Cut sterile, dust with cinnamon
Wipe a single-edge blade or fine shears with 70% isopropyl alcohol, then let it air-dry. Find where the keiki joins the stalk. Cut the spike 1 to 2 inches below the plantlet, taking that short stub with it, because the keiki’s roots usually wrap the spike and tear if pulled off.
Then lift the baby away in one slow motion. Dust both raw faces, the stub on the keiki and the stump on the mother, with a pinch of ground cinnamon to seal each wound against rot.
Over the next day or two the dusted cut dries to a pale crust and stops weeping. That’s your sign the seal has taken. Work over the tray, not the sink. A dropped root rolls out of reach in a heartbeat.
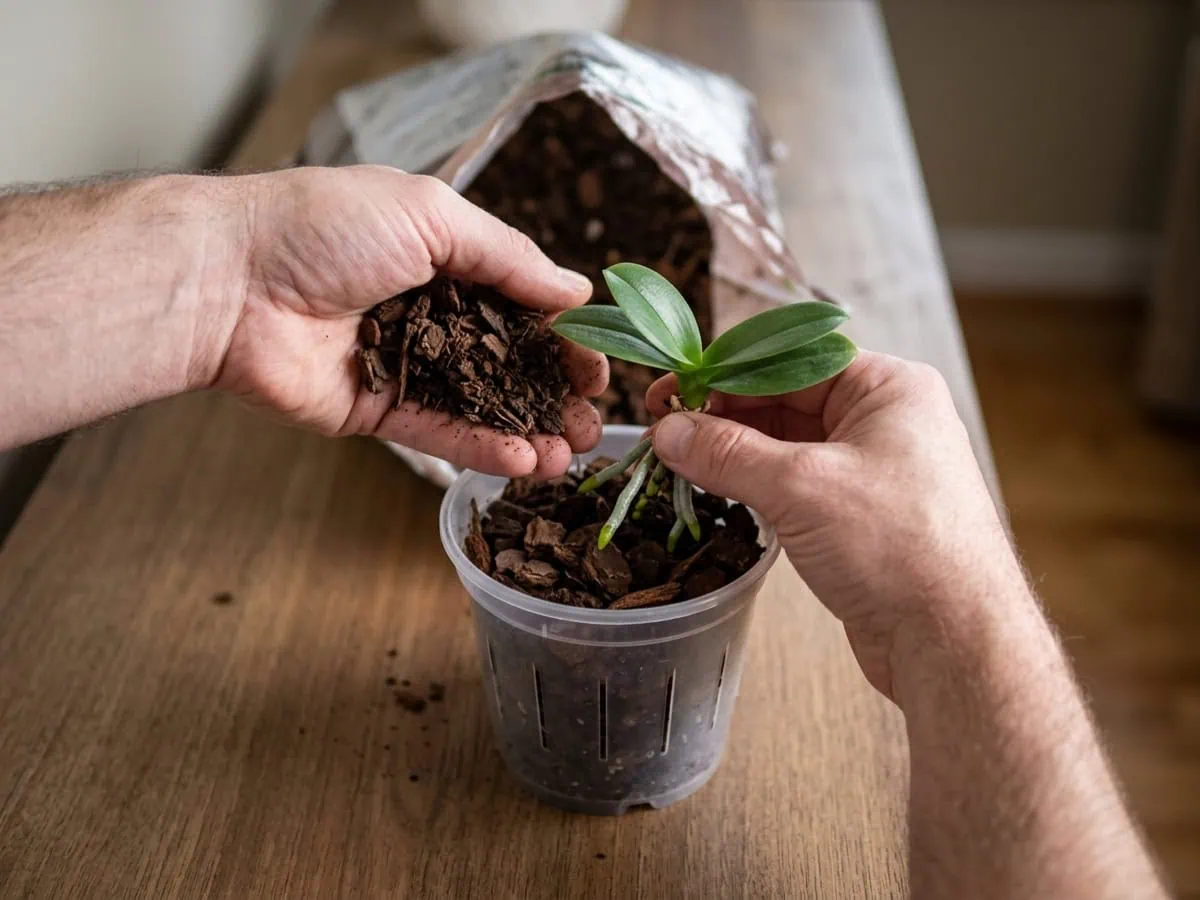
Step 2: Pot in fine bark, about a 4-inch pot
This is the step by step guide to potting up a Phalaenopsis keiki the moment it comes free. Go small. Pick the smallest pot that just holds the roots, about 4 inches across, because a roomy pot stays soggy and rots fragile new roots.
Scoop fine-grade fir bark or damp sphagnum moss around the plantlet, never garden soil or potting mix, which smother the velamen roots that evolved in open air to breathe between drinks. Point the roots down. Settle the bark around them, keep the crown level with the surface, and firm it lightly so the baby holds steady.
A clear pot helps you read root color later through the wall. If you would rather wait, the same handling carries into potting up the new plant beside the mother for its first year, where she buffers the moisture for it. Then leave it be; fussing with a fresh keiki only sets back the rooting.
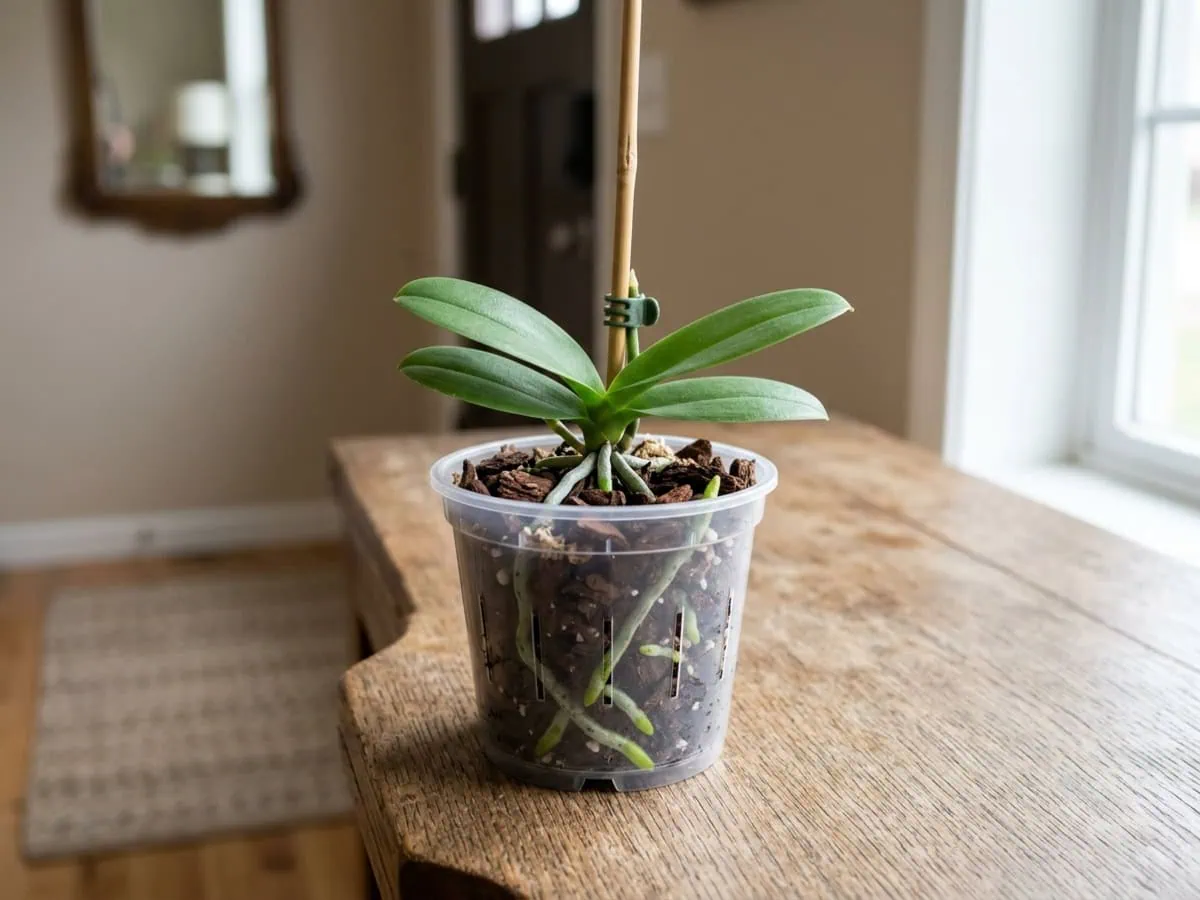
Step 3: Humidity, gentle light, no feed yet
Stand the potted keiki somewhere bright but clear of direct sun, because its small leaf area scorches fast. Three settings keep it comfortable while it roots:
- Light: filtered and softer than the flowering mother takes, never full sun
- Humidity: raised with a pebble tray or a loose clear dome
- Water: let the bark ride to near-dryness between drinks so the new roots breathe instead of drowning
Hold all fertilizer until fresh root tips push out. Only then feed at quarter strength. A slim stake steadies a top-heavy baby while it anchors.
Then comes the long part. Expect leaves and roots first and flowers much later, since a keiki needs a few years to reach blooming size. Week by week, the newest root tip lengthens and greens at the very end, and that slow, steady gain over the following weeks is your proof the baby has taken.
Aftercare, rootless keikis, and propagation myths
Two questions come up after the cut, then the myths worth clearing up.
A rootless keiki stays on the mother
What do you do with a Phalaenopsis keiki that has no roots yet? Leave it right where it is. A rootless keiki stays on the mother until it grows its own 2 to 3 inch roots, however many months that takes, because detaching it strands a plantlet that can’t drink.
If the keiki came from cytokinin paste, the paste itself can stall rooting. Cytokinin drives leaf growth while holding roots back, the opposite of what you want. Two moves nudge roots out:
- Warmth: keep the plant above 70°F
- Reset the hormone: wipe off any leftover paste, then dab a little auxin rooting product
Rooting hormones are auxin; keiki paste is cytokinin, and the two signals pull opposite ways. A keiki low on a crown-damaged plant is its own situation, so see a basal keiki after crown damage.
No leaf, stem cutting, or division here
Can you propagate a Phalaenopsis from leaf or stem cuttings? No, and division does not work either. Here is why each dead end fails:
- A cut leaf carries no growth bud, so it yellows and rots
- A severed stem chunk has no roots and no crown to rebuild from
- Division needs a creeping rhizome, and this monopodial orchid has none
Every real route runs through a keiki at a living node. Skip the cutting jar.
Water rooting? Only a node-bearing spike
Water rooting works for pothos. Not for this orchid. Drop a loose leaf or a rootless stem piece in a glass and it only rots, because neither one holds the meristem that fires the new growth a plantlet would need to live on its own.
The single water route stands a cut, node-bearing flower spike in clean water you refresh every few days. Over the following weeks the node swells, then greens, and a latent bud can wake into a keiki on the stem. Even then you grow a clone from a node, not a rooted cutting. No shortcut exists.
Once your plantlet is potted and pushing fresh roots, move on to feeding a young keiki at quarter strength.
Frequently asked questions about moth orchid keikis
Can you propagate keiki orchids from cuttings?
No, a keiki isn’t a cutting, and a moth orchid leaf or stem piece won’t root, because neither holds the meristem tissue a new plant needs. Instead the mother grows a complete baby plantlet, or keiki, from a latent bud at a node on her flower spike, and it carries her exact genes. You separate that clone only once it has its own 2-to-3-inch roots, never by rooting cut tissue.
What happens if you leave a keiki on the orchid?
Left attached, a keiki keeps growing on the mother and can eventually bloom alongside her. On a healthy plant that’s fine, since the mother feeds the plantlet through the spike until its own roots mature. On a weak or stressed plant, though, it drains energy she needs, so it’s better to pot the keiki up once it owns three leaves and its own 2-to-3-inch roots.
How does a keiki orchid reproduce?
A keiki is asexual reproduction: a clone that’s genetically identical to the mother, not a seedling. It forms from a latent bud at a node on the flower spike rather than from pollination, so it carries the same flower color and form. Grown on, that plantlet blooms true to the parent, which is why a keiki is the only home method that copies a Phalaenopsis exactly.
What causes an orchid to grow a keiki?
Two things combine: a genetic tendency plus a trigger. Many moth orchids are simply predisposed to throw keikis, and sustained warmth, especially high temperatures during flowering, can push a node to grow a plantlet instead of a flower. A stressed root system sometimes does the same, and cytokinin keiki paste dabbed on a node forces the result deliberately by waking that node’s latent bud.
What do I do with an orchid keiki?
Leave it on the mother until it grows its own 2-to-3-inch roots and at least three leaves. Then cut it free just below the plantlet with a sterile blade, dust the cut with ground cinnamon to seal it, and pot it in fine fir bark or sphagnum in a roughly 4-inch pot. Keep the baby humid, shaded from direct sun, and unfed until fresh root tips appear.
Can an orchid cutting be rooted in water?
No, a loose moth orchid leaf or stem piece dropped in water rots rather than roots, since it holds no growth bud or meristem. The only water method keeps a cut, node-bearing flower spike in clean, frequently changed water so a keiki can form at a node. Even then you’re growing a clone from that node, and you pot the plantlet once it makes its own roots, not a rooted cutting.
When to separate a keiki?
Separate a keiki only once it has at least three of its own leaves and its own roots 2 to 3 inches long, ideally tipped bright green. Those green tips show the velamen is actively drinking, so the plantlet can support itself off the mother. Cutting earlier strands a baby that can’t take up water and its survival odds drop hard, so patience here is the difference between a survivor and a loss.
Read the roots, act once, grow on
Here’s the whole experiment in one rule: never cut until the baby owns three leaves and its own two-to-three-inch roots. The wait does the work. Watching the roots beats counting the leaves, every single time.
Then act once: one clean cut, one small pot of fine bark, one stable, humid, shaded spot. Leave it be. Let it root on its own schedule.
Master that timing and one shelf orchid quietly becomes a small collection, which is really all how to propagate a Phalaenopsis orchid from a keiki asks of you.
May your next keiki root deep and leave you with one orchid more than you started.
