🛠️ Quick Prep Summary: rooting a bare Aloe vera
How to root a bare Aloe vera with no roots step by step turns on the cut face. Aloe vera, a member of the Asphodelaceae family, roots only once the cut has corked over. Everything below has to be ready before the blade comes out.
- Tools: a clean knife, plus rubbing alcohol to wipe the edge
- Timing: a day to three days of drying for a small piece
- Difficulty: low to medium, and no rooting hormone is needed here
Get the one-page care card for this guide, plus a printable A4 copy
We condense this guide into one card for your phone and a print version for the pot shelf. Enter your email and we send both to your inbox. Subscribe once, then request the card of any guide you read.
By subscribing you agree to get emails from Plant Care Basics about plant care guides, about once a week at most. Unsubscribe in one click. Privacy policy
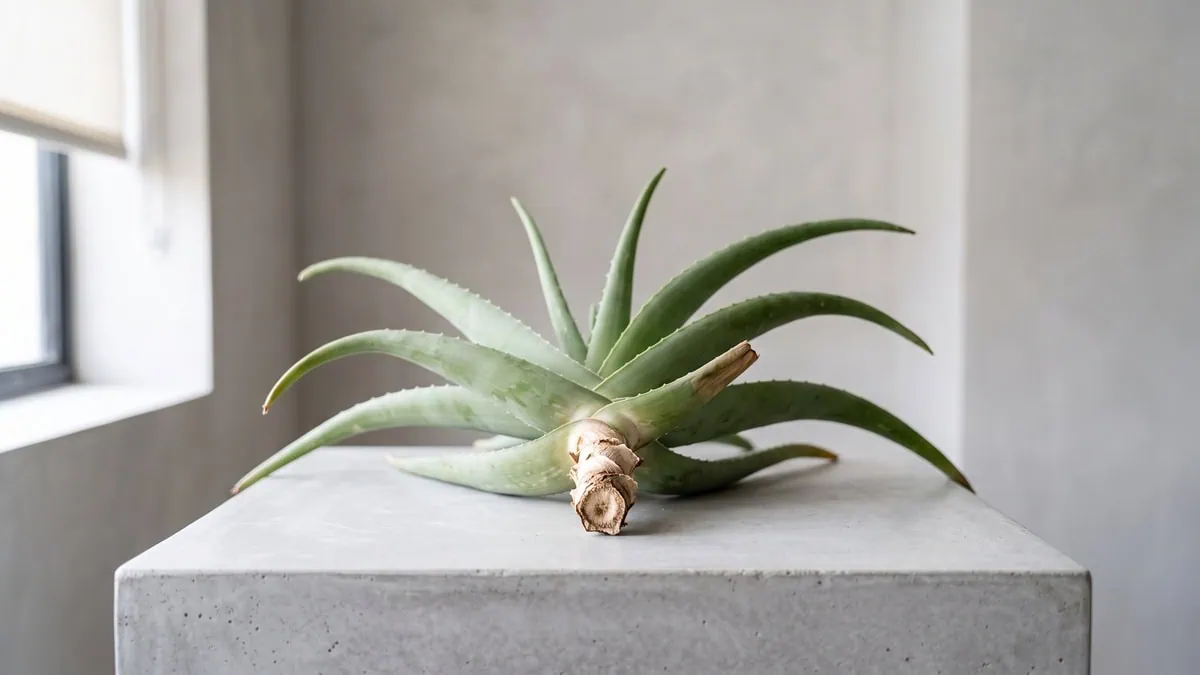
A rootless Aloe rosette is not a dying plant. It is a plant with no way to drink, living entirely off the water banked in its fleshy leaves. Two of them went soft before that sank in, both sitting in damp mix while I waited for root systems that never came.
Let me rewind for a second. Rather than read the bare stem as an injury to patch, I realized it must close on its own — the cut face seals into a dry callus (that part is settled) before adventitious rooting starts.
Let me level with you: the waiting is the hard part. For weeks nothing moves except the oldest outer leaves, which sag lower every week while the tight center spear stays upright. That center is the tell.
For the wider picture, start with the basics that keep an Aloe thriving indoors.
Nothing here is urgent yet; a rootless rosette waits well. The numbers this method turns on are listed below, so you can set up before you cut.
How to root a bare Aloe vera with no roots step by step: quick specs
| Aloe vera specs | What this job takes |
|---|---|
| Difficulty level | Low-medium (Beginner) |
| Time needed | 20-40 minutes of handling, then a few weeks to a few months before roots hold |
| Drying interval before planting | 1-3 days for a small piece, a few days or longer for a large one |
| Rooting hormone required? | No |
| Water at planting? | No – the medium goes in dry and stays dry |
| Growing medium | A fast-draining gritty succulent mix, roughly 1 part peat-free organic base to 2 parts coarse pumice, top-dressed with a thin layer of coarse pumice grit |
You are subscribed
Press the button and we prepare this guide's one-page care card and its A4 print copy and email both to you within a few minutes.
Tap the button below to get more plant fixes in your Google Search results

Table of Contents
First check: is the bare stem firm enough to plant?
A bare Aloe vera stem is worth planting only when the tissue above the old roots is firm and light-colored — this plant reroots from a stem, never from a detached leaf. Soft, dark, watery or wrong-smelling tissue is the disqualifying condition (and I mean stop, not slow down). The sections below give the test and the cut.
The firmness test at the base
Press the base between finger and thumb before anything else. A sound rosette stays where you set it; a failing one leans a little further each day while the base gives under light pressure and stays dented. Firm, or nothing.
That is the single check that separates a slow piece from a lost one, and it outperforms every calendar you could possibly keep. Until roots form, the piece is running on the water already stored in its leaves — which is why a firm base matters more than a full-looking rosette. Three readings follow, in the order you meet them:
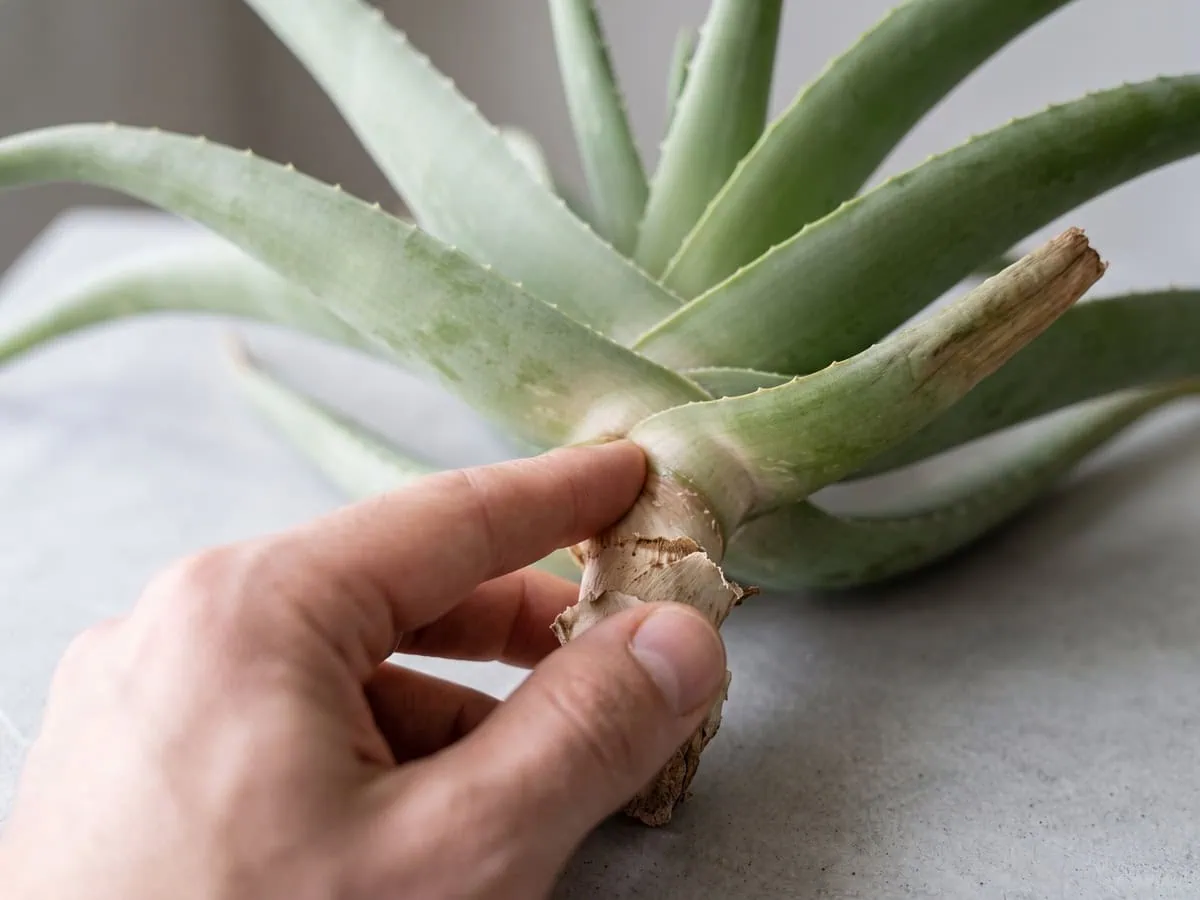
- Firm and pale at the cut: plant it.
- Soft, dark or sour at the base: cut higher first.
- Softness reaching into the leafy crown: the piece is finished.
How far up to cut, and when to stop
Yes — and the answer to “should i cut the soft stem off before rooting an aloe vera” is the same every time, so clean the blade, cut a slice higher, and look at the face you just made.
On a stem this short you get only a few passes before you are into the leafy crown, so repeat until the face is firm and free of visible deterioration (a cleaned blade between each pass, or you carry the problem upward).
Stop cutting when firm tissue is only reachable inside the leafy crown — at that point you are removing the growing point the plant needs in order to regrow at all, and the piece stops being a candidate for rooting. Leave at least two inches of bare stem under the lowest leaf if you can; firm tissue comes first, length second.

Soft tissue that runs up into the leaf bases is past a trim: you are into cutting decayed tissue away and saving what is left, which is a different job with a different order of steps.
Get the one-page care card for this guide, plus a printable A4 copy
We condense this guide into one card for your phone and a print version for the pot shelf. Enter your email and we send both to your inbox. Subscribe once, then request the card of any guide you read.
By subscribing you agree to get emails from Plant Care Basics about plant care guides, about once a week at most. Unsubscribe in one click. Privacy policy
Step by step: drying and planting a rootless Aloe vera
Four moves make the method: cut back to firm tissue, seal the face, plant shallow in dry mix, then give light and no water. Each step below fails in a different way, so none of them is optional.
Step 1: Cut back to firm tissue with a clean blade
Clean the blade with rubbing alcohol, then cut into the stalk rather than through a leaf. Leave about two inches of stem below the lowest leaf, and take a second slice if the face you expose is dark or wet — a sound stalk parts cleanly under the blade, while a failing one drags and smears.
A torn base gets one clean recut. This species roots from stem tissue only, and nothing roots out of a crushed face.

Skin and furniture both take a mark from the yellow fluid inside a cut leaf.
- Wear nitrile or thick gardening gloves for every cut.
- Rinse any latex off the skin under cold running water for at least 60 seconds.
- Wipe drips off the floor and the table straight away, before a pet or a child finds them.
If a severe skin reaction develops (blistering or intense burning), seek medical attention immediately. For chemical exposure, you can also contact Poison Control (1-800-222-1222 in the US).
Step 2: Dry the cut face until it is no longer tacky
Set the piece on its side somewhere shaded and airy, and leave it alone. Search “how long should a rootless aloe vera dry before planting” and you want one number, and the honest answer is a range: one to three days for a small piece, a few days or longer for a big crown.
Judge it by touch, not by the clock. The face is finished when it is dull and firm rather than tacky, because the plant has sealed the wound with a corky skin that water no longer crosses — a closed humid room stretches that wait, and a dry ventilated one shortens it.
Step 3: Plant shallow in dry gritty mix and prop it
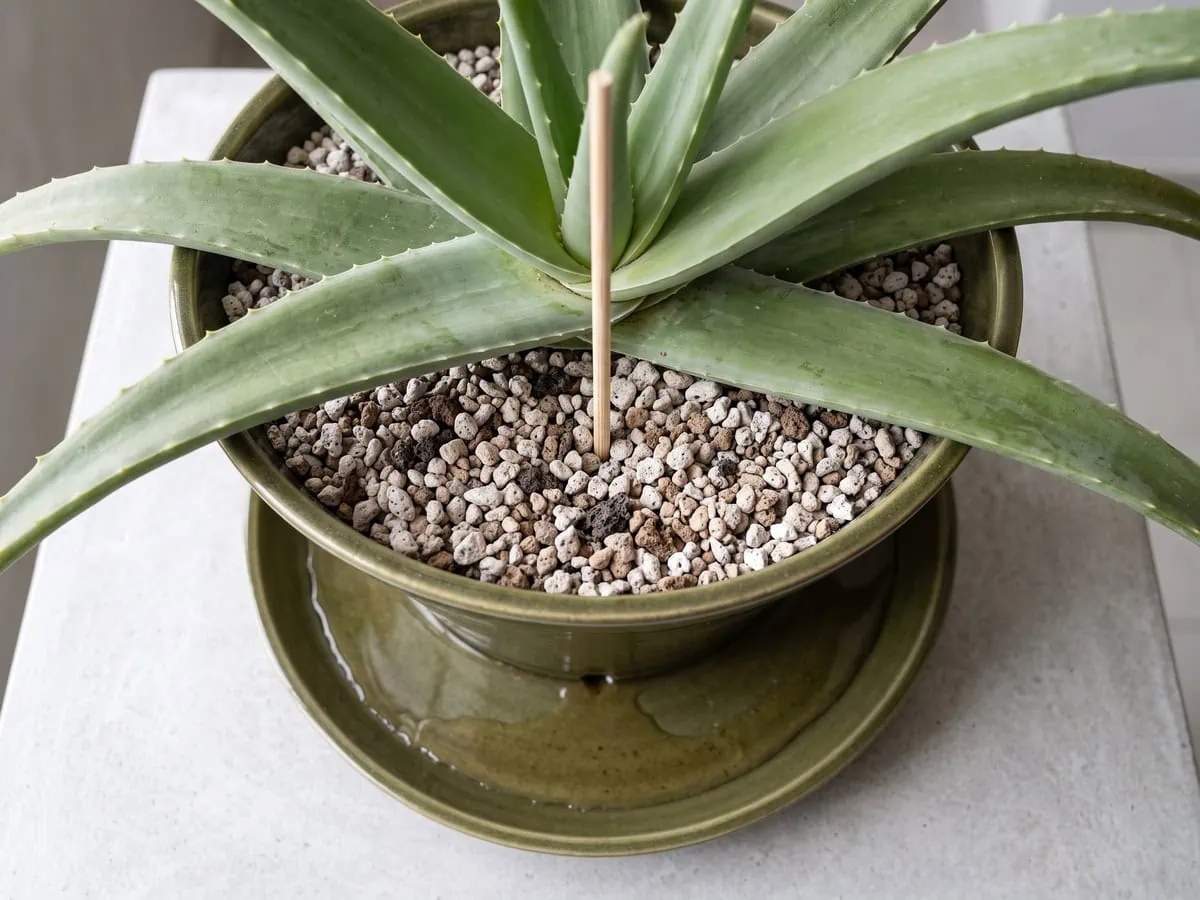
Fill a wide, shallow pot with a drainage hole using a fast-draining gritty succulent mix, roughly 1 part peat-free organic base to 2 parts coarse pumice, top-dressed with a thin layer of coarse pumice grit. Leave only about an inch of fresh mix between the stem and the wall.
The question people actually type is “how deep do i bury a rootless aloe vera rosette”, and it has a one-line answer: only as deep as it takes to hold the plant up.
Every leaf and the center of the crown stay above the surface (bury the crown and it will not grow at all), and a wooden skewer leaned against the rim holds a wobbly piece steady. Nothing green goes under.
Step 4: Give strong light and hold the water back
Put the pot at your brightest window — south-facing (Northern Hemisphere reference) is best, west next — and keep the room above 50F. A cold pane slows rooting even further, so a few inches of clearance from the glass is worth more than it looks.
Then do nothing. No water, no feed, no lifting it out to check; the piece is living on the water already in its leaves, and the outer leaves may thin and lean a little while nothing new appears above.
Tap the button below to get more plant fixes in your Google Search results

After planting: the no-water window and the first signs of roots
The first watering is earned, not scheduled — you wait for the rosette to tell you it has roots. Until then, the pot stays dry. The sections below deliver the trigger first and the timeline afterwards.
When the first watering is earned
Hold the water back for a minimum of three weeks after potting, and considerably longer if nothing has changed. The honest answer to “when do i first water a newly planted rootless aloe vera” is not a date at all: you water when new growth pushes up from the center of the rosette.
When that happens, water once, thoroughly, until it runs from the hole — then let the mix go bone dry to the bottom again before the next one (bone dry at the bottom, not just at the surface). Sink a wooden skewer to the base of the container; if it emerges completely dry, the plant is ready.
Never leave it standing in the saucer. A desert root drowns fast.
Signs it has started rooting, and how long to wait
Four indicators change, and they arrive in this particular order:
- The piece stops shifting when you brush it
- A new leaf rises from the center
- The plant sits steadier in its pot
- The older leaves plump back out
Test the resistance once, gently, then leave it alone — repeated pulling is what undoes the accumulated progress.
Take this with a grain of salt on timing. I once binned a piece at week six because nothing had happened; it was still firm at the base, and I have regretted it since. The published record splits the same way — a few weeks in one account, many months in another (no one has timed it on a sill).
Root induction, the laboratory term for new roots forming straight out of stem tissue, is timed in weeks by BioTechnologia, on a nutrient medium no windowsill matches. Expect a few weeks to a few months, and judge by firmness rather than by any date.
Little visible growth is entirely normal for a rootless crown, not a verdict of failure.
Common mistakes when re-rooting a bare rosette
Every mistake in this section is the same mistake: handling a rootless rosette like a plant that can drink (it cannot, not yet). Two errors, in order: watering it in, then the shortcuts.
Watering it in like a repotted houseplant
The guidance you will meet online splits down the middle at exactly this moment: dry the cut face, then water it in. Both halves are printed with equal confidence, and only one of them was written for a rosette with no roots left to take water up.
Water at planting has nowhere to go. A stem with no roots cannot take it up, so it sits in the mix against a fresh cut face — which is why the mix matters as much as the schedule, and why it is worth knowing what a fast-draining succulent mix is actually made of.
The other half of the same error is the pot. An oversized container holds more damp mix than a rootless piece can ever use, and that surplus stays wet for weeks (a wide, shallow pot dries; a deep one stores).
Water rooting, feeding, and other shortcuts that fail
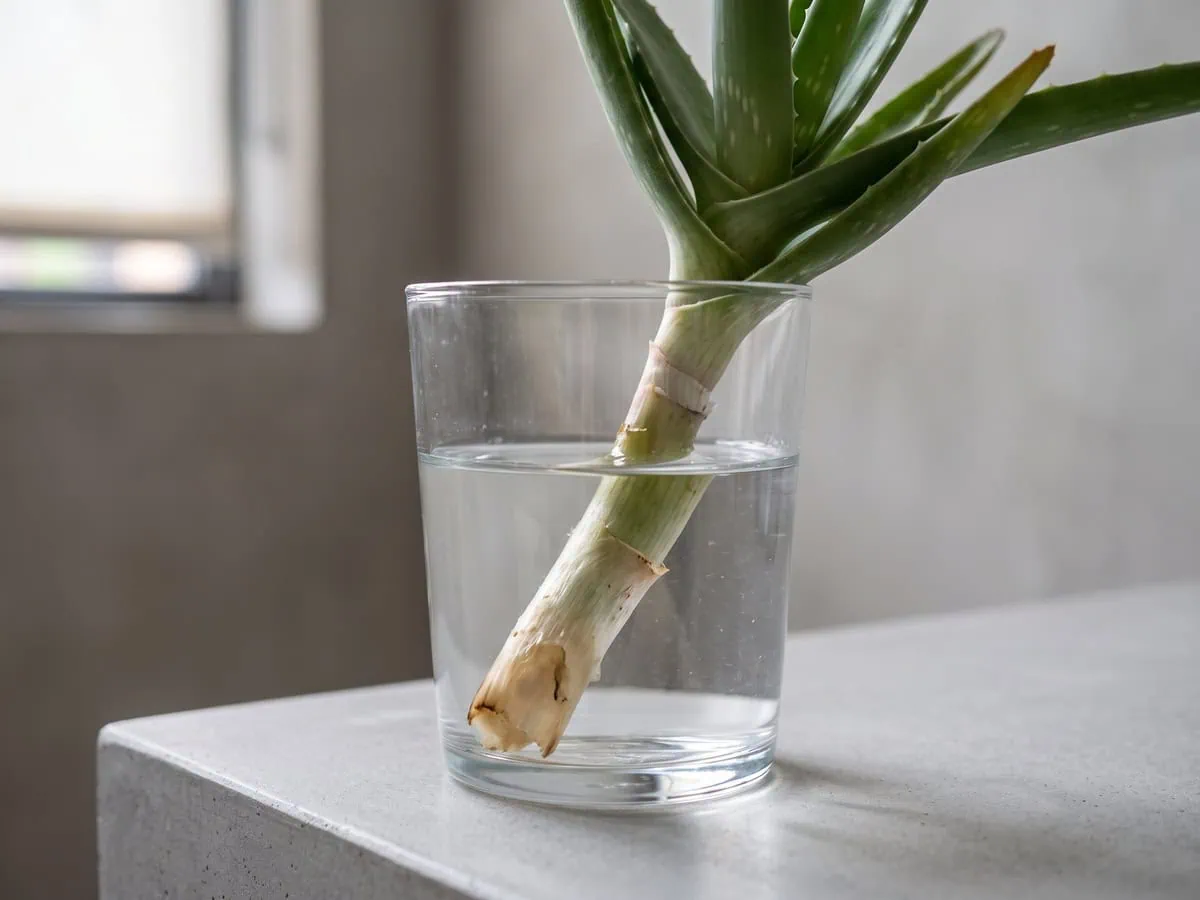
Water rooting is the shortcut I tried first too, and it is the wrong route for this species — the submerged end goes soft and pale, and the piece starts to list in the glass. If yours is already standing in a jar, lift it, cut back to firm tissue, dry the new face and start again in dry mix.
The second shortcut is feeding, and it burns. Product salts reach a root that has only just formed, and nothing you add can be taken up before then — that advice belongs to separating an offset that already carries its own roots, not to a bare stem.
The third is rooting hormone, and for a stem piece that roots adventitiously it is simply optional:
- One guide lists it among the tools
- Another dips the cut end in it before planting
- The longest rootless procedure I compared never mentions it
And if the piece in your hand came off a stretched plant, the stump you left behind is worth keeping — that is a second plant, and it belongs with restarting a stretched plant by taking the crown off.
Frequently asked questions about rooting a bare Aloe vera
What to do if Aloe vera has no roots?
Squeeze the base first, then cut back to firm, light-colored tissue with a blade wiped in rubbing alcohol. Soft, dark or sour tissue is not plantable, and cutting higher is the only fix.
Aim for roughly two inches of stem below the lowest leaf, set the piece aside until the cut face is dull and dry rather than tacky, then plant it shallow in dry gritty mix and hold the water back.
Can you root Aloe vera cuttings in water?
Water rooting fails here. This species is documented as rooting from a sealed cut face, and the submerged end goes soft and pale instead of striking roots.
The published route runs the other way: air-dry the cut face until it seals, then set it into barely moistened sand or a dry gritty mix. A piece already standing in a jar comes out, gets recut to firm tissue, and starts again.
How to make Aloe vera grow roots?
It needs a sealed cut face, a dry gritty medium and strong light, then no interference at all. Those four conditions are the whole method, and three of them are about restraint rather than action.
Take the stem back to firm tissue, air-dry the face for one to three days, plant shallow with every leaf above the surface, and put the pot at your brightest window above 50F. Water and feed both wait.
Will an Aloe plant reroot itself?
Yes, from stem tissue — a rootless rosette or stem section reliably grows new roots once its cut face has sealed. A detached leaf never will.
The stump left behind after the crown comes off also regrows: cut at soil level, it pushes new plants from the root system. That makes one leggy plant into two, provided both pieces stay dry while they work.
Can I replant Aloe vera without roots?
It can be done, though not on the same day you cut it. The exposed face has to dry into a callus first, because wet mix against fresh tissue is what turns a salvageable piece into a lost one.
Wait one to three days for a small piece and a few days or longer for a full crown. Then plant it shallow, prop it with a wooden skewer if it will not stand, and leave the mix dry.
Why isn’t my Aloe vera plant rooting?
Four causes cover almost every stalled piece: it went in too deep, it is sitting by a cold pane, it was watered too early, or the base was never firm to begin with.
Buried crowns do not grow at all, and a cold window stretches an already slow process. Lift nothing to check, because repeated pulling undoes progress. Give it warmth, light and a dry pot instead.
How to root an Aloe vera plant that broke off?
Give the torn end one clean recut with a sterilized blade, because nothing roots out of a crushed face. Keep about two inches of stalk below the lowest leaf.
Then handle it exactly like a deliberate cutting: dry the face until it is no longer tacky, plant it shallow in dry gritty mix, and give it bright light with no water. A snapped-off leaf, by contrast, will not root.
How long does Aloe take to root?
Roots take anywhere from a few weeks to a few months, and firmness is the better judge than the calendar. The published record genuinely splits between those two readings for this species.
Laboratory work on a nutrient medium reports rooting inside three to four weeks, but no windowsill matches those conditions. A cold room stretches the wait further, so warmth is the one lever you control.
Prove it yourself: the firmness test
Pinch the base between finger and thumb before you do anything else. That one squeeze tells you whether the piece in your hand is a plant with a problem or a plant that has already gone, and it takes one second.
Everything after it is restraint. The cut face seals on its own. Weeks later the change is angular rather than dramatic — the lowest leaves stop fanning outward and the newest spear climbs at a visibly steeper pitch than the one before it (low-key obsessed about this, but that pitch is the whole signal).
Once roots take hold and the plant starts filling its pot again, the next job is transferring a grown plant to fresh mix without setting it back.
So that is how to root a bare Aloe vera with no roots step by step: press, cut, dry, plant shallow, and wait. Dry comes before soil, and soil comes long before water – keep that order and your Aloe finds its own roots.
Get the one-page care card for this guide, plus a printable A4 copy
We condense this guide into one card for your phone and a print version for the pot shelf. Enter your email and we send both to your inbox. Subscribe once, then request the card of any guide you read.
By subscribing you agree to get emails from Plant Care Basics about plant care guides, about once a week at most. Unsubscribe in one click. Privacy policy
Tap the button below to get more plant fixes in your Google Search results