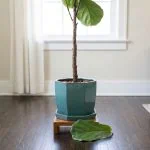

🛠️ Quick Prep Summary: propagating a fiddle leaf fig
Before you start how to propagate a fiddle leaf fig step by step, gather three things and check one date. Every cut on Ficus lyrata bleeds sticky white latex, so gloves come first. Air layering is the route the sources name for this species.
- Sharp knife and gloves: every cut bleeds sticky latex that can irritate bare skin
- Damp un-milled sphagnum, clear film, twist ties: the wrap holds the wound at constant dampness
- Timing: plan on three to five months before roots appear
Get the one-page care card for this guide, plus a printable A4 copy
We condense this guide into one card for your phone and a print version for the pot shelf. Enter your email and we send both to your inbox. Subscribe once, then request the card of any guide you read.
By subscribing you agree to get emails from Plant Care Basics about plant care guides, about once a week at most. Unsubscribe in one click. Privacy policy
The ring of bark lifted away in one strip, and the wood underneath beaded milky white. Pause for a sec. Seven air layers over six years taught me to lift the pot before the knife comes out, because a light, papery rootball dries the sphagnum at the node long before roots form.
Conventional advice sends you to a jar of water and skips the rooting hormone (I’ll explain in a sec). Let me try that again… the real fix for Ficus lyrata Warb., a Moraceae tree that banks no water anywhere inside itself, is to leave the stem attached, wound it in place, and wait three to five months.
The shortened nickname on plant tags belongs to a different family in the animal poison-control database. The binomial settles it. Each route on this page assumes a healthy parent, and a struggling one wants the full set of conditions an indoor specimen needs first.
Seven layers in, the routine still opens the same way: the table that follows holds the numbers I check before the knife comes out.
Quick specs for how to propagate a fiddle leaf fig step by step
| Fiddle leaf fig specs | What to expect |
|---|---|
| Difficulty level | Intermediate: one wound, one wrap, held for months |
| Time needed | 20-40 minutes to set the layer; 3-5 months to rooted |
| Route this species is named for | Air layering on the standing stem |
| Rooting hormone used? | Yes, dusted into the exposed wound |
| Gloves needed? | Yes, every cut bleeds milky white latex |
| Wrap | Damp un-milled sphagnum under clear film, tied above and below |
| Mix for the rooted top | A peat-and-perlite foliage mix lightened with chunky pine bark, 2 parts peat to 1 part perlite to 1 part pine bark, top-dressed with a thin layer of the same coarse pine bark |
You are subscribed
Press the button and we prepare this guide's one-page care card and its A4 print copy and email both to you within a few minutes.
Tap the button below to get more plant fixes in your Google Search results

Table of Contents
What you need in hand, and what this plant does when it is cut
Three checks come before any blade moves: the piece in your hand, the route that piece suits, and the blade itself. A bare leaf never becomes a plant. Everything here assumes a stem section carrying at least one node, plus gloves, because every cut on Ficus lyrata bleeds sticky white latex.
The following sections take the piece, the route and the blade in that order.

Which piece are you holding: tip, mid-stem, or a bare leaf
Type “can a single fiddle leaf fig leaf grow into a whole plant” into a search bar and you meet both answers. It cannot. A leaf and its stalk carry no bud, so a rooted leaf makes roots and then sits unchanged for months.
Weigh the piece in your palm before anything else: a cutting off a well-watered parent has real heft, while a limp one that feels hollow was already short of water.
A tip piece already carries its own growing bud. A mid-stem piece must raise one on the side of the stem first. So it shows a shoot later, and that lateness reads as failure to anyone who was promised a leaf in three weeks.
Thick stems root slowly on this species, and the leaf drop that happens while a piece waits is ordinary rather than terminal, which is worth knowing before you bin a working cutting. Other care guides put two to three nodes on the piece. That count comes from those guides; extension guidance specifies the node itself and not a minimum.
Air layer, water, or medium: pick the route first
Every care guide I compared argues route by preference rather than by outcome. The choice is a trade, not a ranking.
| Route | What you gain, what you give up |
|---|---|
| Air layer on the trunk | [PROS] Top keeps its own roots throughout. [CONS] Months of waiting |
| Cutting in water | [PROS] Roots visible as they form. [CONS] Transfer shock later |
| Cutting in damp medium | [PROS] No transfer to survive. [CONS] Progress stays hidden |
Verdict: choose the air layer for a tall single-stemmed specimen, because the piece stays fed by its own parent through every one of those slow months.

Tools, and the alcohol soak that goes on the blade
Every item below appears in the published procedure, and nothing else earns a place on the tray.
- A sharp knife, and gloves for the latex
- Rooting hormone powder, un-milled sphagnum moss, clear film, twist ties
- A container and fresh mix for the rooted top
Disinfect the blade between cuts. Gloves first. Undiluted 70 percent isopropyl rubbing alcohol suits the job best at home, and it needs no long soak.
Household bleach also works, at 1 part bleach to 9 parts water, with a soak of at least ten minutes and a clean-water rinse afterwards. Wipe dirt and dried sap off the steel first.
Get the one-page care card for this guide, plus a printable A4 copy
We condense this guide into one card for your phone and a print version for the pot shelf. Enter your email and we send both to your inbox. Subscribe once, then request the card of any guide you read.
By subscribing you agree to get emails from Plant Care Basics about plant care guides, about once a week at most. Unsubscribe in one click. Privacy policy
Tap the button below to get more plant fixes in your Google Search results

Step by step: air layering a fiddle leaf fig on the standing trunk
Readers searching “how to air layer a fiddle leaf fig on the trunk” want five moves, and here they are in order: pick the point, ring the bark, dust the wound, pack the moss, seal the wrap. The stem stays on the plant the whole time.
A cutting that leaves the trunk carries no water store of its own, which is why University of Illinois Extension names air layering indoor figs as the main way it propagates them. That matters here, because the piece keeps drawing water through its own bark for every week it spends making roots.
The first layer I set on an old trunk failed on me, because I tied the film loosely and the moss had dried out by the second month.
The following steps run in sequence, and none of them can be swapped around.
Step 1: choose the point and clear the leaves
Pick a point on the stem 12-18 inches below the shoot tip, then strip the leaves from the immediate area so the wound sits on clean wood, clearing a hand span rather than a leaf or two. Press a thumb there first. A stem that flexes and springs back is too young; the one you want barely gives.

Step 2: cut the bark ring and scrape the surface
Cut completely around the stem, down to the woody center. Make a second cut one inch below the first, join the two with a third cut, and lift the ring of bark away. Scrape the exposed surface until no soft cambial tissue is left, so the wood underneath feels slick rather than fibrous, because any that survives will bridge the gap and heal the wound shut.
Latex runs from every fresh wound on this stem, and that sap is a documented skin irritant. Nitrile or thick gardening gloves stay on until the last cut is made; skin that does meet the latex wants at least 15 minutes under room-temperature running water.
If a severe skin reaction develops (blistering or intense burning), seek medical attention immediately. For chemical exposure, you can also contact Poison Control (1-800-222-1222 in the US).
Step 3: dust rooting hormone into the wound
Dust rooting hormone powder onto the exposed surface, pushing it into the cut so it stays put. A pinch weighs almost nothing, lighter in the palm than a coin, and clings only where the wood is still wet. Keep the powder off your skin, since these products often carry a fungicide.
Step 4: pack damp sphagnum and seal the wrap
Pack one or two handfuls of moist un-milled sphagnum around the exposed wood. A properly soaked handful has the heft of a wrung-out cloth, while a dry one lifts like packing foam and roots nothing. Wrap clear plastic film around the moss and tie it above and below the wound, so the moss stays pressed to the wound at a constant dampness.
Step 5: the stem-cutting route and the water it stands in
Readers who type “where to cut a fiddle leaf fig stem to take a cutting” get two incompatible answers, and the one those guides corroborate is a cut immediately below a node, so the lowest node sits at the base of the piece. Other care guides put that piece at six inches with two to three nodes; both figures come from those guides. A six-inch cutting is light enough to tip a narrow glass jar, so use a heavy vessel and avoid softened water, the one water instruction every guide states without contradiction.
After the roots appear: potting up and reading a piece that fails
White roots showing through the film mean the layer is ready to come off, and nothing before that does. Cut the stem just below the bottom twist tie, peel most of the moss away, and pot the rooted top into fresh mix. Then read the plant weekly rather than daily.
Below, the wait, the move, and the piece that is failing, in that order.
How long the wrap stays on, and the room it sits in
Plan on 3-5 months and leave the wrap sealed until then. Do not peek. Published windows for this operation run from several weeks to about a year, and the shortest of them is the one that loses people their layer, because an owner who unwraps early breaks the moisture seal and resets the whole process.
Speculative, but the spread looks less like disagreement about method and more like a difference in what is being rooted: the several-weeks figure comes from general houseplant guidance, and the one-year figure is the one attached to figs.
I unwrapped one at eight weeks to look, and the few root initials inside had already shriveled against the dry moss.
Published sources fix the room rather than a number here. Keep the plant in a room you find comfortable in short sleeves, off a cold sill and out of the draft from any vent, since this species carries no cold hardiness at all.
When the roots are ready for a pot
Two parts make up the answer to “when to move a rooted fiddle leaf fig cutting into soil”, and length is only the first. Other care guides give 1-2 inches of root; the readiness sign most of them omit is smaller roots branching off the primary ones.
A single unbranched strand snaps the moment it meets a solid medium. Step the rooted top into a pot one size up, no more, and water it in straight away.

Lift the pot the day you water it, then lift it again four days later. That difference in weight is the only moisture reading worth trusting on a freshly potted layer.
When a piece is finished, and when it is only slow
Owners asking “why is my fiddle leaf fig cutting not rooting in water” are usually looking at one of two states.
Slow looks like this: the stem stays firm and pale, some leaves have dropped, and no roots have shown. Finished looks different: the stem has gone soft and dark along its length, the leaves yellow in bulk, or mold has taken the surface.
Check the stem first. Run a finger down it and find the boundary between soft darkened tissue and firm pale tissue above it. That boundary decides whether there is anything left to re-cut, and a stem that has softened end to end has nothing above it worth saving.
Leaf drop alone is not that signal. A bare piece with a firm stem is still working, because stems this thick root slowly.
Frequently asked questions about propagating a fiddle leaf fig
Is it better to propagate fiddle leaf figs in water or soil?
Neither route wins on results, because the care guides argue both on preference rather than on outcome. Water shows you the roots as they form, which keeps an impatient owner honest.
A cutting rooted in damp medium never has to survive a transfer, so it trades visibility for a gentler start. Choose water if you need to see progress, and choose medium if you would rather skip the move into the mix an established plant is potted into.
Can I cut a branch off my fiddle leaf fig and replant it?
Yes, provided the piece carries at least one node, and a single branch usually yields two or three usable pieces. The blade lands immediately below a node, so the lowest node sits at the base.
The piece holding the growing tip resumes from a bud it already owns. A middle section has to raise a new bud on the side of the stem before it can push a leaf, so it runs behind its neighbor from the same branch.
How long does it take for a fiddle leaf fig cutting to root in water?
Other care guides publish four to six weeks for visible roots, and that figure comes from those guides rather than from an authority. Watch the submerged nodes instead of the calendar, because warmth changes the answer more than any week number does.
Roots that appear early are initials, not a root system. Move the piece only once those strands branch, since a cutting shifted too soon behaves much like the droop that follows a root disturbance.
What’s the easiest way to propagate a fiddle leaf fig?
Those guides rank routes by preference rather than by the proportion of attempts that worked. The useful answer names where attempts are lost rather than ranking the methods.
Three places account for most losses: a piece with no node, a piece taken from growth that is still soft and new, and the move out of water into a solid medium. Avoid those three and the route matters far less than the handling.
What happens if you cut the top off a fiddle leaf fig?
The plant pushes new growth from buds below the cut, which is how a single unbranched stem becomes a branched one. The removed top can be rooted as a cutting rather than discarded.
Where the blade lands decides the finished silhouette, and that placement question belongs with pruning to force branching low on a bare trunk. This page covers what to do with the piece you removed.
Can you cut a branch off a fig tree and plant it?
Everything on this page is written for Ficus lyrata, and the published sources cover this species only. A branch of this species roots when it carries a node.
Holding a different fig means checking that species before you cut, because the guidance here does not extend to it. Whichever fig it is, the sap rules are the same, so read up on gloves and cleanup after a stem is severed.
Field-tested on the trunk you already own. Ready to cut?
The method comes down to three decisions: which piece you are holding, where the blade lands, and how long you can leave the wrap alone (yes, this sounds slow — bear with me). Months of waiting buy a second tree that never had to survive a transfer.
Watch for the first white root pressing flat against the inside of the film. That is the moment the layer stops being an experiment. Patience does the rest.
The parent stump is the next question, and it branches from below the cut.
And the reason how to propagate a fiddle leaf fig step by step rewards patience is simple: a single-stemmed plant gives you one clean attempt, and the wrap is what protects it.
May your wrap stay sealed through every one of those slow months, and may the first white roots you uncover be thick enough to carry a whole second tree.

Get the one-page care card for this guide, plus a printable A4 copy
We condense this guide into one card for your phone and a print version for the pot shelf. Enter your email and we send both to your inbox. Subscribe once, then request the card of any guide you read.
By subscribing you agree to get emails from Plant Care Basics about plant care guides, about once a week at most. Unsubscribe in one click. Privacy policy
Tap the button below to get more plant fixes in your Google Search results