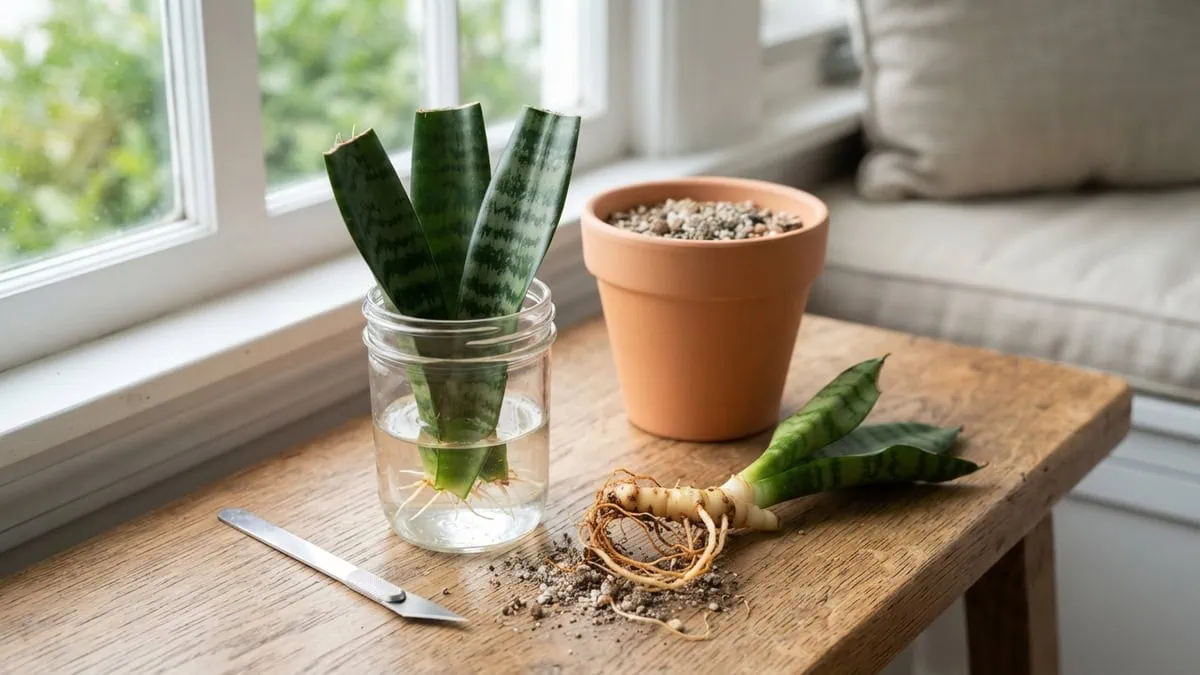
🛠️ Quick Prep Summary: propagating a snake plant
Learning how to propagate a snake plant step by step comes down to picking one of three routes — water, soil, or division — then giving the cut end what it needs. Gather your supplies and match the timing before you make a single cut.
- Sterile, sharp blade: a clean knife or scissors wiped with rubbing alcohol
- Fast-draining medium or clean water: gritty cactus mix, or a clear glass jar
- The right timing: the warm, active growth stretch, never a cold, dim lull
Over two years, I turned four good snake plant leaves into four jars of sour-smelling slime. Every time, the same mistake — I cut a healthy leaf, stood it in water or damp mix, then fussed over moisture it never needed (I’ll explain in a sec).
I assumed a cutting just wanted water and patience — until that fourth mushy, foul-smelling failure taught me the real lever. A snake plant leaf is a living water tank, and its fresh cut has to seal into a dry, corky callus before it meets moisture; keep that wound wet and that same water-storing tissue drinks itself into rot. So the fix was never more attention. It was less.
Get that one idea right and the snake plant (Dracaena trifasciata, formerly Sansevieria trifasciata), a member of the Asparagaceae family, becomes one of the easiest houseplants to multiply. And if your parent still needs its basics down, my guide to keeping your established snake plant thriving keeps your cutting stock healthy.
Take a breath — none of this is delicate work. The following table lays out the specs at a glance, so you can size up the job before you start.
How to propagate a snake plant step by step: quick specs
| Snake plant specs | Recommended setup |
|---|---|
| Difficulty level | Low to medium; beginner-friendly |
| Hands-on task time | About 20-40 minutes |
| Fastest method | Rhizome and pup division |
| Time to first roots | Soil 6-8 weeks; water 2-4 months; bottom heat about 2 weeks |
| Best timing | The warm, active growth stretch |
| Rooting medium | Fast-draining cactus or succulent mix, or clean water |
| Sterile blade required? | Yes; wipe it between every cut |
| Do leaf cuttings keep the variegation? | No; divide instead to keep it |
Tap the button below to get more plant fixes in your Google Search results

Table of Contents
Get the timing, tools, and method right first
Successful propagation starts before the first cut — with the right timing, a sterile blade, and a method matched to what you want back. Snake plants multiply three ways: rooting a leaf cutting in water, rooting one in soil, or splitting the underground rhizome. According to Iowa State University Extension, dividing houseplants into offsets is the quickest route and the only one that keeps a variegated leaf true to type.
Timing matters more than most guides admit. Propagate during the warm, active growth stretch, when a snake plant is already pushing new leaves and can pour energy into fresh roots — not during a cold, dim lull, when everything stalls. Your parent plant should be mature, with firm leaves at least 4 to 6 inches tall, and ideally a few pups already crowding the pot.
For tools, keep it simple. One sharp knife or pair of scissors, wiped with 70% rubbing alcohol between every cut, so you never carry rot from one section into the next. A jar or a small pot of gritty mix. That is genuinely the whole kit.
One habit saves more cuttings than any product — smell your medium. Fresh mix and clean water read faintly earthy and neutral; a sour, swampy note means microbes have already moved in, and it is time to dump it and start over rather than push on.
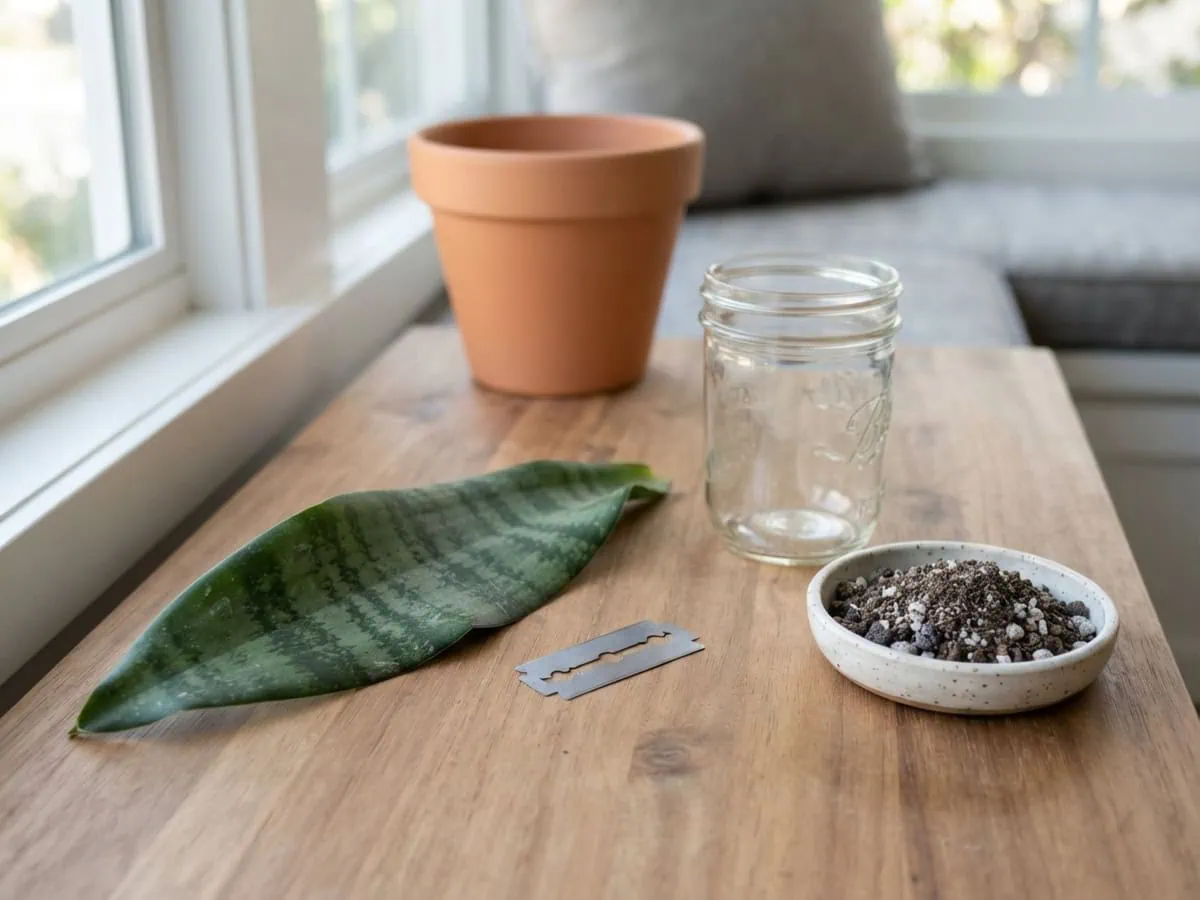
The following section covers when to propagate and how to pick the method that fits the plant on your shelf.
When to propagate and how to choose your method
Choose your method by what you want back. For a plain-green snake plant, any of the three works equally well. This is also where the single most common propagation regret lives: do variegated snake plant cuttings lose their color? Yes — almost always.
The reason is structural. The pale margins on a ‘Laurentii’ or a ‘Golden Hahnii’ are a chimera — two genetically different layers of tissue stacked in the same leaf, one green and one lacking full pigment.
A leaf cutting regrows its new plantlet from a small patch of cells at the base, and that patch almost always comes back as plain green Dracaena trifasciata. Division keeps the whole growing point — rhizome, apical meristem, and all its layers — intact, so the pattern carries straight through.
The rule writes itself. Plain-green or solid-color leaves can go to water or soil; anything with a stripe or a colored edge gets divided instead. If you are not certain which cultivar you own, my guide to telling the snake plant varieties apart helps you check before you cut.
Tap the button below to get more plant fixes in your Google Search results

Propagate your snake plant: three step-by-step methods
The following sections walk through all three methods — water, soil, and division — start to finish.
Step 1: Root a leaf cutting in water
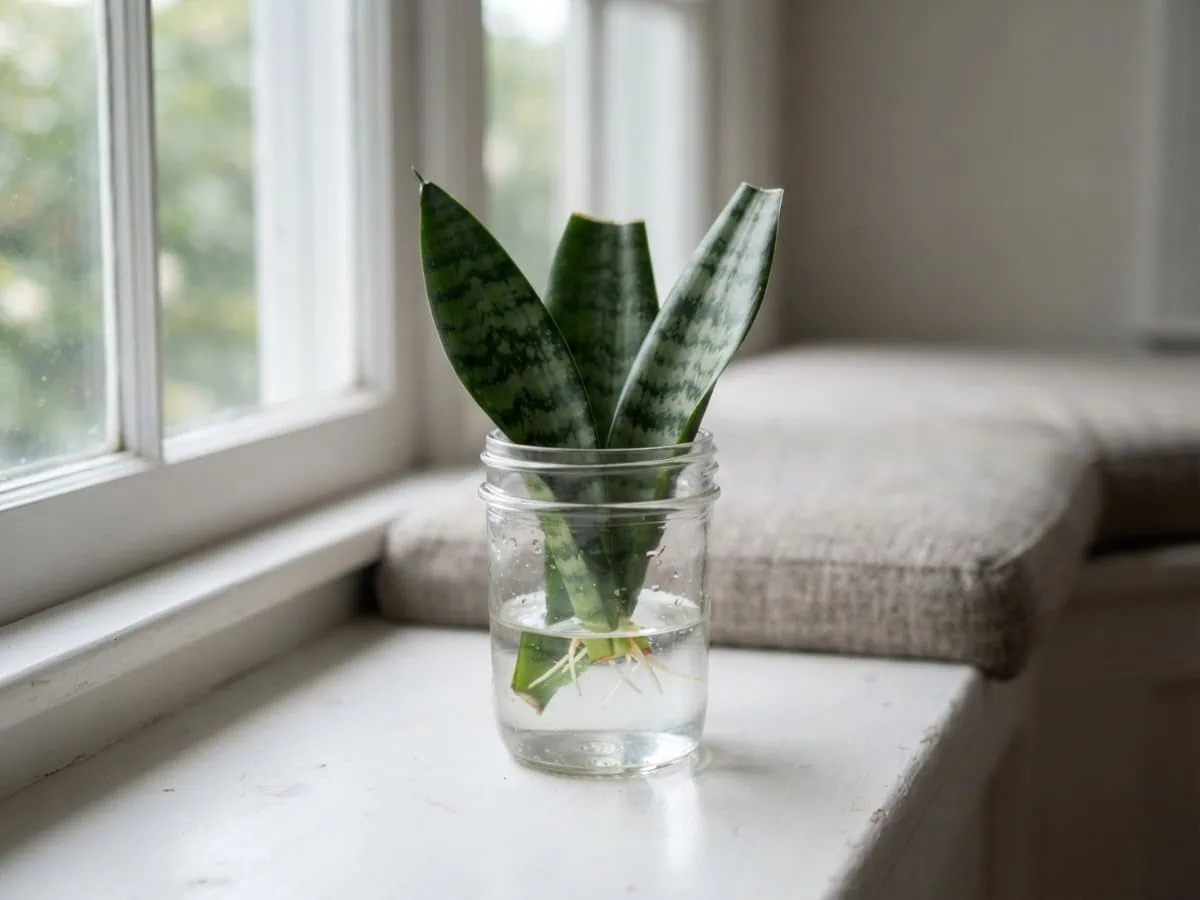
The “rooting snake plant cuttings in water” method is the one you can actually watch happen — the roots appear in plain sight through the glass. It is the slowest of the three, but also the most forgiving.
- Choose a firm, healthy leaf and cut it off low at the base with your sterile blade.
- Slice the leaf into 3- to 4-inch sections, and nick a small notch in the top edge of each so you remember which end points up.
- Rest the cut ends in open air for a day or two, until each seals over with a dry callus.
- Stand the sections notch-up in a clear jar with about an inch of water covering the base.
- Set the jar in bright, indirect light and refresh the water weekly so it never clouds over.
Keep your nose in the loop. Clean water stays odorless — a musty, stale smell is your cue to rinse the jar and refresh it, then set it back in the same bright, indirect spot. New roots come first. A tiny plantlet pushes up from the base of the old leaf weeks later.
Step 2: Root a leaf cutting in soil
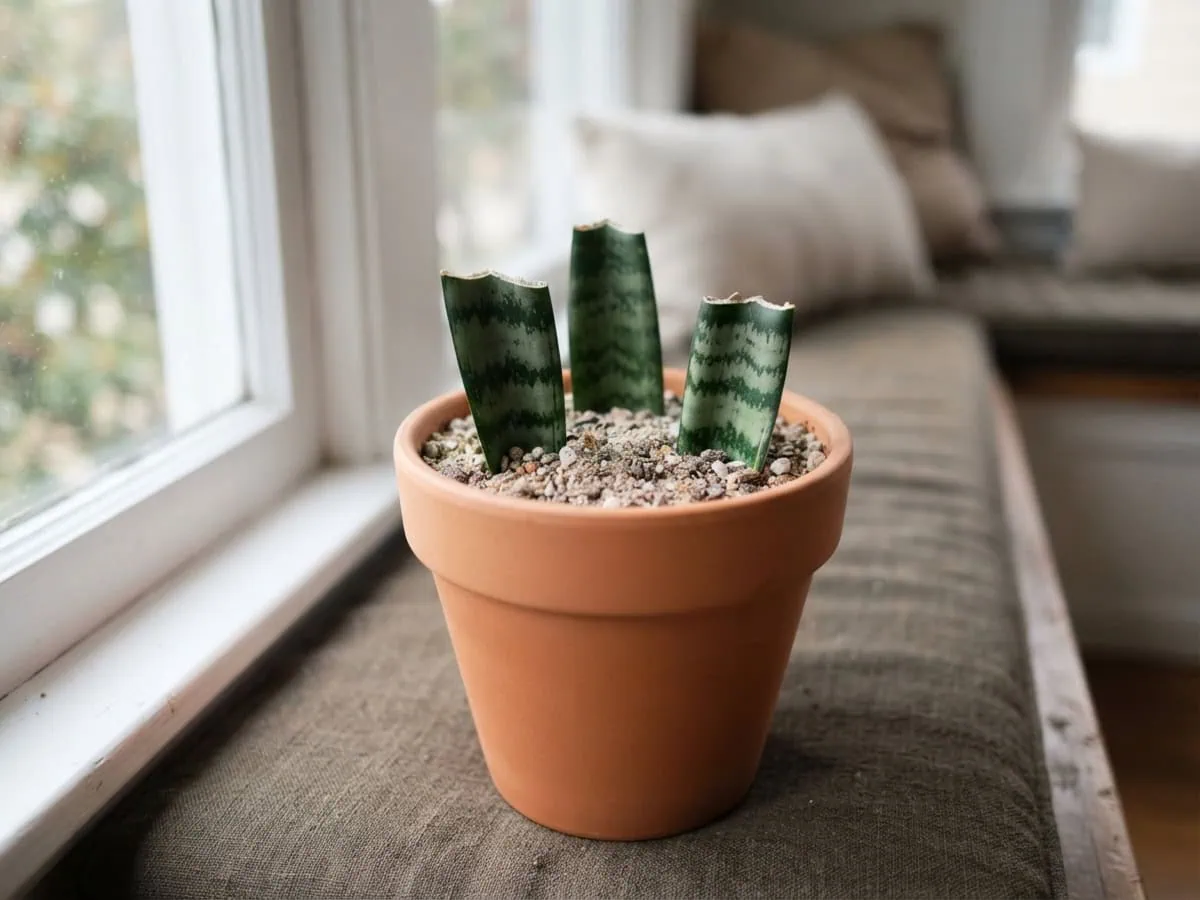
Soil rooting skips the glass but builds a sturdier plant — roots that form in a gritty mix are ready for pot life from day one. The one non-negotiable step is the callus.
- Cut and section the leaf exactly as before, 3 to 4 inches per piece, notched on top for orientation.
- Rest the sections in a dry, shaded, airy spot for 2 to 3 days, until the cut ends form a firm, corky callus.
- Dip each callused base in rooting hormone if you have it — helpful, never required.
- Push the sections about 1 to 2 inches deep, notch-up, into a fast-draining cactus or succulent mix.
- Water once to settle the grit, then wait, letting the mix go nearly bone-dry before the next sip.
Resist the urge to keep it damp. That sharp, sour smell rising off an over-wet pot is exactly the rot you are trying to dodge — snake plant cuttings die wet far more often than they ever die dry. Water thirst, though, is easy to fix; a rotted cutting is not.
Step 3: Divide the rhizome and pups
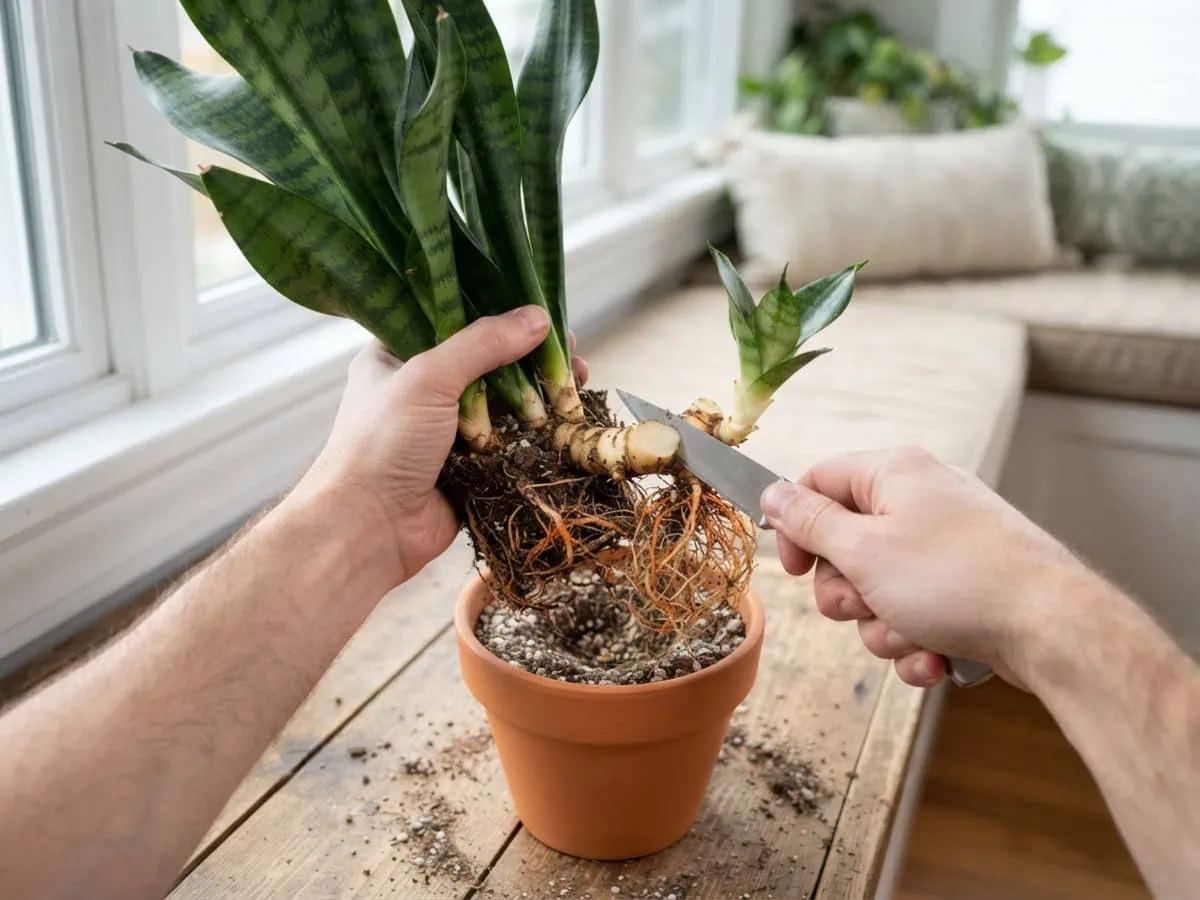
Division is the shortcut — it hands you a whole new plant that already has its own roots, its own leaves, and its true variegated colors fully intact. Division wins on speed. Learning how to divide a snake plant with pups takes minutes and skips the weeks of waiting.
- Slide the whole plant out of its pot and brush the loose mix off the root ball.
- Find the thick, pale-orange rhizomes linking the leaf fans, and locate a pup with its own roots and a healthy fan of its own leaves.
- Cut cleanly through the rhizome with your sterile blade so each division keeps a leafy fan plus its own roots.
- Let any large cut surfaces dry for 2 to 3 days, and dust them with powdered cinnamon as a gentle wound seal.
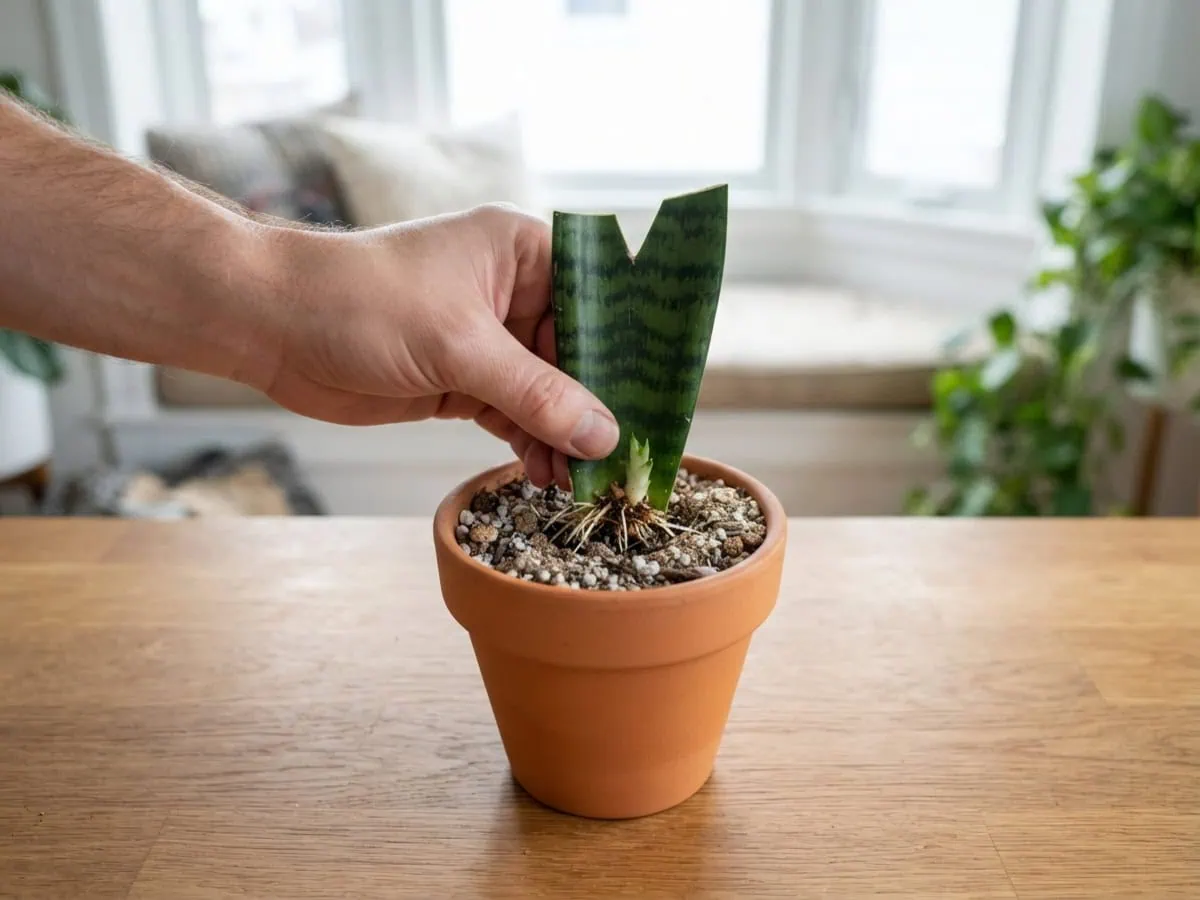
- Pot each division snug in fast-draining mix, hold water for about five to seven days, and set it in bright, indirect light.
Separate a pup once it stands roughly a third to half the parent’s height — big enough to fend for itself. Done right, there is barely any smell and barely any wait. A healthy division just carries on growing as if nothing happened. No jar, no wait.
Care for new cuttings and divisions while they root
A fresh cutting needs far less from you than you would think — the right warmth, restrained watering, and time. Your only real job now is to stay out of the way while roots build.
Keep the medium barely moist for the first week or two so new roots settle, then shift to the plant’s normal rhythm: water only when the mix is dry, and empty any runoff.
Hold off on fertilizer entirely until fresh growth proves the plant has established — feeding a rootless propagule just loads the mix with salts it cannot yet take up. Once it is potted and growing, my guide to dialing in a safe watering rhythm keeps it clear of the overwatering that undoes new roots.
Warmth is the one accelerator worth chasing. Roots build fastest when the rooting zone stays around 65 to 75F, and never drops below the 55F floor where cold damage starts — a seedling heat mat that lifts the medium to 75 to 80F holds that steady bottom warmth and can pull the whole timeline forward. Cold just stalls it. Always follow the manufacturer’s instructions and applicable safety standards for any electrical equipment.
The following sections set your expectations on timing and clear up the myths that sink the most cuttings.
Rooting timeline and when to pot up
The answer to “how long do snake plant cuttings take to root” depends entirely on the method. Soil cuttings usually show first roots in about 6 to 8 weeks; water cuttings run slower, often 2 to 4 months; steady bottom heat can compress that to as little as 2 weeks. Speed tracks warmth.
Do not judge by roots alone, though — a cutting is ready to pot up once its roots reach about half an inch and a small pup has begun to push up at the base. That pup is the real signal the cutting can support itself.
As for how long a snake plant can live in water only — it can sit there for months if you keep the water clean and refreshed. The longer water roots grow, though, the harder they adapt to soil later, because roots formed underwater never build the tough structures soil demands. Move a water cutting into mix within a few weeks of that half-inch mark.
Common propagation mistakes and myths to skip
The “why do my snake plant cuttings keep rotting” question comes up more than any other, and the answer is almost always moisture. A cut end that sits in soggy medium or stale water cannot dry and callus, so the soft, water-rich tissue suffocates and the soil and water microbes that drive rot move straight in.
Three myths make it worse. First, skip the popular hydrogen-peroxide soak for cut ends — keep that peroxide for sterilizing empty pots and tools, and let a dry callus plus a dusting of cinnamon guard the wound instead. Always test on a small area first. Results may vary depending on your specific conditions.
Second, a slanted or notched cut only marks which end points up; it does not magically grow more roots, so cut for orientation, not for speed.
Third, do not feed a brand-new propagule — wait for real growth first, because the same wet-and-hungry habit that stalls cuttings is what drives whole-plant collapse and sends people scrambling into rescuing a snake plant from root rot.
Change the water weekly, let soil cuttings dry between sips, and you sidestep nearly every failure I ever booked. Dry beats wet, every time.
Snake plant propagation FAQ
Is it better to root a snake plant in water or soil?
Soil is better for a sturdy end plant, while water is better for watching the process and learning. Water rooting lets you see roots form through the glass, but those roots are fragile and adapt poorly once moved to soil. Soil-rooted cuttings build tougher roots that are ready for pot life immediately. If you do start in water, pot up early — once roots reach about half an inch — to limit transplant shock.
What is the fastest way to propagate a snake plant?
Dividing the rhizome and pups is by far the fastest way. A division already carries its own roots and leaves, so it skips the weeks or months that leaf cuttings spend forming roots from scratch. It is also the only method that keeps a variegated pattern true. Slide the plant out, cut a rooted pup free with a sterile blade, let large cuts callus for a couple of days, then repot into fast-draining mix.
What are common mistakes in propagating snake plants?
Overwatering the cutting is the number one mistake — a wet cut end rots instead of rooting. Other common errors include skipping the callus step on soil and division cuts, planting a leaf section upside down, feeding before the plant has established, and expecting a variegated leaf cutting to keep its color. Change water weekly, let soil dry between waterings, and always cut with a sterile blade to sidestep most failures.
How long does it take for a snake plant to grow from cuttings?
A snake plant cutting usually takes about 6 to 8 weeks in soil and 2 to 4 months in water to form its first roots. A steady bottom-heat source can shorten that to as little as 2 weeks. After roots appear, a small pup pushes up from the base of the old leaf — that pup is your signal the cutting is ready to pot up and grow on as its own independent plant.
What helps cuttings root faster?
Steady warmth is the biggest accelerator — hold the rooting zone around 65 to 75F, and a seedling heat mat that lifts the medium to 75 to 80F under the pot speeds it up further. Bright indirect light, a fast-draining medium, and a properly callused cut end all speed things along too. Rooting hormone can give a modest boost on soil cuttings but is never required. Keep the medium barely moist rather than wet, since soggy conditions slow rooting and invite rot.
How long can a snake plant live in water only?
A snake plant can live in water for months, even indefinitely, as long as you keep the water clean, refreshed, and lightly oxygenated. That said, it is not the strongest long-term home. The longer roots grow in water, the harder they adapt if you ever move the plant to soil. For a sturdy potted plant, transfer a water cutting into fast-draining mix within a few weeks of its roots reaching about half an inch.
How often should I water a newly propagated snake plant?
Water a newly propagated snake plant lightly — keep the medium barely moist for the first week or two, then let it dry out almost completely between waterings. A fresh cutting or division has few roots and cannot use much water, so soggy mix quickly turns to rot. Settle the medium with one light watering at potting, empty any runoff, and from then on water only when the top of the mix feels dry.
Rescue the cutting, revive the roots, repeat
Real talk: every failed cutting taught me the same thing (yeah, learned this the hard way) — a snake plant does not want your fussing, it wants a dry callus and a warm, hands-off week, not a jar going sour on the windowsill.
Rescue a leaf that is heading nowhere by recutting to firm tissue and letting it callus. Revive it into roots with warmth and restraint. Then repeat, because one plant becomes a shelf full. No nursery required.
Start with division if you can — it is fast, forgiving, and keeps every stripe intact. Once a cutting roots, my guide to moving a rooted division into its own pot takes it from there. Nail how to propagate a snake plant step by step once, and you will never buy this plant again.
May your callused cuttings root firm, your divisions settle in fast, and one snake plant fill every shelf you own.
Tap the button below to get more plant fixes in your Google Search results