🎯 Quick Answer: naming the insect on a peace lily
How to get rid of peace lily pests fails when one spray replaces 2-4 months of coverage on Spathiphyllum, a member of the Araceae family. Name the insect before you reach for anything. Then separate the plant, take off what your hands can reach, and use one agent.
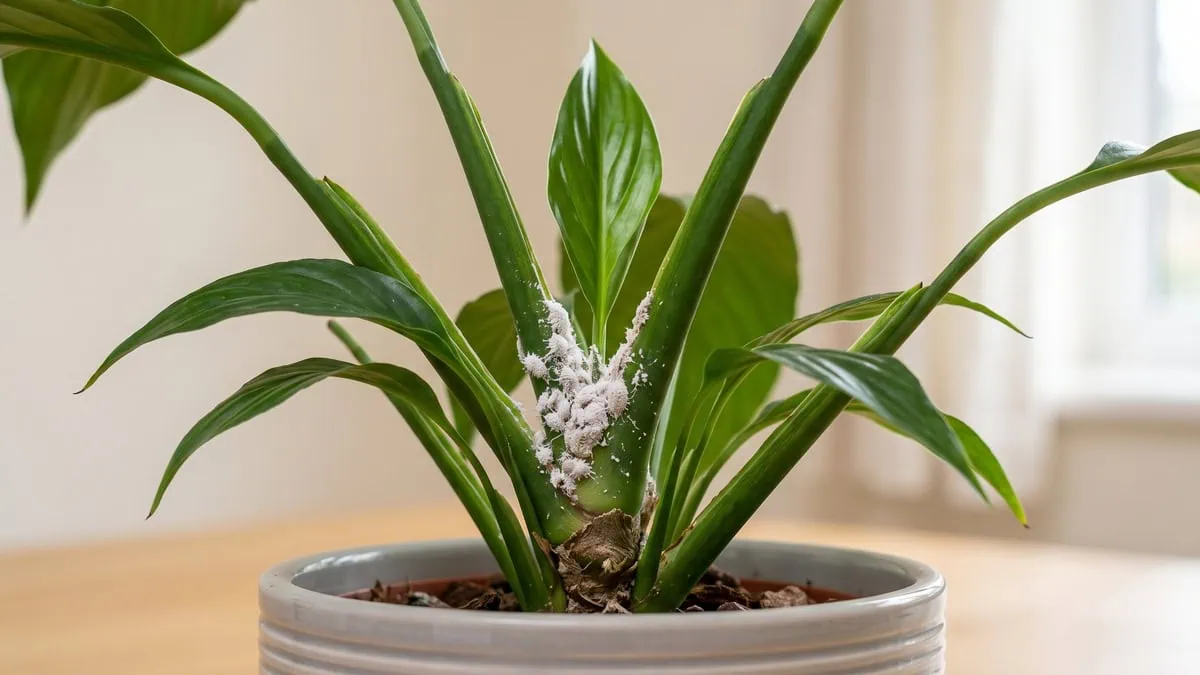
- White cottony clusters: mealybugs hide in leaf joints and stalk bases.
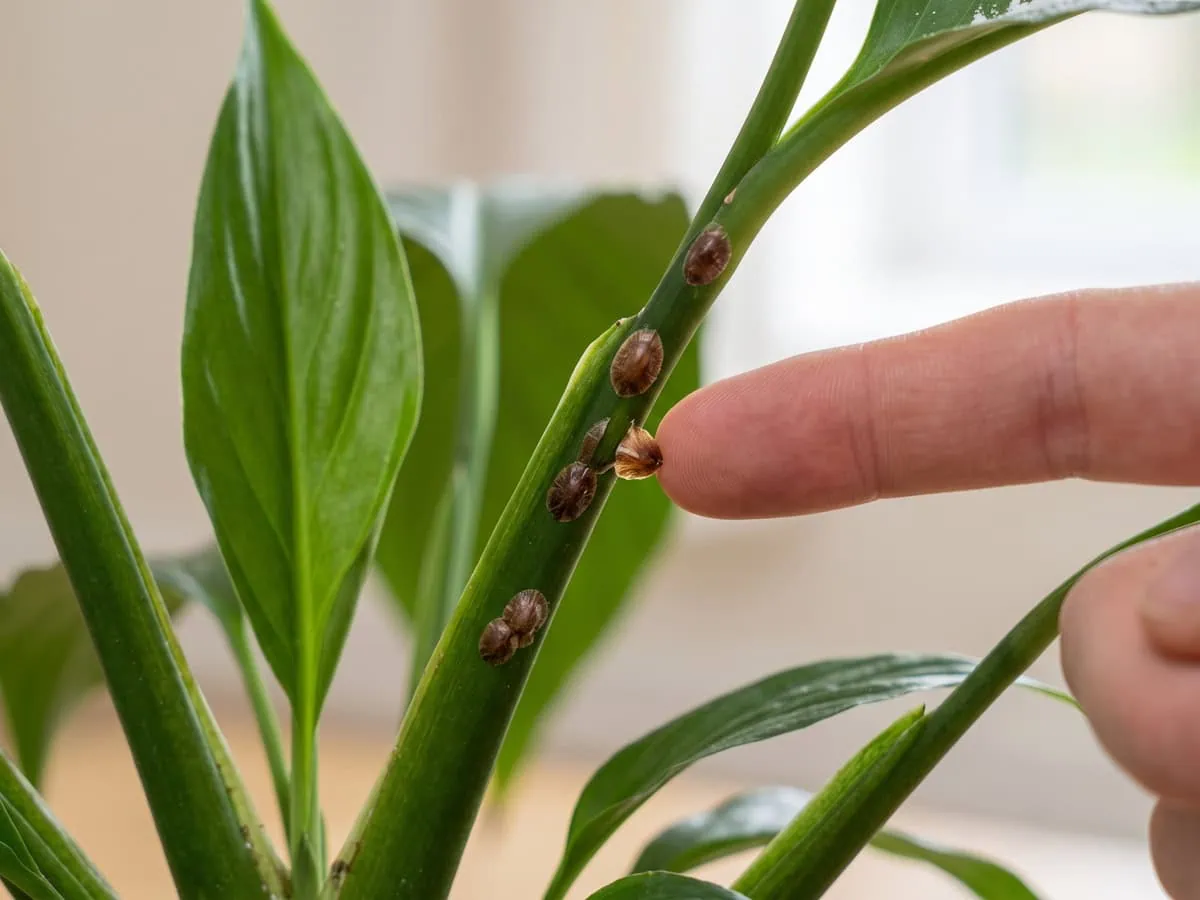
- Brown bumps that stay put: scale, shelled and immobile, sitting tight on the stalks.
- Flies over the soil: a wet soil surface, not a leaf problem at all.
- White dust near a bloom: pollen shed from the spathe, not an organism.
- Work in order: separate the plant, remove by hand, then one agent.
Look — the stalks lean out from the crown at a wider angle every week, and the newest leaf still comes up glossy and clean. (FYI — a peace lily pushes new growth from the center of the clump, so the outer stalks are the oldest ones.)
Sticky film on the older blades: honeydew, and the sooty mold that follows it. That is where the insects are.
Scale was real enough to see, but chasing it was not what fixed anything. The order of the work was the actual failure. I’d like to retract that — the shells were real; the failure was doing everything at once.
The blade itself is why order matters: broad, thin and non-succulent, so an oil film spreads over the whole surface and a swab reaches every insect sitting on it. Name the insect, then work in sequence. Everything else sits inside the full picture of looking after this houseplant.
Breathe. The following table holds the rates and intervals for the insects this plant actually carries, so you can act without looking anything up.
How to get rid of peace lily pests: the numbers at a glance
| Peace lily specs | Rate, interval or answer |
|---|---|
| How these insects feed | By piercing and drawing sap; none of them chews holes in a blade. |
| Alcohol on a swab | The 70% product, used straight from the bottle, on the insects themselves. |
| Soap wash rate | 1 teaspoon of mild soap per gallon of water. |
| Horticultural oil rate | 1% concentration, both blade surfaces. |
| Repeat interval | 7-10 days against scale crawlers; 4-7 days for a soap spray. |
| Does one application finish it? | No – eggs and protected stages survive a contact agent. |
Tap the button below to get more plant fixes in your Google Search results

Table of Contents
Which pest is it? Match what you can see
Name the insect by where it sits and by what it leaves behind. Cottony clusters pack into the leaf joints, hard brown bumps ride the stalks, and loose white powder lies under an open bloom. The following sections take those three looks in order.
| What you see | What it is |
|---|---|
| Cottony white clusters in the leaf joints | Mealybugs, soft and wingless, up to a tenth of an inch long. |
| Brown bumps that stay put on the stalks | Scale, whose shelled adults a contact spray cannot reach. |
| Loose white powder under an open bloom | Pollen shed from the spathe, not an organism at all. |
Verdict: Work from position rather than color, because position separates all three in one look.
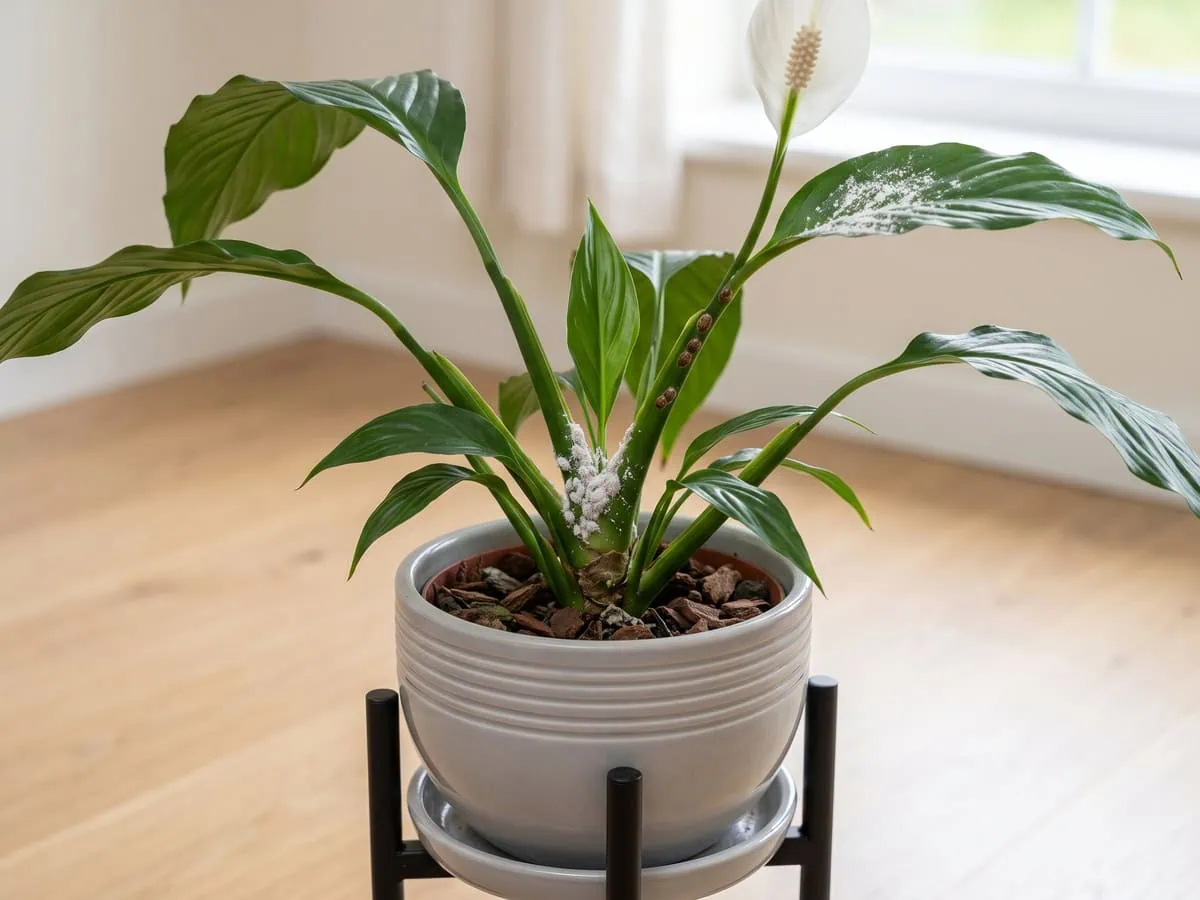
According to Colorado State University, the insects that reach indoor foliage are a short list, and fungus gnats and the other common houseplant pests each announce themselves differently. Flies lifting off the surface when you nudge the pot signal wet soil. Stickiness on a blade signals an insect.
New growth tells a fourth story. Aphids cluster on soft new leaves and their undersides, and they leave the same sticky film. Check the newly opening blooms as well, and take the insects off on sight.
White cottony clusters and a sticky film
Search for white cottony bugs on peace lily leaves and you land on mealybugs. Soft, oval, wingless. They run up to a tenth of an inch long, so your eyes will do.
Look at the joints. The clusters pack into the tight angle where each stalk leaves the crown, well out of sight, rather than sitting exposed on the open blade where you would have caught them in week one.
Then check the film. Honeydew means undigested sap. Sooty mold grows on top of it, so a blade darkening a week later still carries residue rather than a fresh infestation.
Brown bumps that do not brush off
Brown bumps on peace lily stems and leaves are scale, and the test is one fingertip. Push a bump sideways. If it lifts clear while the two beside it hold fast, an insect sits there, feeding.
In my testing that push settles it faster than any photo comparison. A mark cannot move. A settled insect can.
The shell explains the rest. It covers the adult, while the mobile crawler stage underneath stays soft and unprotected, so the repeat interval is set by that crawler stage and never by the calendar.
White powder: pollen or pest?
Ask whether white dust on peace lily leaves pest or pollen is the right question, and position answers it again. Powder lying loose on upper blades directly beneath an open spathe came off the bloom.
A damp cloth lifts it away cleanly. It returns while that bloom stays open.
Powder that clings to the tissue, or that sits on undersides well away from any flower, is something else. And a mark fixed in the blade itself is a separate question, which the browning that is not insect damage takes up.
Tap the button below to get more plant fixes in your Google Search results

Work in one order: separate, remove by hand, then one agent
Do these three in sequence and stop between them. Separation buys time. Hand removal takes out the insects you can already see.
One agent then finishes what your fingers could not reach. Each step below gets its own section.
Separate the plant before anything else
Move the plant out of the room, not just off the shelf. Two to three weeks is the window the indoor guidance uses for an incoming arrival, and an infested plant earns the same. But separation only counts if you look again at the end of it.
I lost plants learning that. Every one went the same way.
I layered three products in a week on a blade this thin, then slid the pot back beside its neighbors before the eggs had hatched. Now it is one agent, one plant, one room.
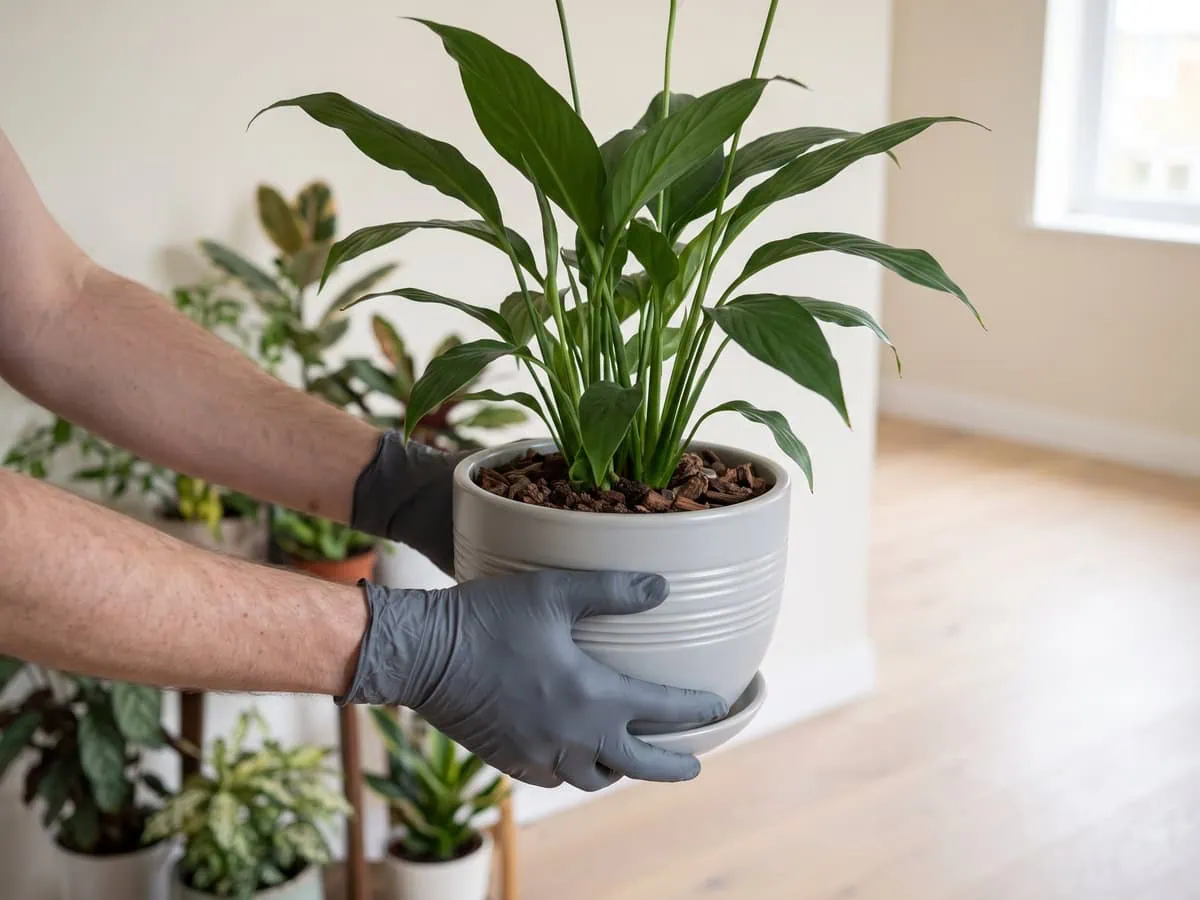
Wear gloves. The sap irritates skin, so wash with soap and warm running water afterward. Keep your hands off your face until you have.
Take off what you can reach by hand
Every insect you remove is one the agent does not have to reach. Use a cotton swab dipped in 70% rubbing alcohol, straight from the bottle. Touch the insects themselves.
Scale lifts under a fingernail; cottony clusters come out of the joints the same way. Clean the blade first, then wipe or dip it in alcohol, and skip the long soak.
And keep the solvent off the leaf where you can, because this plant carries a broad, thin, non-succulent blade with none of the waxy reserve a thick-leaved plant banks against a solvent.
Dry the surface to stop the soil flies
How to get rid of fungus gnats in peace lily soil is a watering question. The flies breed where the surface stays wet. Let the top two inches dry between waterings and the egg-laying sites dry with it.
Push a finger two inches down to check, or lift the pot, which weighs noticeably less once the mix is dry.
Two habits carry most of the result. Empty the saucer after every watering, and time the soak by the pot rather than the calendar, which is exactly how the routine soak is timed.
A drench aimed at the larvae is the second lever, spaced five to seven days apart. It reaches larvae only. Eggs, pupae and the adults flying over the surface all survive it.
Not everything in the mix is a gnat larva. Springtails are small insects with gray or cream-colored bodies, and they show up wherever the medium stays damp. So dry the surface and look again before you strip a plant out of its pot.
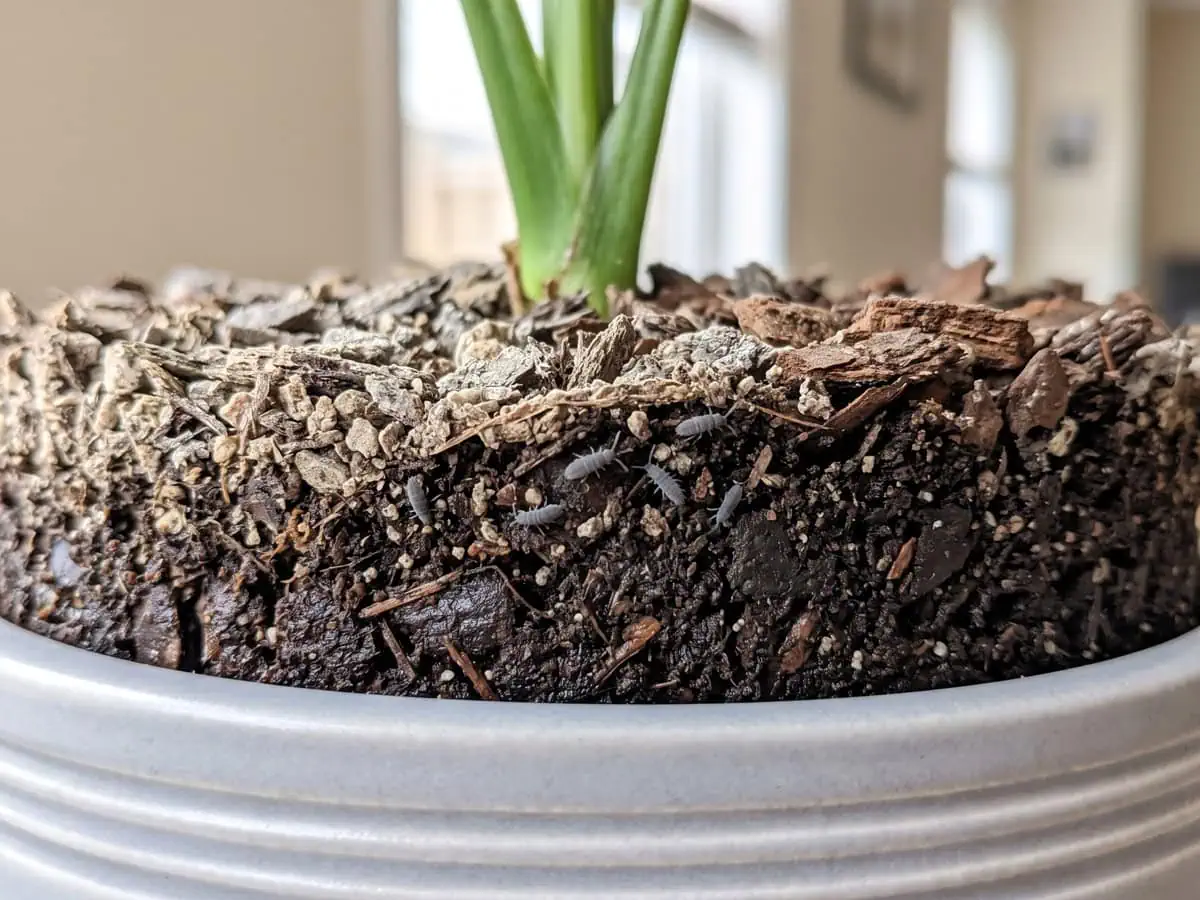
So the dry surface does the work while the drench cleans up behind it. If the surface never dries, the mix is the problem, and a soil recipe that drains instead of staying wet fixes what no drench will.
Finish the job: repeat, clean the blades, keep the next ones out
Three moves close this out: repeat on the interval the insect’s life stage sets, wipe the residue off the blades, and check every incoming plant before it reaches the shelf. Each of those three has its own section below.
Repeat on the interval the life stage sets
Time the repeat by the organism, not by the calendar. Scale crawlers take an application every 7-10 days, while a soap wash goes back on every 4-7 days. Coverage runs two to four months.
Scale settles and stops moving. The shell over a settled adult keeps a contact agent out. The crawler underneath carries no shell, so that stage is the window every interval above is built around.
This is an open question for me — why one organism needs a week and another needs ten days is nowhere in published guidance, only that the protected stage survives what the visible one does not. Expect the plant to look clear before it is clear.
Wipe the sticky film off the blades
Wipe the film off once the insects are gone. Search “sticky residue on peace lily leaves what causes it” and every answer names the cause: undigested sap, excreted by sap-feeding insects. None of them tells you to clean it off.
Damp, not wet, is the standard — a cloth that drips leaves water sitting in the leaf joints where the insects were. Work both faces of every blade, underside included, since that is where the settled adults hide. Extreme temperatures on either end injure the tissue, so stay lukewarm.
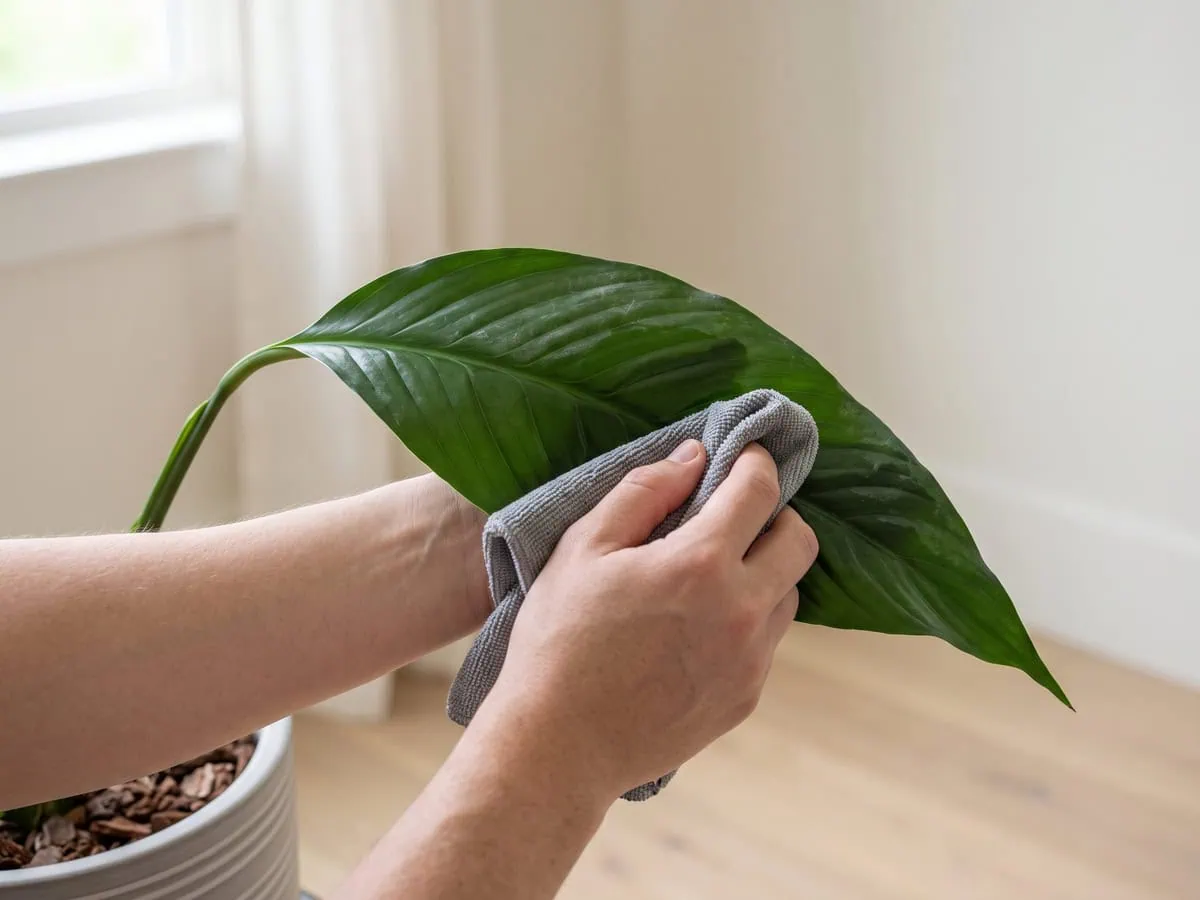
The cloth reports when the job is done. It drags on the first pass across a filmed blade, then glides on the second. Soap is a last resort here, because detergents cut the waxy surface layer and leave dry, crispy tissue behind. Always test on a small area first. Results may vary depending on your specific conditions.
Skip the shine products too, on a plant already recovering from an infestation. The film they leave behind is one more thing sitting on a blade that just got cleaned.
What does not work on this plant
One agent, applied once, does not finish the job. Oil is recommended for this plant almost everywhere with no condition attached. The condition is this: keep oiled foliage out of direct light, hold off above 85F, and never spray a plant whose roots are already dry.
Myth: one application of oil ends an infestation. Fact: shelled adults survive a contact agent, so the repeat set by the crawler stage is what finishes the job.
Nothing on this plant chews. Every organism recorded on it feeds by piercing and drawing sap, so missing tissue with a clean edge points somewhere else entirely.
Tissue going soft and blackening at the base belongs with roots that have broken down below the soil line. Separate every incoming plant for two to three weeks, then look again before it joins the others.
Frequently asked questions about peace lily insects
How do I get rid of bugs in my peace lily plant?
Separate the plant, remove what your hands can reach, then apply one agent and one only. That order is the answer.
Physical removal comes first because it takes out every insect you can already see. A cotton swab dipped in 70% rubbing alcohol handles the settled ones.
After that, a single agent covers what the swab missed: a mild soap wash at one teaspoon per gallon, or a horticultural oil at 1% on both leaf surfaces. Repeat it on the interval that organism sets rather than stopping at the first clear inspection.
Can I add baking soda to my peace lily plant?
No. Nothing in published guidance supports baking soda as an insect control on this plant, and the sources that cover these organisms reach for soap, oil or alcohol instead.
The wider question of what belongs in the growing medium is a substrate question rather than an insect question, and the peat-and-bark mix article carries it in full. For the insects themselves, the useful surface change is dryness rather than chemistry: letting the top two inches dry between waterings removes the egg-laying sites that the soil flies need.
Can I spray neem oil on a peace lily?
Yes, with conditions the recommendation almost never carries: keep oiled foliage out of direct light, and hold off above 85F.
An oil works by covering the insect’s breathing pores, so it has to reach both leaf surfaces to do anything. The rate documented for a horticultural oil is 1%.
Follow the dilution printed on a neem product’s own label. A plant already dry at the roots is the one case where the injury risk outweighs the insects.
Will coffee grounds get rid of fungus gnats?
No. Every page that covers these soil flies reaches for a drench or a trap instead, and none of those routines involves scattering grounds on the mix.
The lever that is documented is moisture. Larvae live in the top layer of the growing medium, so letting that layer dry between waterings removes the site they need.
Where a drench is used against them, space it five to seven days apart and expect it to reach the larvae only. Emptying the saucer after every watering closes the loop.
What is eating the leaves of my peace lily?
Nothing is eating them. Each organism published sources list for this plant pierces the tissue and draws sap, and none of them chews.
That distinction changes the search. Sap feeding leaves intact tissue that is stippled, sticky or discolored, and the insect sits on the plant while it works.
Missing tissue with a clean cut edge points to physical damage instead, which is a different question. Blackening that spreads from the base and softens the tissue is a root-zone failure rather than an insect problem.
Master the order of work, skip the repeat infestation
The product matters less than the sequence. Separate the plant, take off what your hands can reach, then let one agent finish the rest.
The blades are the part people leave behind. Wipe the film and the mold off once the insects are gone, keep to the interval that organism sets, and the next leaf opens glossy and clean instead of tacky.
Check every new arrival for two to three weeks before it joins the shelf, and that is the whole of how to get rid of peace lily pests, worked in an order that holds. Name the insect first, and the sticky film you wipe off a peace lily blade stops coming back.
Tap the button below to get more plant fixes in your Google Search results