⏱️ 30-Second Answer: light, water and root health
Peace lily care requires 150-500 FC of indirect light; Spathiphyllum, a member of the Araceae family, will not take direct sun. The bigger risk is water. A waterlogged, airless root zone caused 7 of 16 indoor losses in owner reports.
Hold the room at 65-80F with humidity near 40-50 percent. Feed monthly at half label strength only while new leaves are pushing. Water when the top two inches read dry and the pot feels light.
Never leave the pot standing in its saucer. Spathiphyllum banks no water reserve, so drowned roots and thin blades fail together.
- Lift test: a dry pot weighs noticeably less than a watered one
- Recovery clock: a thirsty plant stands back up within a few hours
- No lift: inspect the roots instead of adding more water
- Salt flush: run two to three pot volumes through every four to six months
- Repot step: go up about two inches in diameter, never more
The lowest blade went first — not yellow, just slumped over its petiole, soft and cool and faintly slick between two fingers, the way a wrung-out cloth feels after a night folded on the sink. Eleven peace lilies died on me across seven years (more on this below) before I stopped blaming the light.
Full stop. Rather than a lighting problem, I discovered a plumbing one: Spathiphyllum banks no water in leaf, stem or clump, so the pot is the only reservoir it has. Actually, I take that back — the creeping stem does spread the clump, it just never stores a drop.
That single fact reorders everything else. Water, light, warmth and feeding all hang off whether the root zone can still breathe between drinks. It is the failure behind 7 of 16 peace lily losses in owner reports, and it is the one most owners water harder to fix.
Pause for a sec. The following table is the entire plant on one screen, so you can stop guessing before you read another word.
Peace lily care at a glance
| Peace lily specs | Target or answer |
|---|---|
| Light | 50-100 FC survival, 150-500 FC optimal; north, north-east or north-west window (Northern Hemisphere) |
| Room temperature | 65-80F day, thermostat 68-70F |
| Relative humidity | 40-50 percent |
| Growing medium | A peat-and-pine-bark foliage mix, 2 parts peat moss to 1 part pine bark, top-dressed with a thin layer of the same coarse pine bark |
| Feeding | Monthly at half label strength while growth is active, none while it rests |
| Drainage hole required? | Yes – and never leave the pot standing in its saucer |
| Pet safe? | No – toxic to cats, dogs and horses; insoluble calcium oxalate raphides cause oral irritation (ASPCA) |
Tap the button below to get more plant fixes in your Google Search results

Table of Contents
Forest-floor origins, and what they fix about indoor care
The peace lily is a wet-tropical forest-floor plant, and almost every indoor rule it obeys follows from that one address. Shade above. Humidity around it.
Warmth that never breaks, and a litter layer that drains while staying damp — that is the entire brief. Every aroid trait that matters indoors traces back to that floor. Roots evolved in a loose litter layer that is damp and full of air at once, exactly the combination a bagged potting soil destroys as it settles into an airless brick.
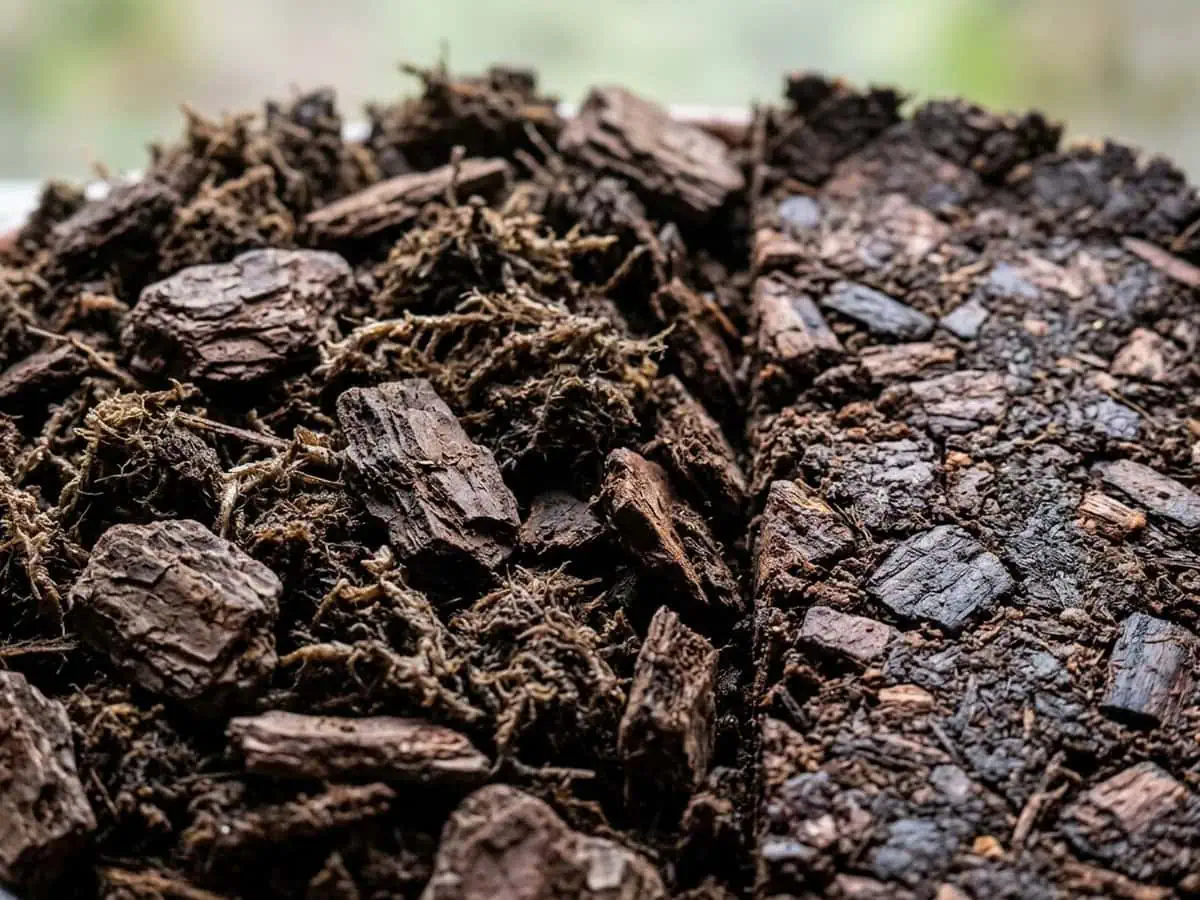
Two things follow. The mix has to hold water and still breathe, and the light has to arrive filtered rather than direct. That pairing is why extension guides rate this species only slightly drought tolerant and still rot-prone in a wet pot.
The following sections take that address apart: where the plant actually grows, and what its shade tells a room.
The native range, and the elevation behind it
Kew accepts the native range of Spathiphyllum wallisii as a binational strip in the northern Neotropics, and one documented occurrence sits at about 4,806 feet above sea level. That is premontane forest. It is not baking lowland heat, which is why the plant reads a warm room as normal and a hot windowsill as an assault.
The genus is wider than the houseplant. Kew lists 31 native regions for Spathiphyllum, spread across two tropical zones rather than one, so genus-level advice written for the entire group routinely misses the species actually sitting on your shelf.
Elevation and canopy together set the temperature the plant reads as ordinary. Missouri Botanical Garden puts the comfortable band at 68-85F, calls 40-55F a growth-slowing zone, and marks sustained cold below 40F as tissue damage. A Spathiphyllum chilling trial found no visible injury at 52F, worsening injury at 45F and 38F, and first symptoms inside 24 hours.
What understory shade sets for a room
Understory shade is why a peace lily flowers in a room that would starve most flowering plants. Three independent sources converge on the same habitat — wet tropical biome, forest and woodland, forest floors — and a closed canopy is a low-light, high-humidity, still-air place that no window quite reproduces.
But shade tolerance is not a shade preference. Light is the bloom switch. The plant survives at its floor and performs one step above it, so a dim corner keeps green leaves and quietly cancels bloom.
Direct sun is the one exposure this plant never evolved for. Canopy-filtered light is the whole of its experience, so an unshaded pane is not a stronger version of what it knows — it is a different environment altogether.
You can feel the texture. A blade grown in true understory light is thin and cool and slightly waxy under a thumb, nothing like the stiff, dry-papery feel of one that has sat in an afternoon sunbeam for a week. That is the canopy, written into a leaf.
The soggy root zone that kills more peace lilies than anything
A waterlogged root zone is the single most common way an indoor peace lily is lost. It explained 7 of 16 indoor losses in owner reports, ahead of dry-out at 5.
The mechanism is oxygen, not water. According to University of Maryland Extension, how excess water drives soil oxygen down in indoor plants explains the rest: fine roots suffocate first, and a plant with dead fine roots cannot drink even while it stands in water.
That is why the same droop means two opposite things. This is anecdotal, so weigh it against your own pot, but the plants I lost were almost all watered again at the moment they needed air. Eight of my eleven losses ran that way.
The following sections give you the separator, the normal-loss baseline, and the two doors into a wet root zone.
Thirsty or drowning – the test that separates them
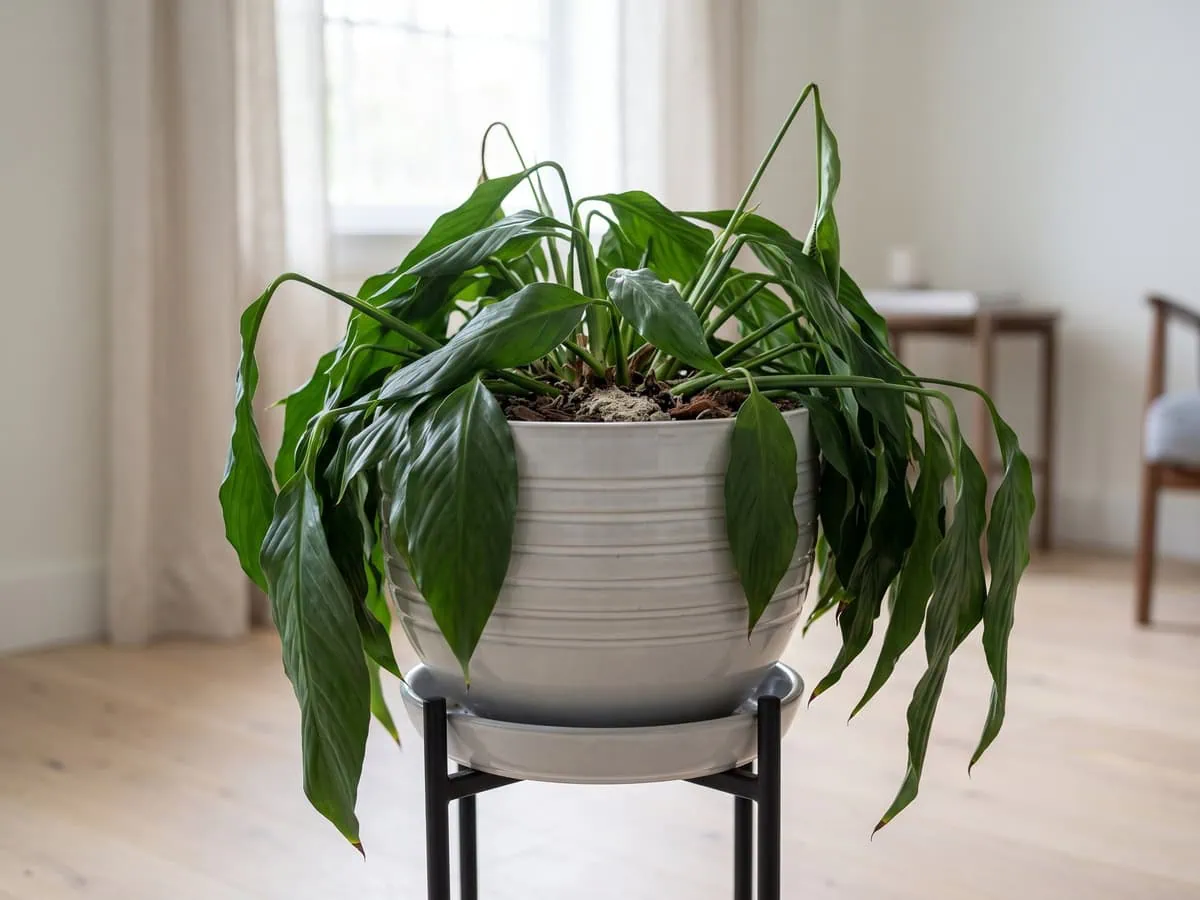
Water thoroughly, then watch the clock. A dry plant stands back up within a few hours. Still down after a soak means the roots have failed — that is a plant that droops and will not lift again, and more water compounds it.
| What you check | What it tells you |
|---|---|
| Recovery after a soak | Up within hours means it was dry; still down means the roots failed |
| Pot weight before watering | Light means thirsty; heavy under a drooping plant means drowning |
| Leaf feel | Limp and soft points at root suffocation, not ordinary thirst |
Verdict: Choose the soak-and-watch test first, because it asks nothing of you and it is the only reading that separates the two before you act.
If the plant did not lift after the last thorough soak, do not water it again. Lift the pot, feel its weight, and look at the roots instead. Adding water to a root zone that has already failed is the one move you cannot undo.
What normal leaf turnover looks like
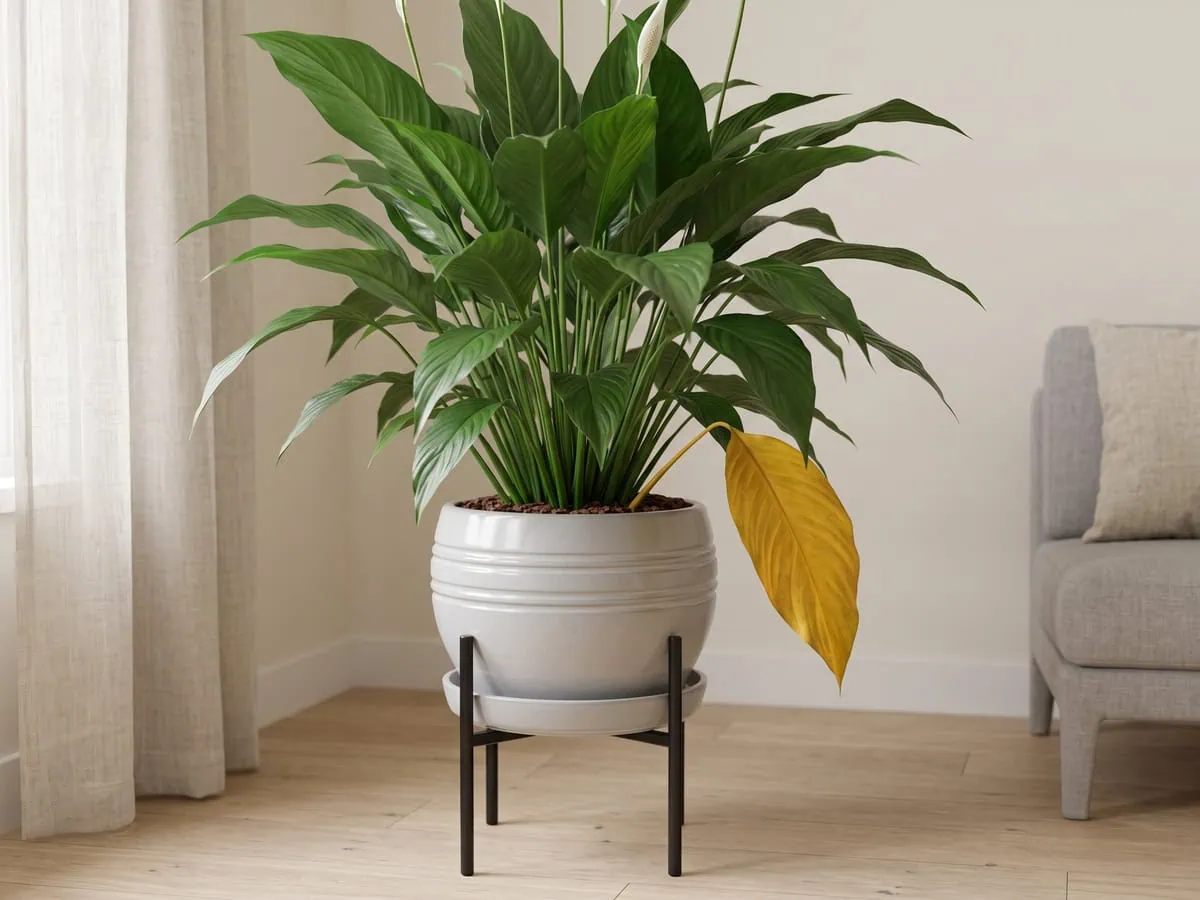
Not every yellow leaf is a symptom. One old lower leaf going at a time is ordinary aging, and yellowing never reverses, so the leaf is spent either way. Several going together, days after a wilt, is the signature of a dry-out that already happened — the pattern behind leaves yellowing one at a time from the bottom.
Scale matters too. A mature clump of the mainstream large-leaved cultivar stands about 2 feet tall on 10-12 inch stalks, so losing one blade off a full fan is a rounding error, not a decline. Owners typing “how do you keep a peace lily healthy indoors” are really asking what normal looks like, and this is it.
The two doors into a waterlogged root zone
The published sources keep two doors separate. Five of the seven root-zone failures came from watering too often or into a container that could not drain. Two came from moving the plant into more pot and more soil than its roots could drink, which is where rescuing a root system that has already gone soft begins.
Both doors are container decisions as much as watering decisions. Step a pot up by about two inches of diameter and no more, keep a drainage hole under the mix, and empty the saucer every time. Unused wet soil is the part the roots never reach.
Where to stand it, and how far from the window
A peace lily holds its color and its flower load at 150-500 foot-candles of indirect light, and merely persists at a survival floor of 50-100 foot-candles. The sections below turn that band into a distance you can pace out.
Type “where is the best place to put a peace lily in your home” into a search bar and nearly every answer comes back as an adjective: bright, indirect, filtered (yes, this sounds fussy — bear with me).
An adjective is the one thing you cannot check while standing in the room. The usable rule is a distance plus a ceiling. Stand the plant within about three feet of a north, north-east or north-west window (Northern Hemisphere reference), where no direct sun reaches the blades.
Distance from a north, north-east or north-west window
North glass is the safe default because its light never arrives as a beam, so this forest-floor species can sit close to the pane. An east window works nearly as well once the pot goes a few feet back. Distance is the single variable.
West and south glass are usable, but only across the room: about 3-10 feet back from a west pane, and 15-20 feet back from an unshaded south one. A sheer curtain does the same work by turning the beam into a wash.
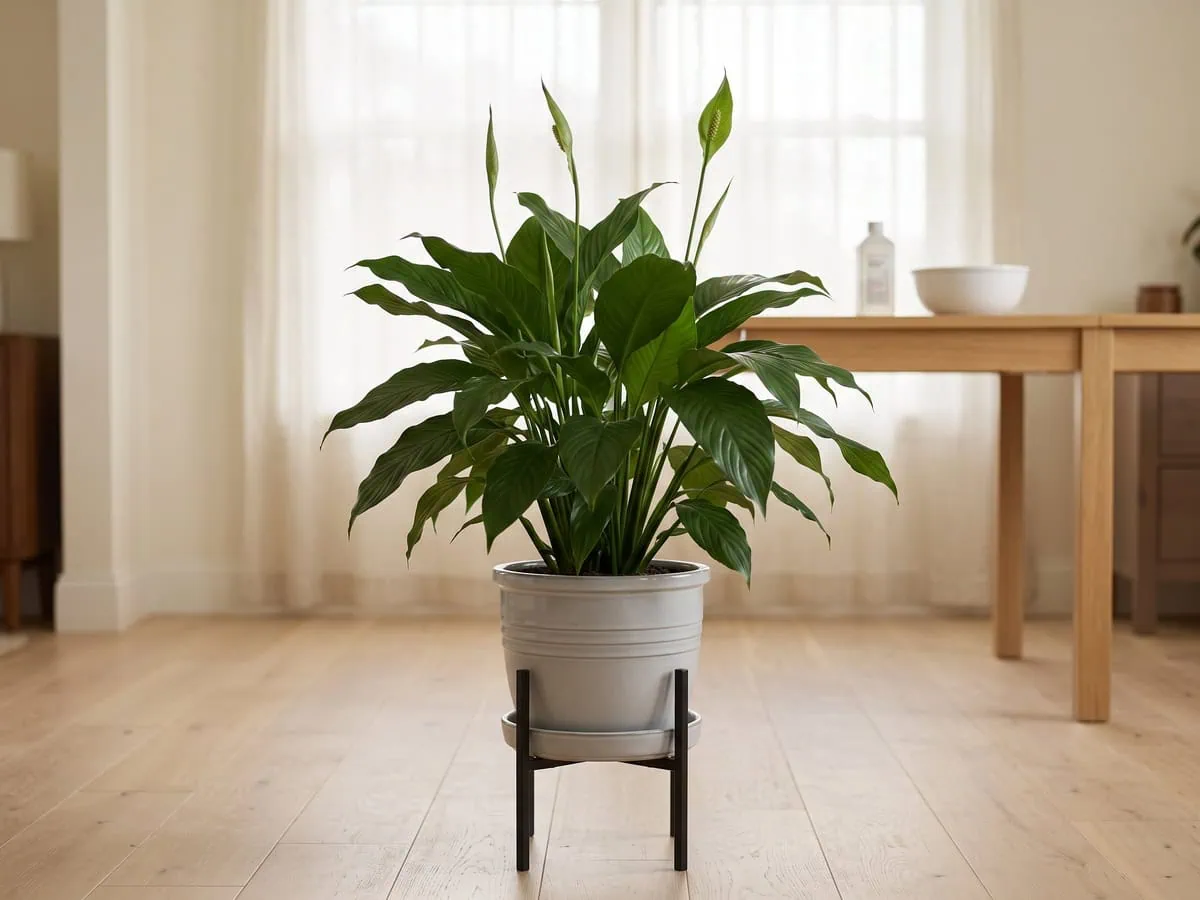
Move it in stages rather than all at once. Per University of Missouri Integrated Pest Management, how houseplants acclimatize to interior light intensity depends on the leaf rebuilding itself for the new level, and that rebuild takes weeks.
Reading indoor light without a meter
Use your own eyes at pot height instead of buying a meter. If you can read small print there at midday without a lamp, and no sunbeam crosses the blades, you are inside the band.
Hold a hand a foot above the leaves. Watch its shadow. A soft, blurred edge is the target, and a hard edge means the beam is landing on blades that never evolved to take it.
The plant reports the other direction just as plainly. An under-lit clump stretches, pushes out smaller and paler new leaves, and quietly stops flowering, which is why a healthy clump that will not produce a white spathe is usually a placement problem rather than a feeding one.
The drawback care guides will not print
The honest downside of an easy plant is that it does not fail dramatically. It fails slowly, at the root, because a dim corner dries the mix so slowly that the roots sit wet between waterings. The leaves say nothing for weeks.
I have lost more of these in a dim corner than to any insect. The tell was tactile rather than visual: two weeks after a thorough soak the surface still felt cool and tightly packed under my thumb.
If the fans lean and stretch toward the glass instead of filling out, read stems that stretch and flop toward the light as a placement fault first, not a fertilizer one.
Room climate through the heating and cooling year
Daytime warmth belongs between 65-80F, with the thermostat set around 68-70F and relative humidity at 40-50%. The sections below map where a real home breaks that band.
That band is ordinary human comfort, which is the good news. The bad news is that the room average is not what the plant experiences, because a vent, a pane of winter glass and a radiator each run their own microclimate, and the pot sits inside one of them.
The comfort band, and where a home breaks it
Cold injury starts well above freezing here. No visible damage appears at 52F, damage builds at 45F, and it is worse again at 38F, where the most sensitive selections show symptoms within 24 hours.
The mark is unmistakable. Browning starts at the tip and the edge, turns black, then dries out completely, which is what separates a cold injury from the tan crisping of dry air.
Speed matters as much as the number. A long-established specimen recorded by one university horticulture program wilted after its room fell about 30F in a single day, and the rate of that change, rather than the low reading itself, is what the account blames.
The repair is almost always to break the draft rather than to move the thermostat. A few inches back from cold glass is usually enough, and a very drafty window can be covered with plastic for the cold months while the plant keeps its light.
Humidity – the number first, the method second
Aim for 40-50% relative humidity, and judge every method by how far it closes the gap to that number. A heated winter room commonly sits at 10-20%, which is the deficit you are actually working against.
Two no-device methods move the needle: a tray of damp gravel with the pot standing above the water line, and a cluster of plants transpiring together in one low-draft corner.
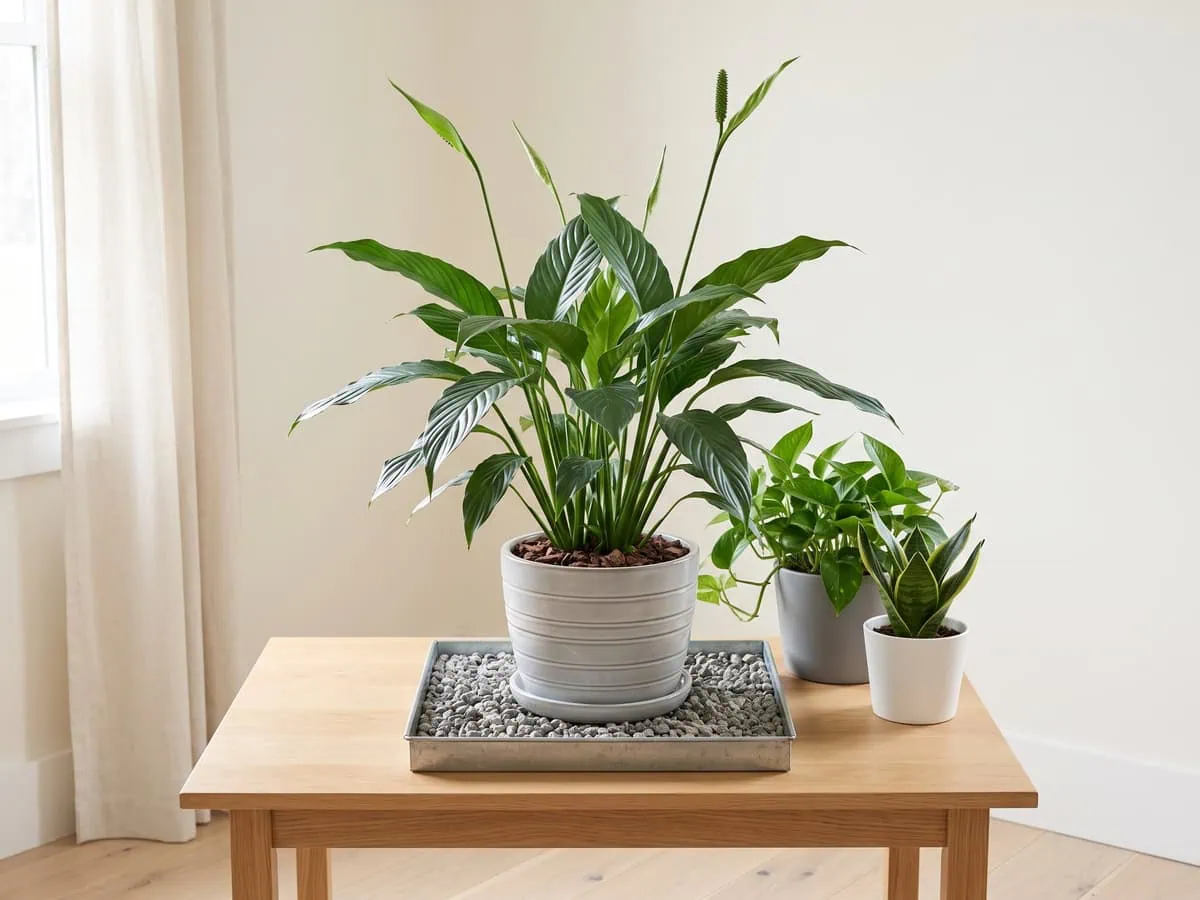
Misting is the one that does not. It wets a blade for a few minutes and leaves the air exactly where it was, which is why a misted plant in a dry room still browns along its edges.
Moving air is the real culprit near a vent, because it drives transpiration past what the roots can refill. That is why a plant parked in an air-conditioned downdraft shows brown crisp tips and the marks inside the blade that look like a watering fault and are really a placement fault.
Taking it outside for the warm months, and bringing it back
People ask “can you put a peace lily outside in summer” and the honest answer is yes, on two conditions: deep shade or dappled light under larger plants, and never a spot that catches midday sun.
Bring it back before nights reach the injury zone. Use 52F as the line rather than a date, because that is the temperature at which this species shows no damage at all, and every degree below it is borrowed time.
I stopped reading hardiness zones for this decision years ago. Published zone bands for the species disagree with one another, and not one of them describes the room the plant actually lives in, so the indoor figures above are the operative numbers.
Check the plant over before it rejoins the others. Run a thumb along the leaf backs and into the leaf axils: a fine grit that smears is pest debris, and a tacky film means something has been feeding out there.
Tap the button below to get more plant fixes in your Google Search results

Feeding without burning the roots
Feed a peace lily monthly at half the label strength while new leaves are pushing, and stop completely once growth stalls. The sections below give the dose, the salt line and the trace elements a bagged mix never carried.
Owners searching “how to fertilize a peace lily without burning the roots” are usually staring at a white crust already, so the honest answer starts one step earlier, at the dose rather than at the rescue.
Monthly at half strength, and when to stop
Monthly through the growing season is the published cadence for this plant, and care guides cannot agree on it: across twelve care pages the interval runs from monthly to six weeks to every third watering, and not one of them prints an actual dose.
Extension guidance does print one. One teaspoon per quart of water suits a monthly feed, half a teaspoon per quart suits a feed every two months, and a quarter teaspoon per quart suits a weekly one.
Pick the weakest of those three that fits your routine. A peace lily is a low-demand foliage plant, and foliage plants take a nitrogen-leaning ratio near 3-1-2, which any complete houseplant grade such as 8-7-6 or 20-20-20 satisfies once it is diluted that far.
Stop when the days shorten and no new leaf has unrolled for weeks. The trigger is daylength and visible growth rather than the thermostat, because a heated room in midwinter is warm and dark at the same time, and feeding a plant that is not growing only loads the pot with the salts that brown its edges.
Reading the salt line, and the flush that clears it
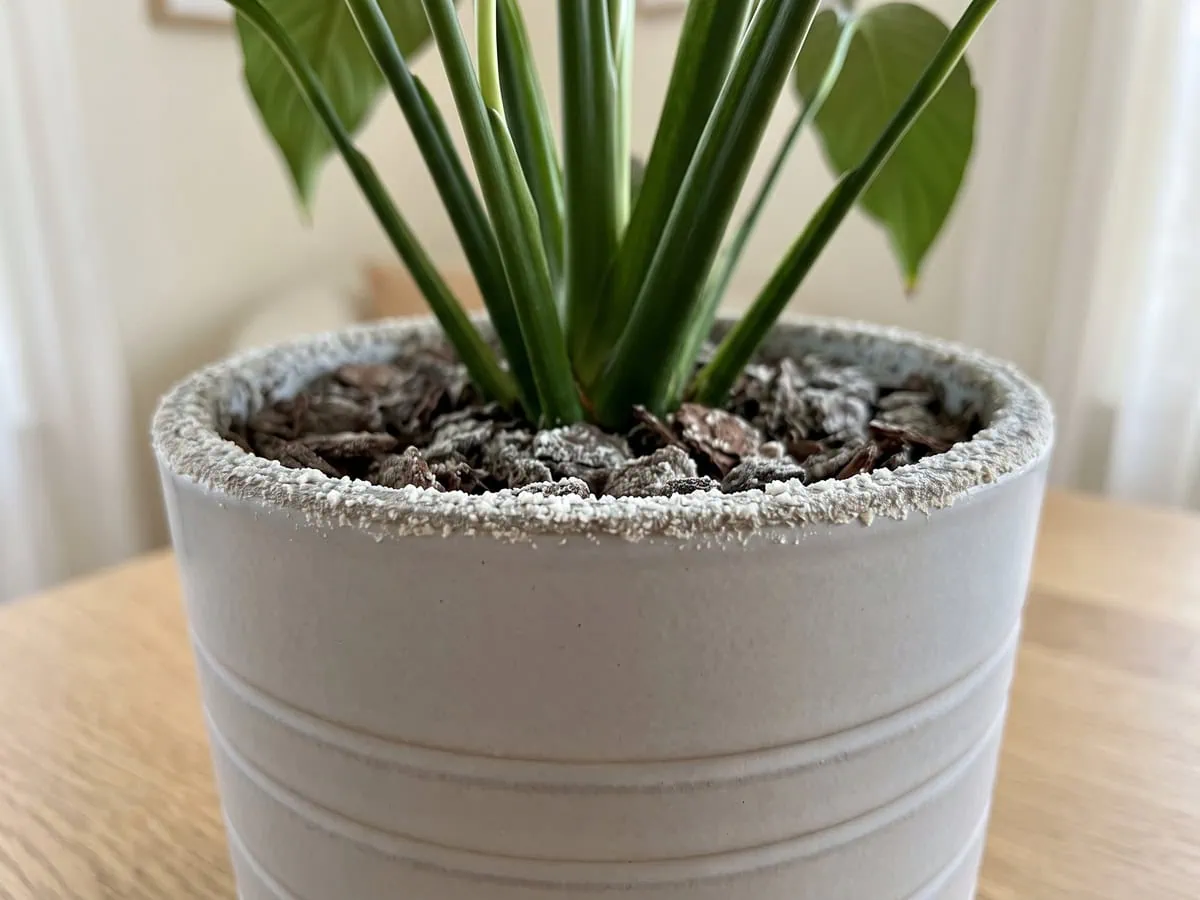
Salt announces itself before the leaves do. A whitish crystal build-up appears around the lip of the pot and across the surface of the mix, and it scrapes off like dried salt from a pan rim, gritty under a fingernail and faintly sharp.
On the plant the same problem reads as brown leaf tips, yellowing leaves and unaccountable wilting, with scorched root tips and leaf margins underneath. Per Texas A&M AgriLife Extension, managing soluble salts in a container is the whole of the repair.
- Scrape first: lift the white crust and the top layer of mix off before any water goes on
- Then flush: pour two to three pot volumes of plain water through, in stages
- Drain fully: let it stop dripping between passes, and empty the saucer afterwards
- Repeat every 4-6 months, or repot into fresh mix when the crust keeps coming back
Volume is easier to picture than to measure. A six-inch pot holds roughly five cups of mix, so two pot volumes is about ten cups of water poured through in passes, and three volumes is half as much again.
Micronutrients a soilless mix never had
A peat-and-bark mix starts out almost empty of trace elements, because the iron, boron, zinc, copper, manganese and molybdenum a plant needs in tiny amounts arrive with soil, and there is no soil in it.
Two moves cover the shortfall. Choose a complete fertilizer that lists micronutrients on its label, and top the trace elements up about once a year rather than at every feed.
Magnesium is worth handling separately, because it leaves with every watering. One teaspoon of Epsom salts per gallon of water, twice a year, replaces it.
And if you mix your own medium rather than buying it, building an airy mix that still holds moisture is where the calcium and magnesium question gets settled, with ground limestone doing that job inside the recipe itself.
Grooming, deadheading and keeping the leaves clean
Groom a peace lily by taking each spent flower stalk and each tired leaf off at its base with a sterilized blade, and clean the foliage with plain water and nothing else. The sections below cover the cut, the tip question and the dusting.
Truth is — there is no way to cut this plant smaller. The leaves rise straight off a creeping stem at soil level, so there is no aerial node to pinch above and no branch to shorten. That is why “how to prune and deadhead a peace lily” resolves to two removals rather than a shaping cut.
Where to cut a spent stalk or a spent leaf
Take the whole stalk at its base. A spent inflorescence, once the white spathe has greened and browned around its spadix, contributes nothing further, and a leaf that has yellowed through is spent whatever you do next, because chlorophyll withdrawal does not reverse.
Sterilize before you cut, in the order the extension guidance gives it. Wipe dirt and sap off the blade first, because debris shields whatever is underneath it, then wipe or dip the metal in isopropyl alcohol with no prolonged soak. Do it between plants at minimum, and between cuts if anything looks diseased.
Nothing in the published record sets a ceiling on how much foliage may come off at once. So use a visible rule instead: stop while the plant still carries more sound leaves than removed ones.
- Spathe: the white hood people call the flower.
- Spadix: the pale column inside it, carrying the true florets and the pollen.
- Petiole: the long stalk that holds one blade up.
- Blade: the flat green leaf itself.
That distinction decides where the blade goes: a spent flower is cut where its own stalk leaves the crown, a finished leaf where its petiole does, and neither leaves a stub to rot back into the clump.
Wear nitrile or thick gardening gloves for any cut. The sap carries calcium oxalate raphides and is a documented skin irritant, causing burning, pain and swelling on contact. If sap reaches bare skin, rinse at once, then lather the area repeatedly with soap and rinse again under warm running water. No sun-avoidance step applies: phytophotodermatitis is an explicit negative finding for this species. If a severe skin reaction develops (blistering or intense burning), seek medical attention immediately. For chemical exposure, you can also contact Poison Control (1-800-222-1222 in the US).
Size is handled somewhere else entirely, by splitting a crowded clump into separate plants or by root-pruning it back into the same container. Neither is a scissors job on the foliage.
Trim the tip or take the whole leaf
Care guides split down the middle here and gives no reason either way. One care page tells you to trim the browned tip off because the plant looks better for it; another tells you never to cut a tip and to take the whole leaf at its base. Two answers, both printed.
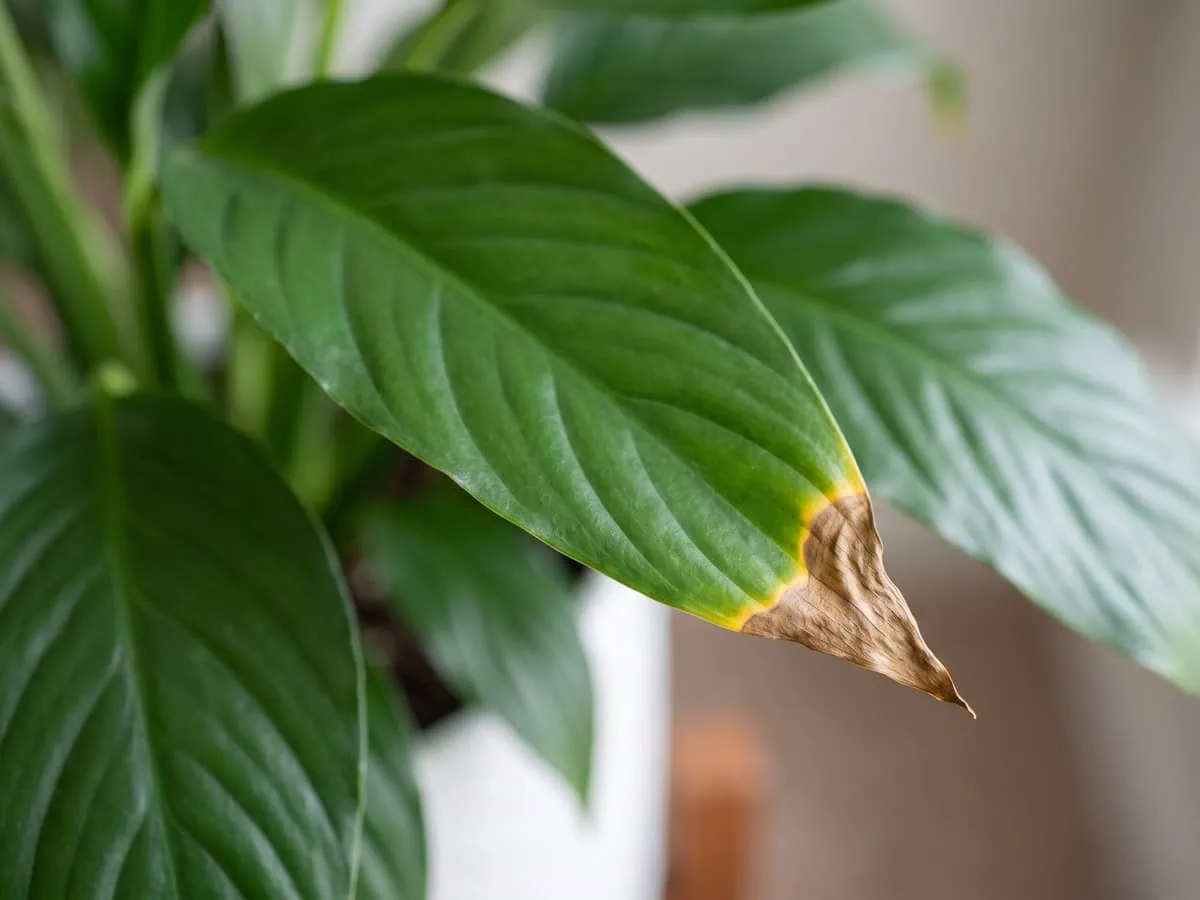
But neither explains what happens next, which is the part that decides it. A cut across living tissue leaves a fresh edge that browns in its turn, while removing the whole leaf takes the mark away permanently and takes a working blade with it.
| What you do | The result |
|---|---|
| Trim the brown tip only | The mark goes; the fresh cut edge browns in turn, and the leaf keeps working |
| Take the whole leaf at its base | The mark goes for good, but the plant loses a whole working blade |
| Leave the tip alone | Dead tissue stays put and spreads nothing, because it is already dead |
Verdict: Trim the tip on a plant that is short of light and cannot spare leaf area, and take the whole leaf on a full clump where one blade will not be missed.
Dusting, and the one product to leave alone
Dust on these broad blades blocks the light the plant is already short of, so cleaning is a care task here rather than a cosmetic one. Only one care page in twelve puts an interval on it, and that interval is monthly.
Use the plant instead of a calendar. Draw a dry cloth across one blade: a clean leaf drags and squeaks faintly, while a dusted one slides and leaves a gray smear on the cloth.
Wipe both surfaces with a soft cloth wrung out in plain lukewarm water, supporting each blade from underneath. Temperature is not a detail, because both hot and cold water injure the tissue. A rinse at the sink does the same job faster on a big clump.
Soap is a last resort and never a routine. A few drops of mild dish soap in lukewarm water will shift a greasy film, but detergents cut through the waxy cuticle that holds water in the leaf, and the result is discolored, crisp tissue. Always test on a small area first. Results may vary depending on your specific conditions.
Leave leaf shine alone. Its residue sits on the surface and interferes with air exchange, so a coating meant to brighten the leaves works against the reason they were cleaned.
Common mistakes that set peace lilies back
The mistakes that hold this plant back are nearly all substitutions: a kitchen amendment standing in for light, a reference table standing in for a look at the plant. The sections below take the four that recur.
Start with the shape of the routine, because it decides the rest. Care advice for this species is published as a set of input headings, light and water and food and humidity, and not one of the twelve care guides I compared organizes it around a recurring moment when you look at the plant.
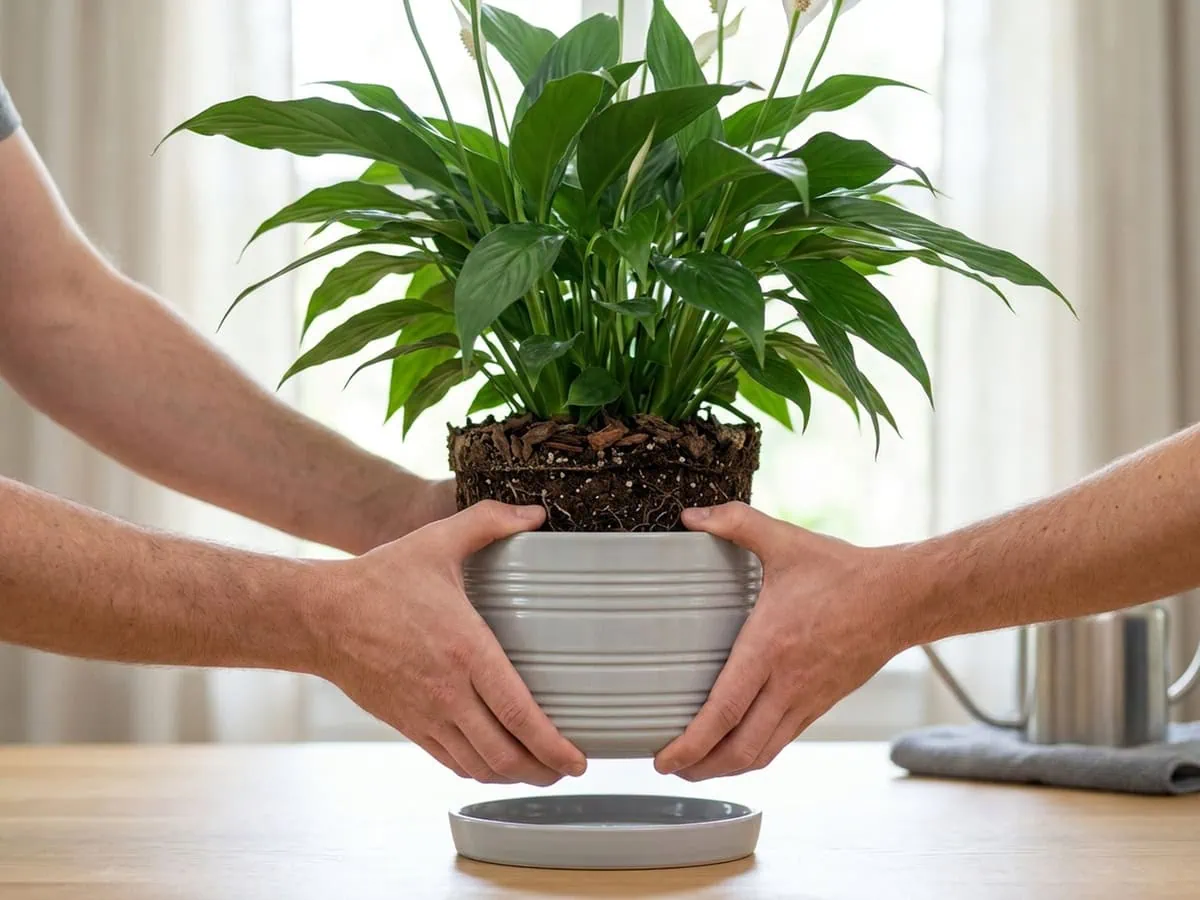
Pick the container up instead. A clump that has filled it lifts as one solid block, the mix moving with the roots instead of crumbling off them, and that is something only your hands can tell you.
Sugar and coffee grounds
Neither question has an answer in any of the care guides I compared. A search of twelve top care guides for sugar, syrup or sweetener returns nothing at all, and the same search for coffee, caffeine or used grounds returns nothing either, so both are answered here from what is documented about this plant rather than from what other pages say.
What is documented is the damage side. Dissolved solids accumulating in a closed container brown this plant’s leaf edges and burn its root tips, so a sugar solution only adds to a salt load this species already carries. Skip it: a plant that is not growing is short of light, not of sugar.
Coffee grounds fail for a structural reason instead. A layer of grounds on the surface holds water where the mix most needs to dry between waterings, while what this plant’s substrate actually needs is coarse pine bark worked through it for air. Put the bark in the mix rather than the grounds on top, and skip the amendment entirely.
Easy is a conditional claim
Eleven of the twelve care guides I compared call this plant easy, forgiving or trouble-free, and not one of them attaches a condition to the claim. The same page that calls it relatively trouble-free also records, four pages later, a root failure that develops readily in an ordinary indoor position.
However, both halves are true at once. Extension services rate it low-maintenance against five stated criteria, wide light tolerance, tolerance of inconsistent watering, tolerance of low humidity and reliable flowering among them, with one honest caveat: it needs more water than most houseplants and wilts quickly when it runs out.
So the claim holds on placement and watering, and nowhere else. Easy means forgiving of neglect in the light and humidity it gets, not forgiving of a pot that never dries, which is why how often the mix should actually be re-wetted is the one routine worth getting right.
How long one of these actually lasts
Care guides disagree with each other by a factor of two or more. One page gives three to five years with proper care, another gives well over ten, and the one page that prints the question as a heading answers underneath it with how long a flush of blooms lasts instead.
Two different things are being counted. A single crown ages out on its own timetable, while a clump renewed by division carries on indefinitely, because each division is a new plant with its own roots. I could be wrong here, but the split reads as one side counting the crown and the other the clump.
Home growth rate tracks light, warmth and feeding rather than a fixed rate. The nearest published figures are commercial production benchmarks, about twenty weeks to finish a compact selection and six and a half to nine months for a standard one, both grown at roughly 1,500 foot-candles, which is brighter than most rooms.
The bedroom question, answered horticulturally
Answer it the way you would answer it for any other room. The bedside has to sit inside the same window distance the light section gives, the room has to hold its humidity overnight, and the spot has to be clear of a vent that runs while you sleep.
The one genuinely bedroom-specific variable is access. A room where a cat sleeps puts the foliage inside reach for eight hours a night, which is a question of what the calcium oxalate crystals do to a pet rather than a question about the plant. This information is for educational purposes only and is not a substitute for professional veterinary advice. If your pet ingests any part of this plant, seek immediate veterinary intervention or contact the ASPCA Animal Poison Control Center (888-426-4435) or the Pet Poison Helpline (855-764-7661) immediately.
Frequently asked questions about growing a peace lily indoors
How do you care for an indoor peace lily?
Let the top two inches dry before watering, keep the plant in indirect light, and hold the room between 65-80F. Those three settings carry most of the outcome.
Half label strength once a month suits it while new leaves are pushing, and the pot never stands in its saucer. The large selections and the compact ones want identical conditions at different scale, which is worth knowing before you buy, because telling the large selections from the compact ones changes how much room it will eventually need.
What are common peace lily problems?
The recurring problems are a droop that will not lift after watering, lower leaves yellowing, brown leaf tips and a plant that will not bloom.
Each has its own separator. A droop that recovers within hours was thirst; one that does not points at the root zone. Tip and margin browning tracks water quality and accumulated salts, while a green plant that never flowers is almost always under-lit rather than unwell, and sticky film or hard bumps on the foliage mean sap-feeding insects and the flies over the soil instead.
Why would you add sugar to a peace lily?
There is no reason to add it. Not one of twelve top care guides mentions sugar, syrup or any sweetener at all.
Documented evidence runs the other way. Dissolved solids building up in a closed container brown this plant’s leaf edges and burn its root tips, so a sugar solution adds to a load the pot is already accumulating. A plant that has stopped growing is short of light, and the useful response is to move it closer to a window.
Can I sleep with a peace lily in my room?
Yes, provided the bedroom meets the same conditions any other room has to meet for this plant. Nothing about night-time changes its requirements.
Judge the spot on four things: distance from the window, whether the room holds humidity near 40-50 percent, whether a vent blows across the plant overnight, and whether a pet sleeps in the room. The last one matters most, because this species is toxic to cats and dogs and the foliage sits within reach for hours.
How long does a potted peace lily last?
Published answers disagree by a factor of two or more, running from three to five years at one end to well over ten at the other.
The disagreement is really about what is being counted. One crown ages out on its own schedule, while a clump renewed by division continues indefinitely, because every division is a new plant carrying its own roots. Read the lower figure as one crown’s life and the higher as a clump split at least once.
What makes a peace lily happy?
Indirect light at 150-500 FC, a mix that drains freely, and water that arrives before the leaves wilt.
Those three cover the survival axes that matter most. Warmth in the 65-80F band and humidity near 40-50 percent handle the rest, and a container only two inches wider than the last one keeps the roots from sitting in soil they cannot reach. Flowering, as opposed to survival, is a light question rather than a feeding question.
Will coffee grounds help my peace lily?
It does not work. Searching twelve top care guides for coffee, caffeine or used grounds returns nothing whatever.
The structural problem is easier to see than the chemical one. Grounds spread over the surface hold moisture exactly where this mix most needs to dry between waterings, while the amendment this substrate genuinely needs is coarse pine bark worked through it for air. Keep the bark in the mix and the grounds out of the pot.
Where is the best place to put a peace lily in a house?
Within about three feet of a north, north-east or north-west window, in a spot that never catches direct sun.
A north pane is the safe default, because its light never arrives as a beam. Set an east window a few feet back, allow 3-10 feet at a west pane, and keep 15-20 feet from an unshaded south one unless a sheer curtain sits between the glass and the leaves. Distance does the work.
Skip the myth, use the science: air at the roots beats every kitchen remedy
Everything above reduces to one question: whether the root zone can still breathe between drinks. Light sets the bloom, warmth sets the pace and feeding sets the salt load, but air at the roots decides whether the plant is alive to use any of it (stay with me here). Air first.
Get that one right and the next leaf arrives firm and stiff under your fingertips instead of soft, which is the plant confirming the fix. That is the whole test.
Now that you can read the pot, the next thing worth learning is the move into a new one, because recovery after a move into a new container is where most of the remaining losses begin.
Peace lily care is a weight in your hand and a look at the roots, never a day on the calendar. May the pot feel light in your hand before you ever pour, and may every root you lift come up firm and white.
Tap the button below to get more plant fixes in your Google Search results