
Quick Answer: Correct peace lily watering relies on checking soil moisture, not a calendar. Water thoroughly only when the top inch of soil feels dry or the leaves slightly droop. Use filtered water to prevent brown tips. To fix it fast, you should use the “soak and drain” method and ensure the pot has drainage holes to avoid root rot.
If there is one plant in the horticultural world that deserves an Academy Award for best dramatic performance, it is undoubtedly the Spathiphyllum. I still remember the first time I witnessed the “fainting” phenomenon. I was a novice plant parent, overly anxious and trying too hard. I had left for a weekend trip, leaving my lush, upright plant looking perfectly happy on the living room table. I thought I had watered it enough before I left, but clearly, I had misjudged the intense heat.
When I returned on Sunday evening, I walked in to find what looked like a tragedy. The entire plant had collapsed. It wasn’t just drooping a little; it was plastered against the pot rim. My stomach dropped. I assumed I had killed it. But as I rushed it to the sink, frantically grabbing the watering can, I realized this was my first real lesson in the nuances of peace lily watering. I saturated the soil, let it drain, and went to bed feeling guilty.
When I woke up the next morning, I was greeted by a transformation. The plant was standing tall again, leaves reaching upward, looking glossy and vibrant as if the collapse had never happened. It hadn’t been dying; it had just been thirsty.
This behavior is what earns it the affectionate nickname “Drama Queen” among growers, but I prefer to think of it as a highly effective communication strategy. Unlike many other houseplants that suffer in silence until their leaves turn brown and drop off, this species screams at you when it needs a drink. As I emphasize in my comprehensive peace lily care guide, mastering this routine is simply about learning to interpret these dramatic signals without panicking.
Table of Contents
Understanding the Biology of Peace Lily Watering
Secret 1: The “Water Balloon” Reality
I want you to forget the textbook definitions for a second. To master peace lily watering and keep my Spathiphyllum alive, I had to stop thinking of it as a decorative object and start seeing it as a collection of pressurized water balloons.
This isn’t just a metaphor I use lightly; it is the only way to explain the sudden, heart-stopping collapse that happens when you miss a watering. Unlike my Snake Plants, which are built like tanks with thick skins to hoard moisture, the peace lily is a “spender.” It has broad, thin leaves that transpire (sweat) moisture rapidly, which is why choosing a moisture-retentive soil for peace lily is just as crucial as the watering schedule itself.
When I first started, I didn’t realize that the plant relies entirely on turgor pressure—internal water pressure—to hold itself up. The moment the roots run dry, that pressure drops to zero. It’s a hydraulic failure. The plant isn’t just being dramatic; it is physically unable to fight gravity.
Secret 2: Interpreting the “Faint”
We joke about them being “drama queens,” but that fainting spell is actually a desperate survival mechanism that saved my plant more than once. By collapsing, the plant curls in on itself to reduce surface area and stop losing water. It is effectively holding its breath. But here is the hard lesson I learned: just because it can bounce back from a faint doesn’t mean it should.
I used to wait for the droop as my signal to water. It seemed easy. But after six months, I noticed the lower leaves turning yellow and crispy. I was stressing the plant out. The constant cycle of “starve and binge” was weakening its immune system. Now, I aim to do my peace lily watering exactly 24 hours before the drama starts. It’s a game of timing, and winning means never seeing that sad, flat plant again.
Secret 3: The Leaf Feel Test
So, how do you know it’s thirsty without the visual drama? I stopped looking and started touching. This is the biggest “Anti-AI” advice I can give you: touch your plants. A fully hydrated peace lily leaf feels cool, firm, and has a slight rigidity, almost like fresh cardstock. It pushes back against your finger.
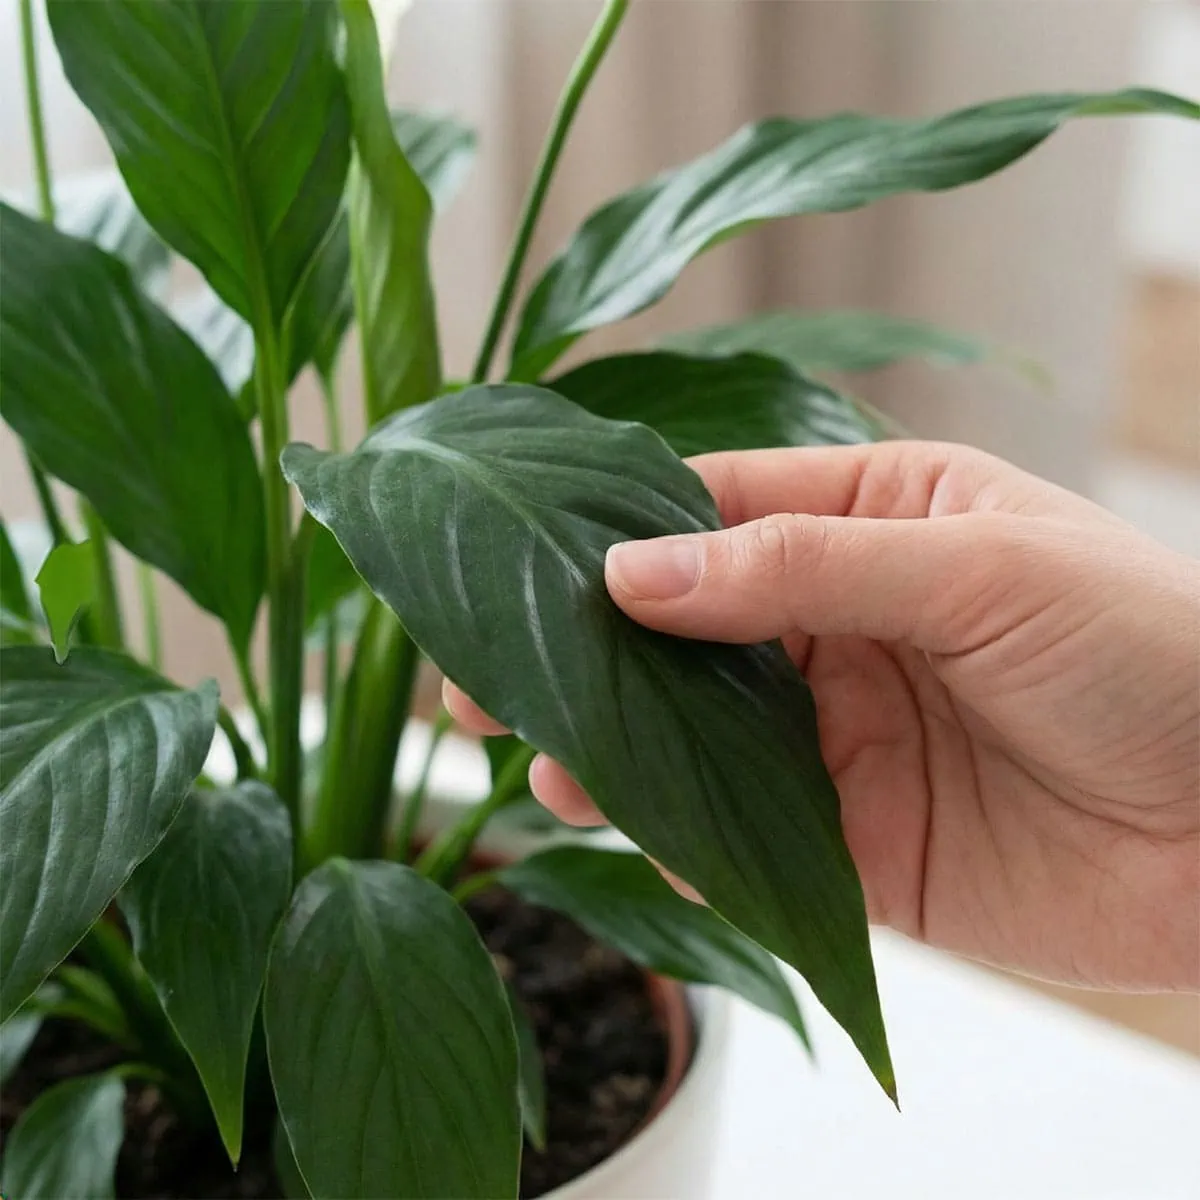
When the plant is getting thirsty—long before it droops—that texture changes. It feels soft, pliable, and slightly warmer, more like an old piece of fabric. I make it a habit to brush my fingers against the leaves when I walk by. If I feel that “softness” or lack of resistance, I know I need to water immediately. Catching this tactile shift is the secret to successful peace lily watering that keeps those tips green.
How Often to Water Peace Lily Correctly
Secret 4: Why Calendars Kill Plants
I cannot tell you how many Peace Lilies I nearly killed by following a “water every Monday” rule. It is the worst advice on the internet. In my home, the humidity fluctuates wildly depending on the airflow and temperature. One week, the soil stays wet for ten days; the next, it’s bone dry in three. A calendar cannot see these changes.
My “schedule” is now entirely dictated by the how often to water peace lily rule of thumb: The Finger Test. I stick my index finger deep into the soil—down to the second knuckle. If I feel dampness, cold dirt, or if soil sticks to my skin, I walk away.
I don’t care if it has been two weeks. If it’s wet, it’s wet. But if it feels dry, dusty, and hard, I water deeply. This manual check is the only way to avoid the root rot that plagued my early gardening days.
Secret 5: Adapting to the “Rhythms”
Another thing I realized is that the plant has two distinct personalities depending on the growth cycle. During the active growth phase, usually when the light is stronger, my plant drinks like a marathon runner. I find myself filling the watering can twice a week. It’s pushing out new leaves and flowers, and it is thirsty.
But when the light levels drop and the plant enters a dormant resting phase, its metabolism crashes. It stops drinking. If I kept up that “active” peace lily watering pace during the dormant phase, I would drown it.
I learned this the hard way when I kept watering heavily during a low-light period and ended up with a pot full of sludge. You have to watch the plant’s consumption. If the soil is still wet after a week, respect that signal and back off.
Secret 6: The “Soak and Drain” Ritual
I used to be a “sipper”—giving the plant a little cup of water every time I did my peace lily watering rounds. I thought I was being attentive. I was actually destroying the root system. Shallow watering only wets the top inch of soil, encouraging roots to stay near the surface where they dry out fast. The bottom roots? They starve.
- The Fix: Now, I take the plant to the kitchen sink.
- The Action: I flood it. I pour tepid water until it rushes out of the drainage holes.
- The flush: I let it run for a good 30 seconds to wash out salt buildup.
This peace lily watering method ensures the entire root ball is saturated. It mimics the heavy downpours of the rainforest floor. The difference in plant health was visible within weeks—the leaves got bigger and glossier because the deep roots were finally getting a drink.
The Best Water for Peace Lily Health
Secret 7: The “Brown Tip” Frustration
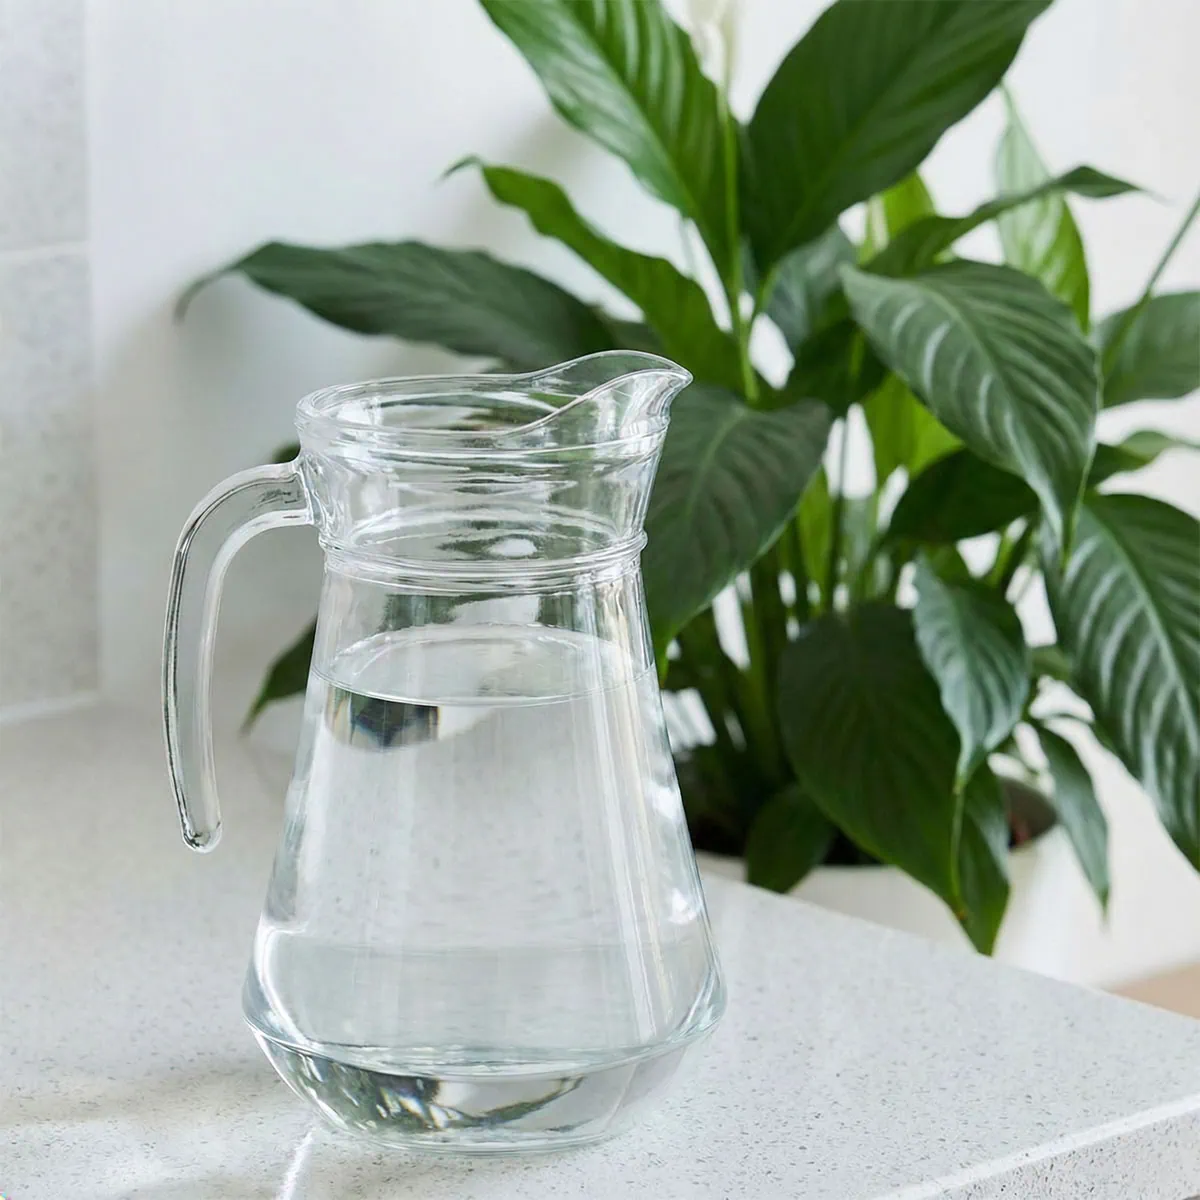
Let’s talk about a frustrating side effect of improper peace lily watering: the crispy brown tips. I spent months thinking I was underwatering, or overwatering, or that the air was too dry. I bought humidifiers. Nothing worked. The tips kept turning black. It wasn’t my technique; it was my tap water.
These plants are incredibly sensitive to chemicals. My city water is loaded with chlorine and fluoride. While chlorine evaporates if you let the water sit out (which I tried), fluoride does not. It builds up in the plant’s tissue until it burns the leaf tips.
It is a slow poisoning. The moment I switched to using filtered water (the same stuff I drink), the new leaves started growing out perfect and green. Finding the best water for peace lily care is often just about purity.
Secret 8: Temperature Shock
Another mistake I made was being lazy and using cold water straight from the tap. I poured icy water onto a tropical plant that prefers 70°F weather. The plant reacted as if I had thrown it in a freezer. It drooped instantly, even though I had just watered it. I had shocked the roots.
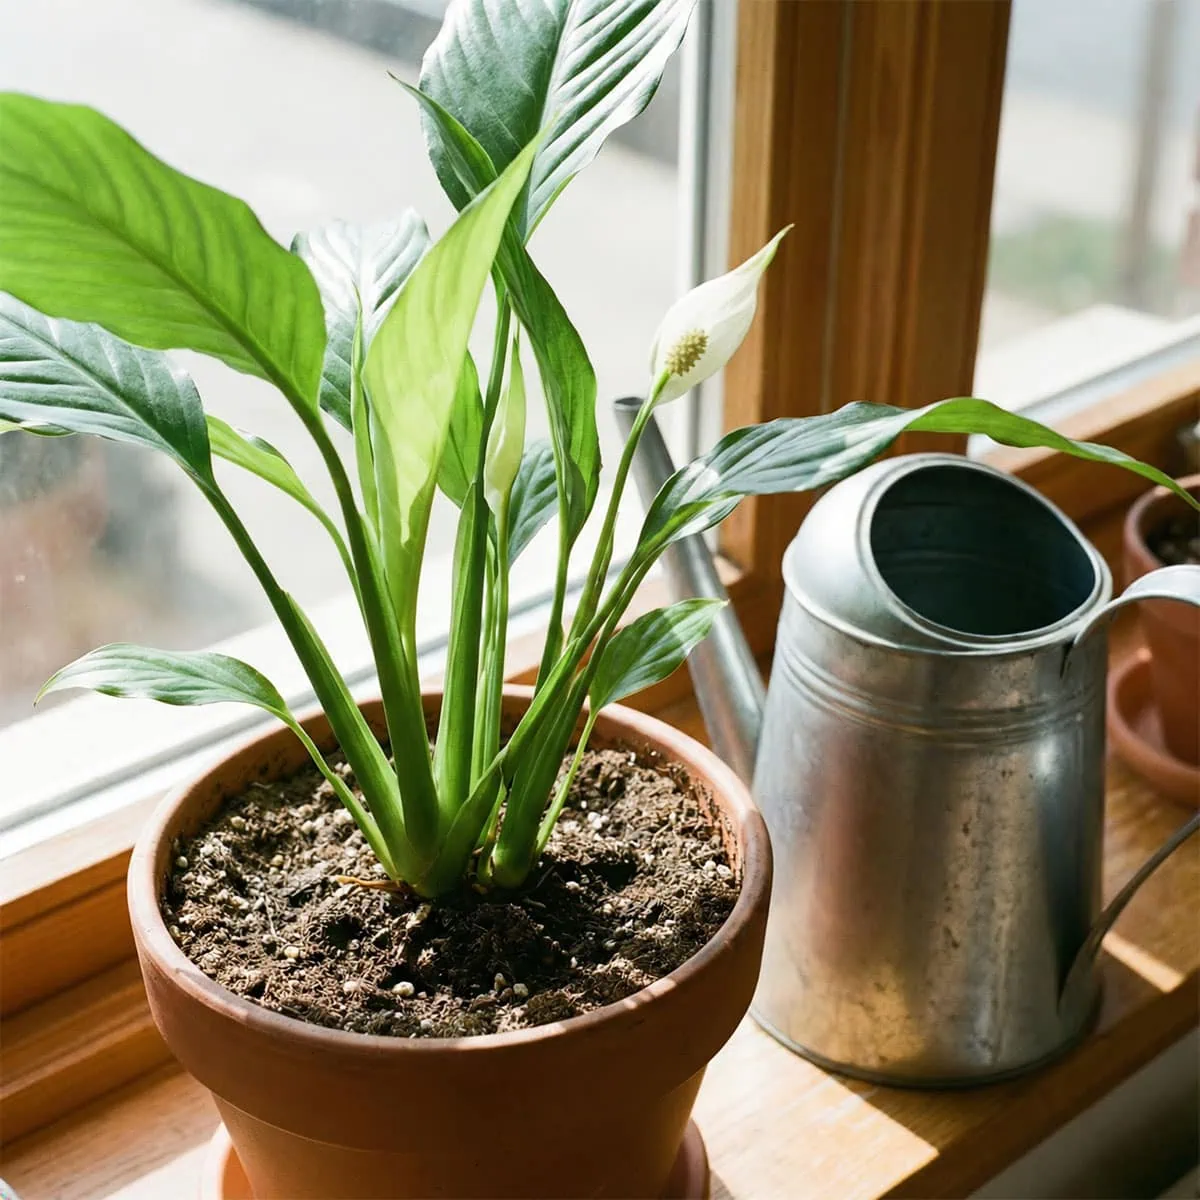
Now, I keep a jug of water sitting on the counter specifically for my plants. It ensures the water is at room temperature. It seems like a small detail, but these plants hate thermal shock. Treating them to tepid water is a crucial detail in peace lily watering that keeps the root system relaxed and efficient at absorbing moisture.
Pro Tip: The Muscle Memory Check
After years of lifting pots, I developed a “sixth sense” for water weight. I don’t even poke the soil anymore. I just lift the pot a few inches. A dry pot feels dangerously light, almost top-heavy, like it might tip over. A wet pot has a satisfying, anchor-like heaviness.
I suggest you try this. Pick up your pot right after you water it. Feel that heft. That is “100%.” Then wait until it droops slightly. Pick it up. That is “0%.” Memorize those two weights. It’s the fastest, cleanest way to diagnose thirst without getting dirt under your fingernails.
Diagnosing an Overwatered Peace Lily
Secret 9: The Smell of Failure
I want to be very real about what root rot is. It isn’t just “too much water.” It is a fungal infection that thrives in lack of oxygen. The first time I dealt with an overwatered peace lily, I didn’t see it; I smelled it. It was a faint, swampy, rotten-egg odor coming from the soil. It smelled like decay.
If you catch a whiff of that swampy smell, or if you see fungus gnats hovering around the soil surface, you are in trouble. I made the mistake of thinking “maybe it will dry out.” It didn’t. The roots were already turning into mush. If you ignore the “No Wet Feet” rule and let the pot sit in standing water, you are basically suffocating the plant.
The “Mushy Root” Surgery
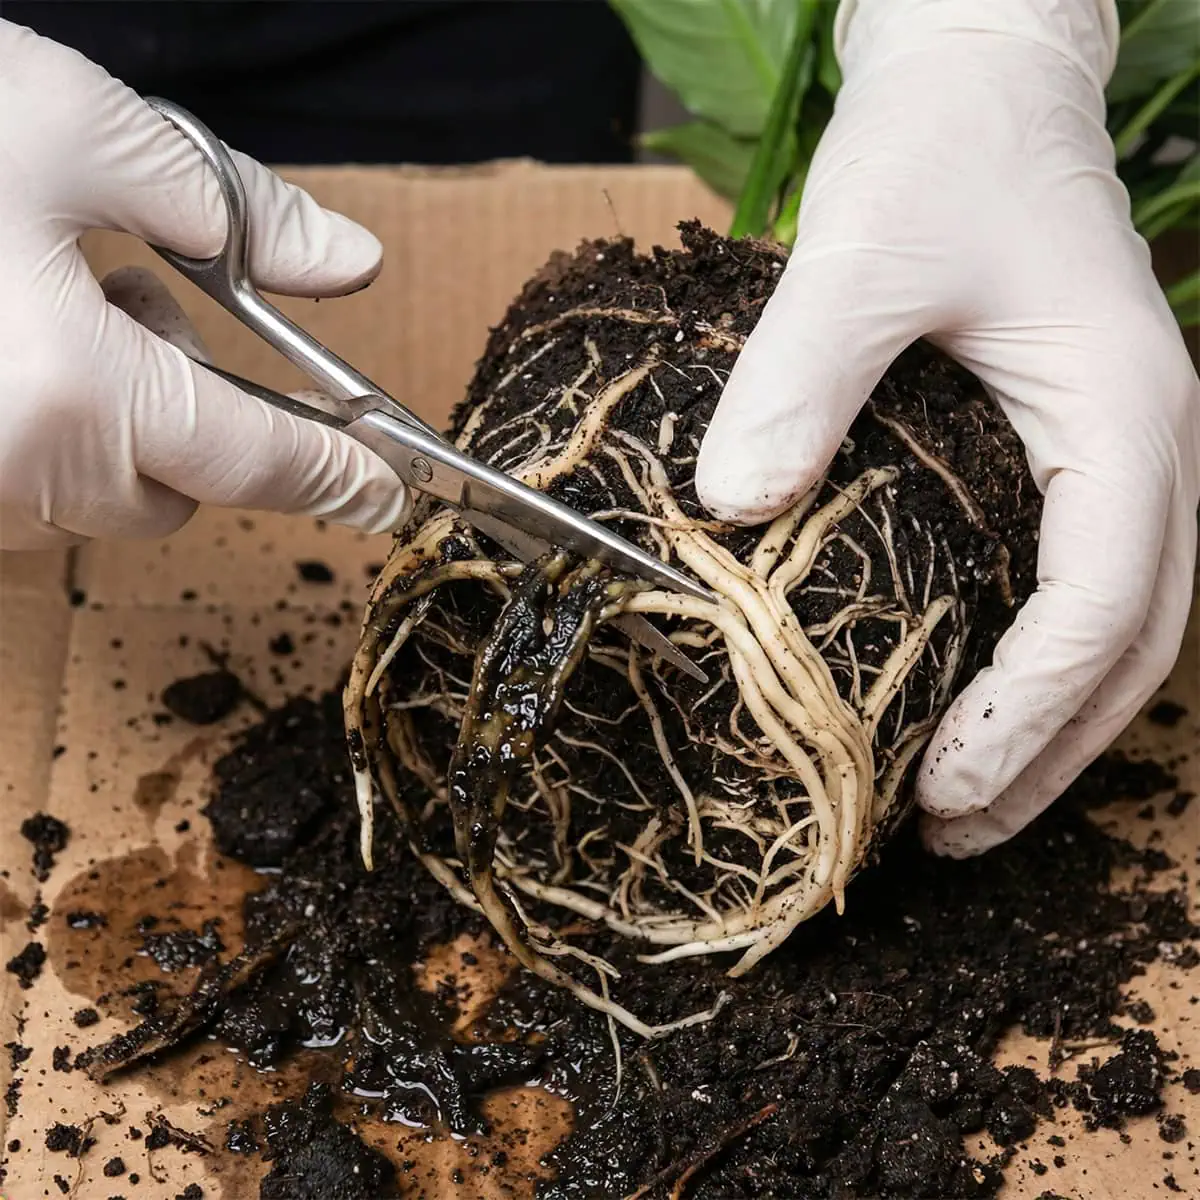
Saving a plant from this stage is messy work. I had to pull the plant out of the pot, and the sight was heartbreaking. Instead of firm, white roots, I held a handful of black, slimy slime that pulled away effortlessly. The outer sheath of the roots slid off, leaving thin, hair-like strands behind.
I had to perform surgery. I washed off all the old, contaminated soil. I sterilized my scissors with alcohol and cut away every single black, mushy bit until only firm, creamy roots remained. It felt aggressive, but it was necessary.
I repotted it in fresh, dry soil with extra perlite for drainage. It took two months to recover, but it survived. This is why I stress drainage holes so much—without them, you are trapping your plant in a coffin.
The Double Pot Strategy
To avoid ever doing that surgery again, I strictly use the “Double Pot” method. My plant lives in a functional, ugly plastic nursery pot with huge drainage holes. That plastic pot sits inside a decorative ceramic planter. This setup gives me the best of both worlds.
When I water, I take the plastic pot out, soak it in the sink, let it drain for 15 minutes, and then put it back. This ensures that the decorative pot never holds a pool of stagnant water. It acts as a safety barrier. If you are planting directly into a ceramic pot with one tiny hole at the bottom, you are playing a dangerous game with peace lily root rot.
Solving Peace Lily Drooping Issues
Distinguishing Thirst from Environmental Shock
Seeing your plant collapse can be scary, but peace lily drooping is usually just a cry for help. However, you need to be a detective to figure out why it is drooping.
As we discussed, the most common reason is simply a lack of water. The soil is dry, the turgor pressure is gone, and a good soak fixes it in hours. But what if you water it and it doesn’t bounce back?
I once moved my healthy plant to a spot near the front door during a cold spell. Within a day, it went limp. I watered it, thinking it was dry. It stayed limp. I realized too late that the cold drafts every time the door opened were sending the plant into thermal shock. These are jungle plants; they hate cold drafts below 60°F (15°C). You must analyze the environment, not just the soil.
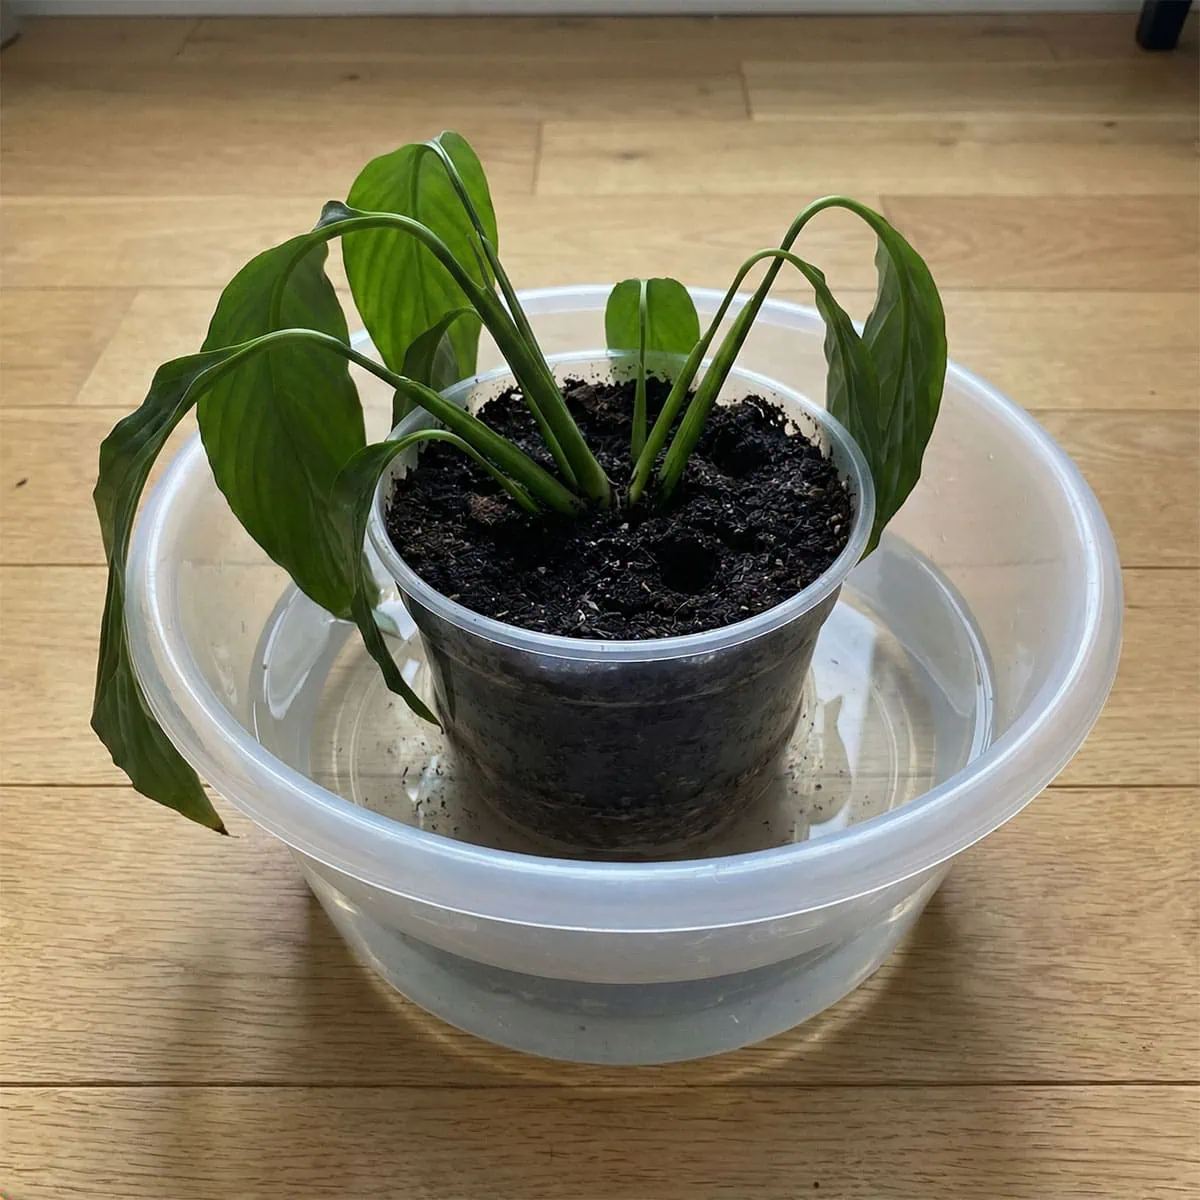
The “Deep Soak” Emergency Move
If you have severely neglected your plant (we have all been there) and the soil has pulled away from the sides of the pot, becoming hard as a brick, regular watering won’t work. The water will just run down the sides and out the bottom without touching the roots. The plant stays drooping.
In these extreme cases, I use the “Deep Soak” method. I fill a basin with room-temperature water and set the entire pot inside, submerged halfway up the side. I let it sit there for 45 minutes.
You can actually watch the water level drop as the soil sponges it up. This forces hydration into the center of the root ball. It’s the CPR of plant care. Lift it out, let it drain, and usually, by the next morning, the resurrection is complete.
Frequently Asked Questions (FAQ)
How do I know if I am doing peace lily watering correctly?
The best indicator of successful peace lily watering is the plant’s posture and leaf texture. If the leaves are upright, glossy, and firm to the touch, your routine is perfect. You should also check the new growth; if new leaves are unfurling without black tips, you are doing great. If the leaves are constantly yellowing or brown at the tips, you may need to adjust your frequency or water quality.
Is there a strict rule for how often to water peace lily?
There is no fixed calendar rule for how often to water peace lily because it depends entirely on your home’s humidity and light. Instead of watering on a set day, you should check the soil moisture twice a week and only water when the top inch feels dry to the touch.
How do I fix peace lily root rot?
Peace lily root rot is a serious fungal condition caused by overwatering. To fix it, remove the plant from its pot and wash away the old soil. Trim off any black, mushy, or slimy roots using sterilized scissors.
Repot the plant in a clean pot with fresh, well-draining soil mixed with perlite. Water sparingly until you see new growth. For more detailed scientific information on diagnosing plant diseases, you can refer to this fact sheet from Clemson Cooperative Extension.
Why is my peace lily drooping even though the soil is wet?
This is a major red flag. If the soil is wet but the plant is limp, it is not thirsty; it is drowning. This is often caused by damaged roots that cannot absorb moisture. The roots have likely died from lack of oxygen due to waterlogged soil. You should check the roots immediately for rot and stop watering. Cold shock or transplant shock can also cause this behavior.
Can I stick to a strict watering schedule?
It is risky. Indoor environments change. A schedule that works during the active growing phase will leave the plant swimming in water during cooler months when it drinks less. It is much safer to rely on the “finger test” or the “turgidity test” (feeling the leaves). Let the plant dictate the schedule, not the calendar.
Conclusion
Caring for this dramatic communicator is a relationship, not a chore. It teaches you to be observant and responsive. Once you master the art of reading the leaves and feeling the soil, you stop seeing the peace lily watering routine as a source of anxiety and start seeing it as a conversation. You are providing the essential element of life to a living thing that responds to your care in real-time.
Trust your touch, ignore the rigid schedules, and use the best water you can find. Your plant will reward you with lush, air-purifying foliage and beautiful white blooms.
You’ve got this. Happy growing!