🛠️ Quick Prep Summary: separating a parlor palm clump
Before the pot tips, how to separate and propagate a parlor palm clump is already half decided. Chamaedorea elegans is sold as many seedlings sharing one container, not one thickening plant. Gather these three things first, because every division must leave with its own roots attached.
- Straight-bladed snips: debris wiped off first, then dipped in 70 percent isopropyl
- Timing: early spring preferred; water the parent an hour before you start
- Difficulty: medium; 20-40 minutes for a three-stem pot, over a tub
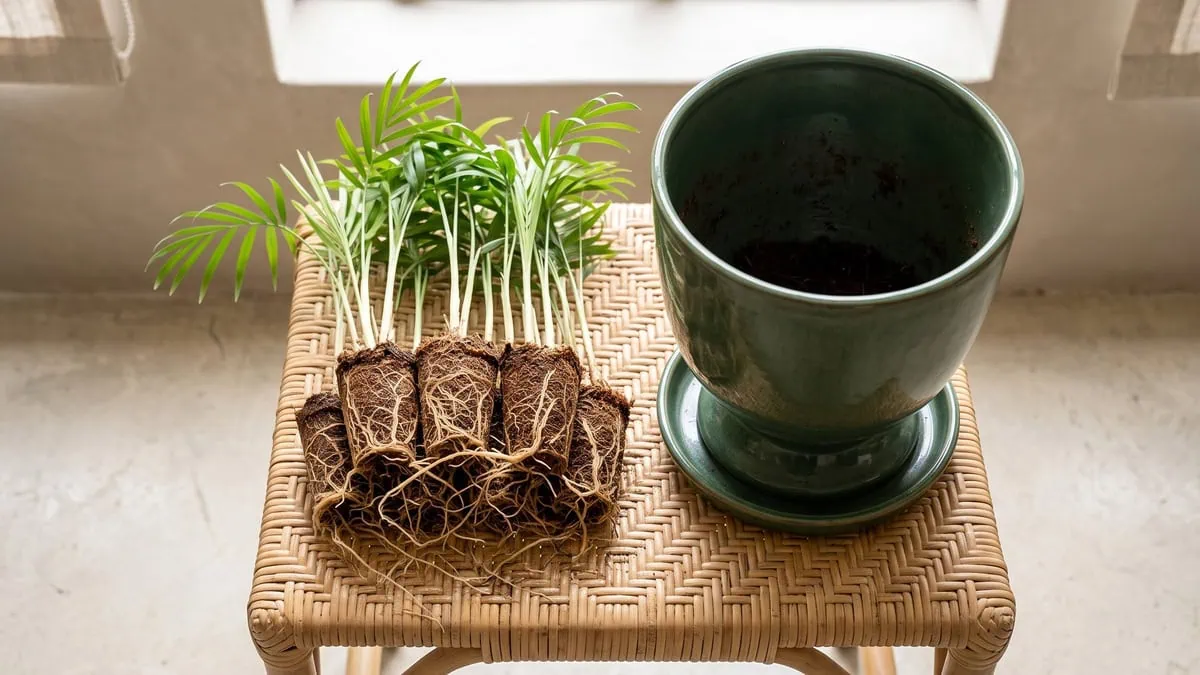
The pot came apart in my hands and the smell of wet coir came with it. Ten stems in one pot, and I had been feeding all of them as one plant (stay with me here). Each stem sat on its own fibrous plug, pale cream and firm, its own primary root spreading sideways.
The mistake I kept making was reading that clump as one thickening palm. Let me reframe that. What fixed it was counting stems at soil level before the blade came out.
Seed is the other route, and dehydration drops its viability within weeks. Chamaedorea elegans carries one growing point per stem, so a stem separated without roots of its own has nothing left to grow from, and no cut surface will replace it.
Separation is still doable. Before the specs, one caution from the master guide covering every stage: every division leaves the pot with its own roots, or it does not leave.
You do not need to know how many plants are in that pot yet. The table below settles the specs first.
How to separate and propagate a parlor palm clump: the quick specs
| Parlor palm specs | Specification |
|---|---|
| Routes this species actually supports | Division of the clump, and seed |
| Timing for separating offsets | Early spring preferred; any point in the year workable |
| Blade preparation | Debris off first, then wipe or dip in 70 percent isopropyl, no soak |
| Difficulty level | Medium (intermediate) |
| Time needed | 20-40 minutes for a three-stem pot |
| Will a severed stem re-root? | No — one growing point per stem, and none below the cut |
| Seed germination onset | Months rather than weeks, continuing unevenly past a year |
Tap the button below to get more plant fixes in your Google Search results

Table of Contents
Before the first cut: what a parlor palm pot actually holds
A parlor palm pot holds several separate plants, not one plant with several stems. That single fact decides every cut that follows, because a stem taken without its own roots keeps no growing point at all and cannot rebuild one of its own. Stem count first, then the frond, then the cut, then the blade, in that order.
Count the stems at soil level, not the fronds
Search “how many plants are actually in one parlor palm pot” and the results split down the middle. Some care guides describe a clump that thickens with age, which is the picture most owners arrive with and the one that makes them wait for stems that never come.
Others say otherwise. Growers sow several seedlings into one container for looks. The second group is right: Chamaedorea elegans is solitary and does not sucker, so nothing new ever rises from the base.
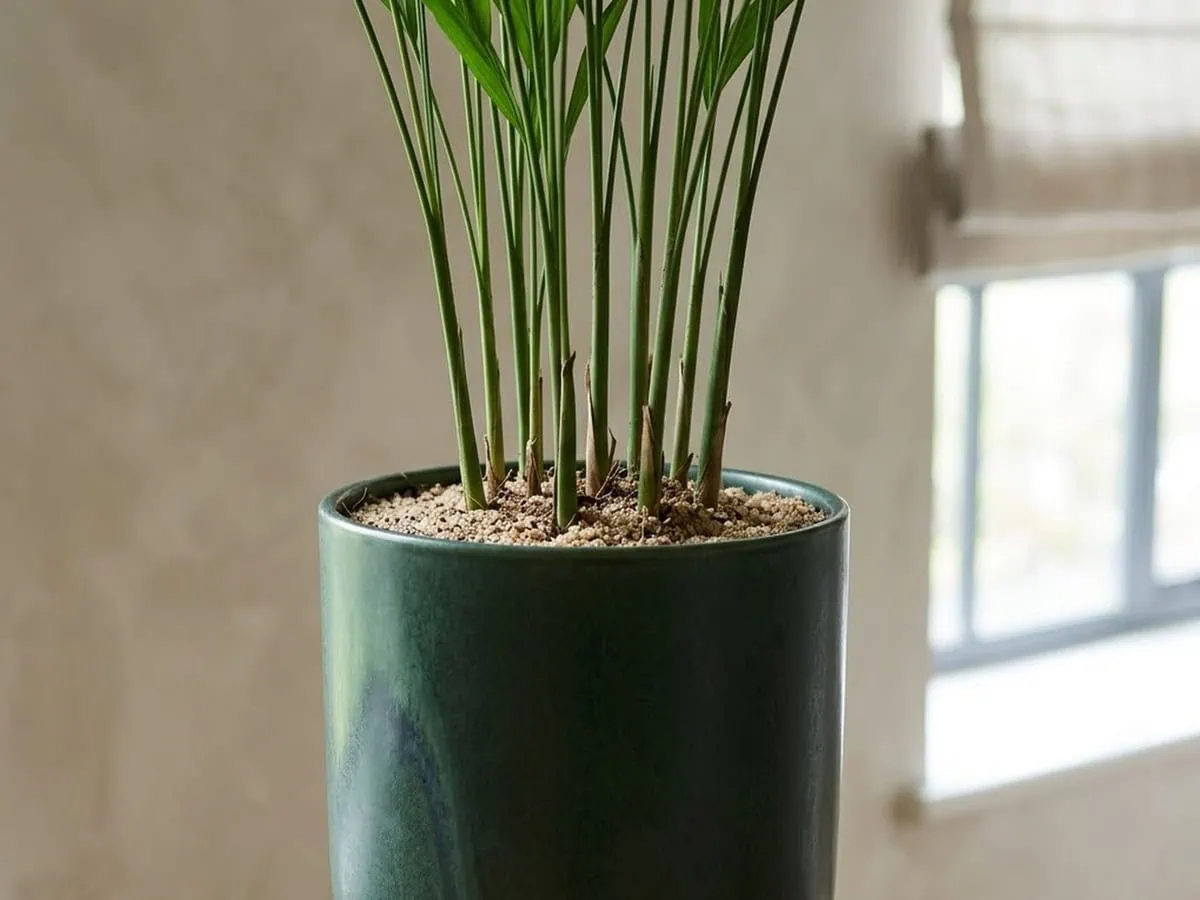
Look down. Count the points where separate stems enter the medium at soil level. Each of those points is where one plant’s own roots begin.
The part you are calling a branch is one leaf
The word branch appears in none of the care guides, and that is the whole problem. What looks like a branch is one leaf, called a frond. Trace that green stalk down to the upright stem: nothing else branches off it anywhere along the way.
That leaf comes away at the joint and takes no growing tip with it. So it does not root. Names on the tag make it worse: bamboo palm is the one that causes real trouble, because a second, taller species carries it too, while good luck palm and Neanthe bella ride on the same tags.
Separating a rooted stem or cutting the root ball
Most care guides say separation works, and between them they describe two different physical acts under one name. Most select a stem that already carries its own roots. A few cut the root ball itself into sections.
| What the cut follows | What happens to a stem |
|---|---|
| Follow one stem to its own roots | The stem leaves with the roots that feed it |
| Cut the root ball by geometry | The cut can pass between a stem and its own roots |
| Leave the stem attached | Nothing is lost, and the pot stays as bought |
Verdict: Follow the stem, not the shape of the root ball, because a rooted stem is the unit that survives the move.
Choose only after the medium is washed off. Few care guides tell you to do that, and without it you are picking a stem blind.
Clean the blade before it touches anything
Care guides hand you a blade and call it clean or sterile. Not one says how to get it there. Wipe the debris off first, because grit you can feel with a fingertip carries soil straight into an open root.
Then wipe or dip the blade in 70 percent isopropyl, straight from the bottle, with no dilution and no soak. I have carried soft, dark root tissue from one division to the next on an unwiped blade, and the second plant showed it. Do it again between the parent plant and every division.
Tap the button below to get more plant fixes in your Google Search results

Splitting the pot, stem by stem
Splitting the pot is four moves, and each one protects the roots that the next move needs. Nothing here cuts green tissue, and the only cut that matters is the one that frees a stem together with the roots it grew. The following steps run from watering the parent to potting the last division.
Step 1: Water the plant and let it rest
Water the plant in the pot it is in and leave it an hour before anything else. A damp root mass slides apart. I have skipped that hour, and the dry mass came apart in crumbs that took the fine feeder roots with it, which is loss you cannot see until later. The stems you are about to separate hold no water store of their own, so the mass must be damp when it comes apart. Early spring is easiest, though any month works.
Step 2: Wash the medium off the roots
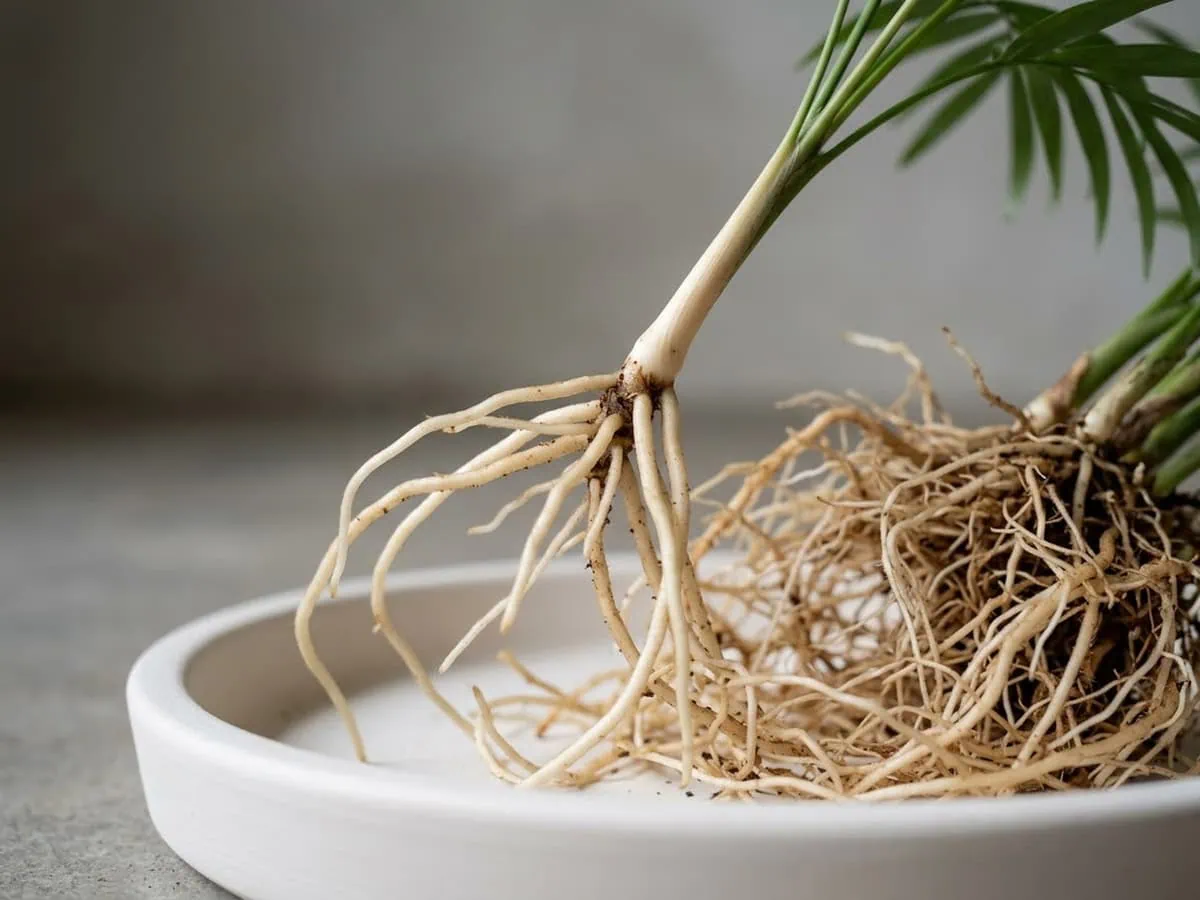
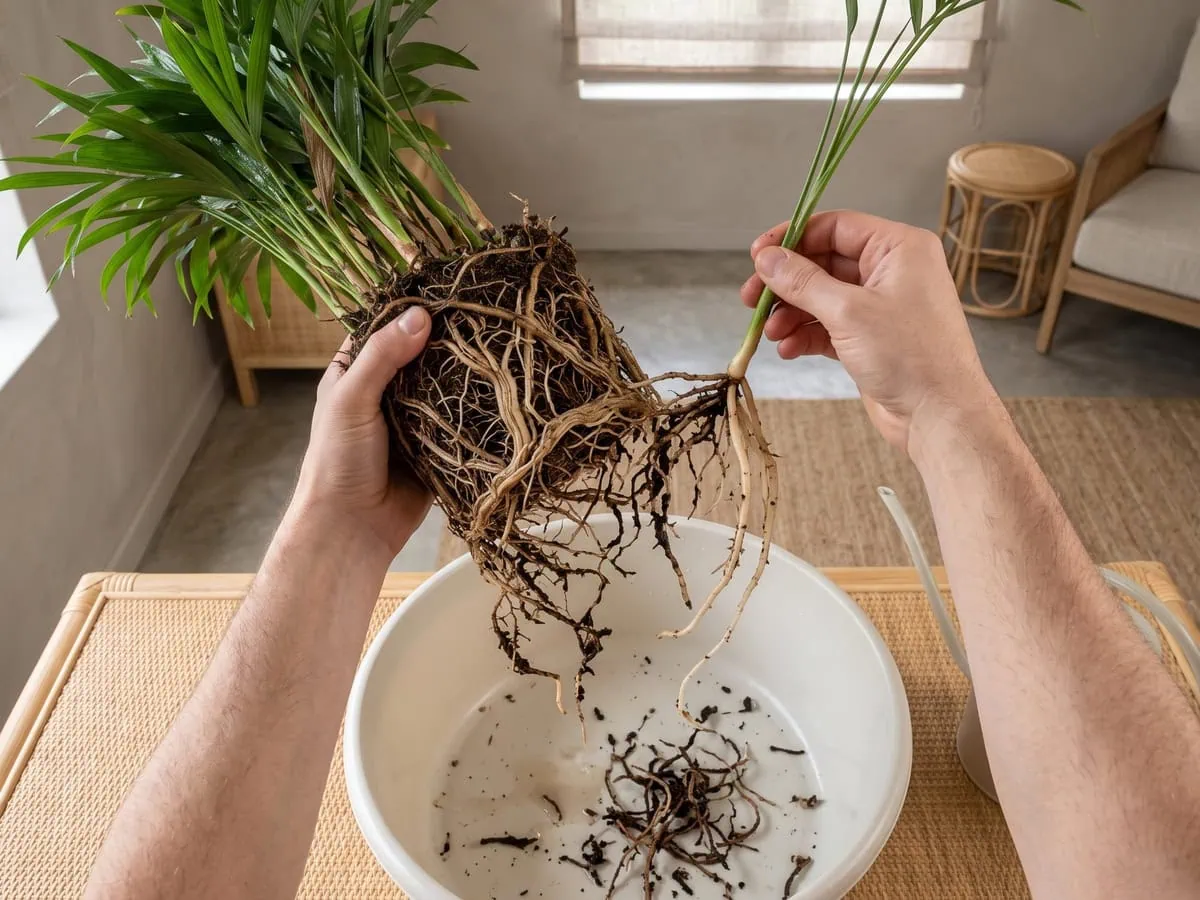
Wash the medium off the roots under a slow tap. You cannot choose a stem you cannot see. Hardly any published instruction says to do this at all, and it is the step that turns a guess into a decision, because the roots of one stem thread straight through a neighbor’s. Rinse until the fibrous plug reads as separate root systems rather than one cylinder. Work over a tub, not a sink drain, so the washed medium does not go down the pipe.
Step 3: Follow one stem down and free its own roots
Follow one stem down to where its own roots begin. Take it away only there. A root that stays firm between finger and thumb, its pale cream skin staying put instead of sliding off a thin dark thread inside, is a root worth keeping. Dark, soft segments whose outer sheath slips away from the thread inside come off now, and nothing green does. Cannot trace them? Leave that stem attached to the parent.
Step 4: Pot each division just large enough
Pot each division just large enough for the roots it has. Step up one size only. An eight-inch pot steps to a ten-inch, and a four-inch to a five-inch, because a division swimming in wet medium it cannot occupy is the fastest way to lose it. Set the root mass about an inch below the rim, water it through, and let it drain before it goes back on the stand. Skip the gravel layer entirely; it holds a perched water table instead of moving water out. Fresh mix goes in, never the old spent medium. Choose it well, because the mix each division goes back into decides how fast it settles.
The weeks after, on both halves of the pot
Both halves of the pot go quiet for a while, and that quiet is the normal outcome rather than a warning. Water, light and feeding come next, then the test that separates a setback from a loss on either half.
Water, light and the feeding hold
The next watering waits until the top one to two inches of the mix have dried. No calendar. A division that has just lost part of its root system cannot drink at its old rate, so damp rather than saturated is the target while the cut surfaces are still open.
Keep both halves in bright indirect light, roughly 75 to 500 foot-candles, and out of any direct beam. Hold the feed for six to eight weeks after potting.
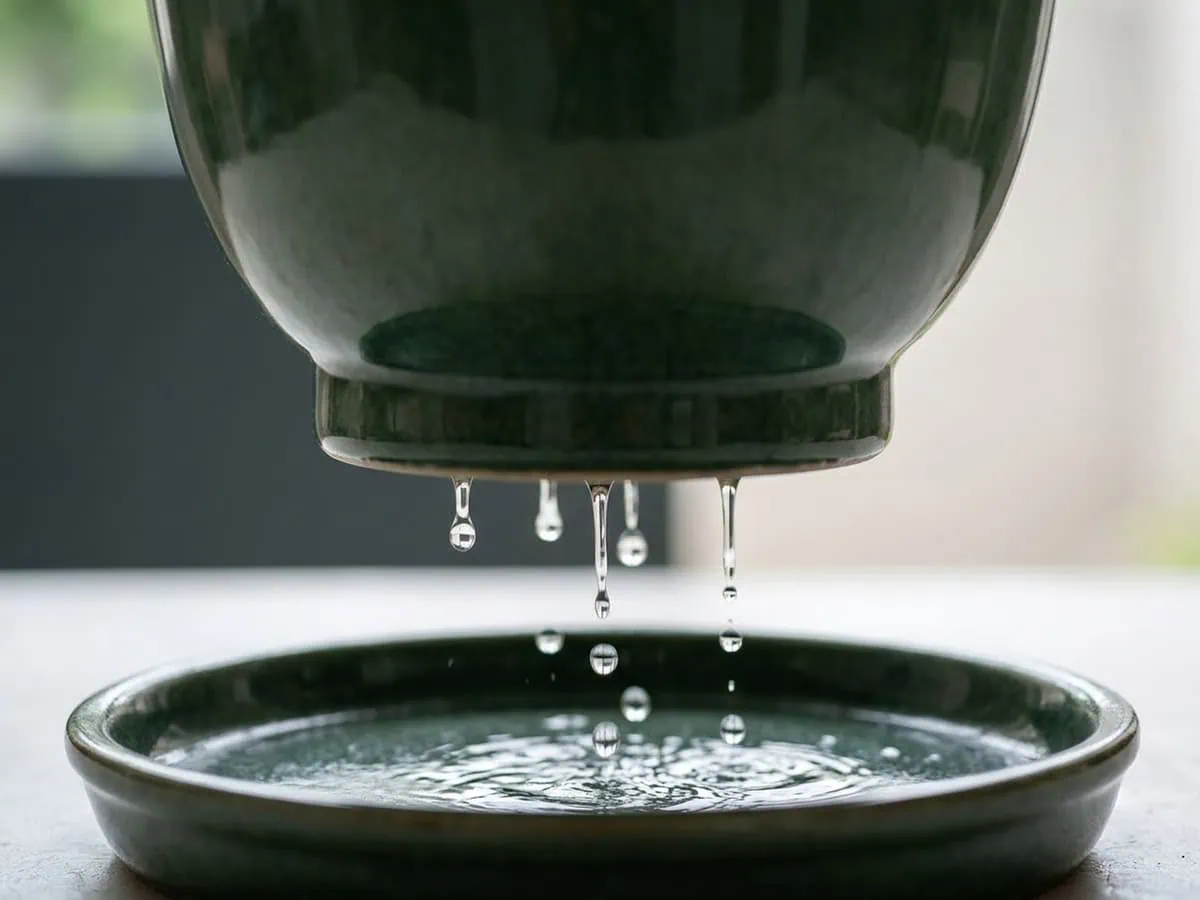
Do not mist. On this species misting is warned against outright, because it wets the foliage without changing the air around the plant. Water each division through until it drains, and empty the outer pot once it has finished, so no half stands in its own runoff.
Normal setback, and what a real failure looks like
Expect both halves to look worse before they look better. Owner accounts put the standstill at a month or more, with stress taking about as long to surface, which is an owner report rather than a measured figure and the same shape as what recovery from root disturbance looks like week by week.
This palm holds no water store, so it cannot coast through the wait on reserves. What it can do is rebuild leaf area, which is why one frond lost early is not the same thing as a plant lost.
A real failure reads differently. Pinch the stem base of every division, and of the parent. Firm is fine; soft, with the surface giving under a thumbnail, is not.
Fronds that yellow and dry from the tip are the plant shedding load it cannot carry, and they come off only once they are brown, because green tissue is never cut from this palm.
The seed route, and the two routes that do not exist
Only one route makes a genuinely new plant, and that is seed, which is slow. Below: collecting and soaking the seed, sowing it warm, the months-not-weeks wait, the two methods that never root at all, and the tall bare stem.
Collecting and soaking the seed
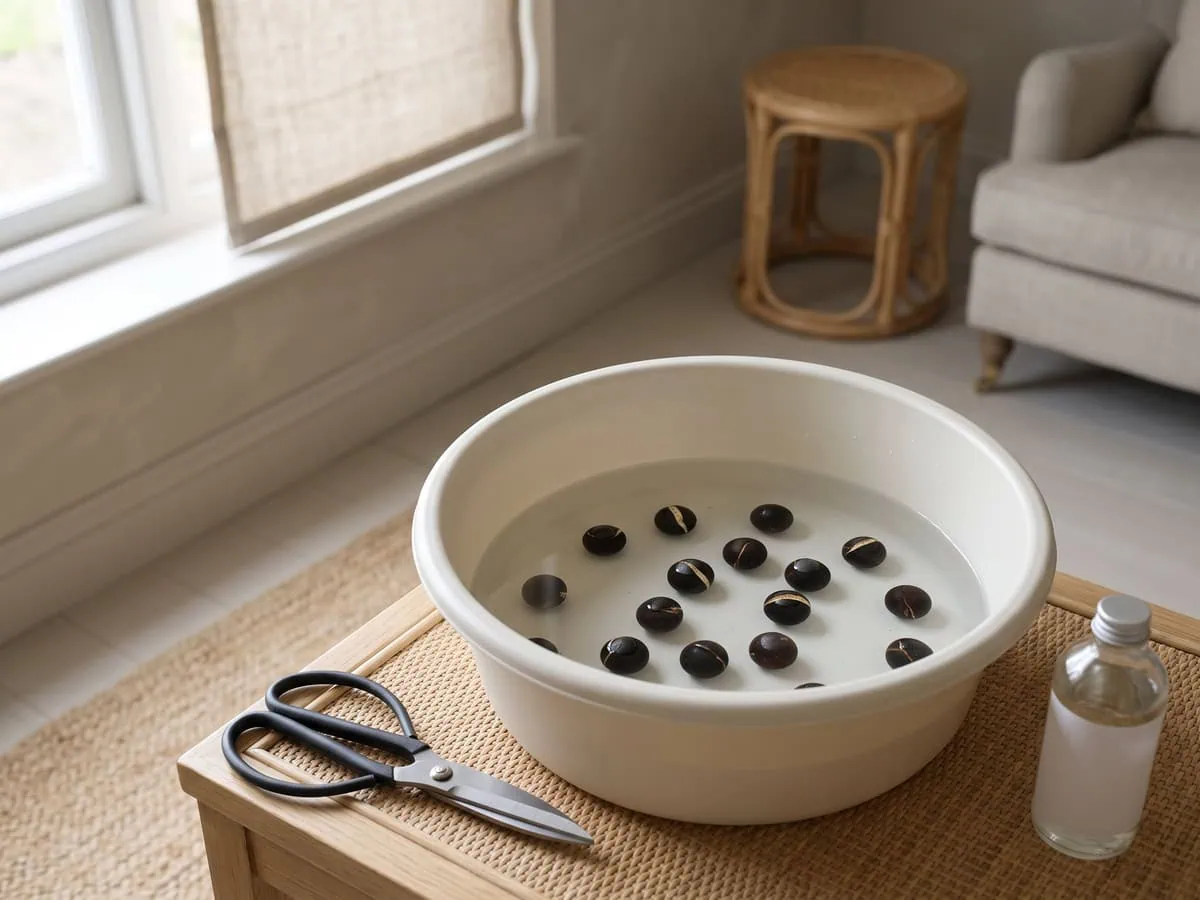
Seed comes off a mature plant as small round black fruit held on a thin branching stalk, and where the black fruit on a mature plant comes from starts earlier than most owners expect. Most indoor plants never get there. Male and female flowers sit on separate plants, so a specimen standing alone has nothing to pollinate it and rarely sets fruit.
Soaking comes up constantly — “do parlor palm seeds need to be soaked before planting” — and yes, it matters. Soak the cleaned seed for one to seven days and change the water daily. The end point is visible rather than timed: the coats begin to crack and green up underneath.
Sowing warm, and how long the wait really is
Sow into a well-drained medium. Keep it warm. According to the International Society for Horticultural Science, palm seed germination runs best when the seed was picked fully ripe, the flesh removed, and the seed sown promptly.
85-95F is the band that germinates fastest, which is warmer than the room that will later house the plant.
So “how long do parlor palm seeds take to sprout” has an honest answer. Months rather than weeks. This species is singled out for starting slowly, even among palms.
Emergence then continues unevenly for more than a year, and germination percentage is low across palms as a class, so judge a sowing by the batch rather than by the first seed.
Why a cut stem or a jar of water never roots
Ask “can you root a parlor palm from a stem cutting” and the answer is no. There is no node anywhere along the cane to break dormancy, and the one bud that could grow sits at the very tip you cut away. Water will not do it either.
Published guidance rarely answers that question at all, and where it does, the answer is that this palm is grown from seed, never from a water-rooted cutting.
In my experience — though n=1 — a stem in a jar stays green for weeks before it fails, and that greenness is exactly what keeps people waiting on it. Nothing is rooting behind it. The stem is spending what it already had.
The tall bare stem, and what no guide covers
The question “can a tall bare parlor palm stem be re-rooted higher up” comes up once a stem outgrows the room. Division and seed stay the two routes this species supports, and neither one starts partway up a standing stem.
The honest position is this. Check whether the stem still carries a live growing tip at the top. If it does, the plant is alive and the height simply stays, which is where what to do with a stem that has outgrown the room takes over; if it does not, that stem is finished, and no cut will restart it.
Frequently asked questions
Can parlor palms be separated?
Yes. The stems in the pot were never one plant, so taking one out is separation rather than surgery. Several seedlings go into a single container at the nursery for a fuller look.
The toll is real. Both halves shed some foliage afterwards, and that shedding is what the move takes out of them. Neither half does anything visible for the first month or more.
Can you take cuttings from parlor palm?
No. Cut below the crown and what you hold is a length of cane with no bud on it at all.
That is why published guidance carries no node count and no cutting length for this species. The absence is the answer rather than a missing figure. Division and seed are the two routes that work.
Can you root a palm branch?
No, and the part in your hand is not a branch. This palm grows one unbranched stem per plant, and what looks like a branch is a single compound leaf, a frond.
Trace the green stalk back to the stem and nothing comes off it along the way. Removing it takes one leaf and no growing tip. It will not root in soil, in moss or in water.
Can you root a palm in water?
No. A stem in water does not root, and the only step in the whole procedure that involves standing water is the pre-sowing seed soak.
Green tissue on that piece is not evidence of a root; it is stored sugar being spent, and this palm holds no water store to spend for long.
How do you separate palms?
Water the parent an hour ahead, wash the medium off the roots, then follow one stem down to where its own roots begin and free it there.
Give each division a pot just large enough for the roots it carries, moving up one container size at a time. Keep the medium damp rather than saturated, and hold the feed for six to eight weeks.
The 4-move parlor palm division protocol
Four moves take a parlor palm clump apart: water it, wash the roots clear, follow one stem down, then pot each division just large enough. Honestly? The counting comes first, the blade last.
Three stems at soil level means three plants (count where they leave the medium, not higher up). Hold the feed six to eight weeks and keep the medium damp. Push a finger in, and when the top one to two inches come out dry and cool to the touch, the division is ready for water.
Skip the mister. Cut brown tissue only; green fronds stay. Next is the mix each division goes into, then recovery week by week.
Four moves, and one rule about roots: that is how to separate and propagate a parlor palm clump. Count the stems before the blade goes in, and nothing you lift out of that parlor palm pot will leave its roots behind.
Tap the button below to get more plant fixes in your Google Search results