🚨 Emergency 30-Second Answer: brown tips on a peace lily
Stop cutting — brown tips on Spathiphyllum wallisii, a member of the Araceae family, are dry air below 40% humidity or salt, not rot. If you are asking why does my peace lily have brown tips, the cause sits upstream of the leaf. Dead tip tissue never turns green again.
Work the cause first: check the newest leaf, then the pot, then the water. Salt shows as white crust on the soil surface and the pot rim. Trim the dead edge only after the cause is corrected, or the next leaf browns too.
- Newest leaf first: older leaves brown with age, not from stress
- Feel the tip: dry and papery points to air or salt
- Check the rim: white crust on soil or pot means salt
- Move it back: vents, radiators and cold glass all dry leaf edges
- Fix, then trim: cutting first leaves the driver running and browning continues
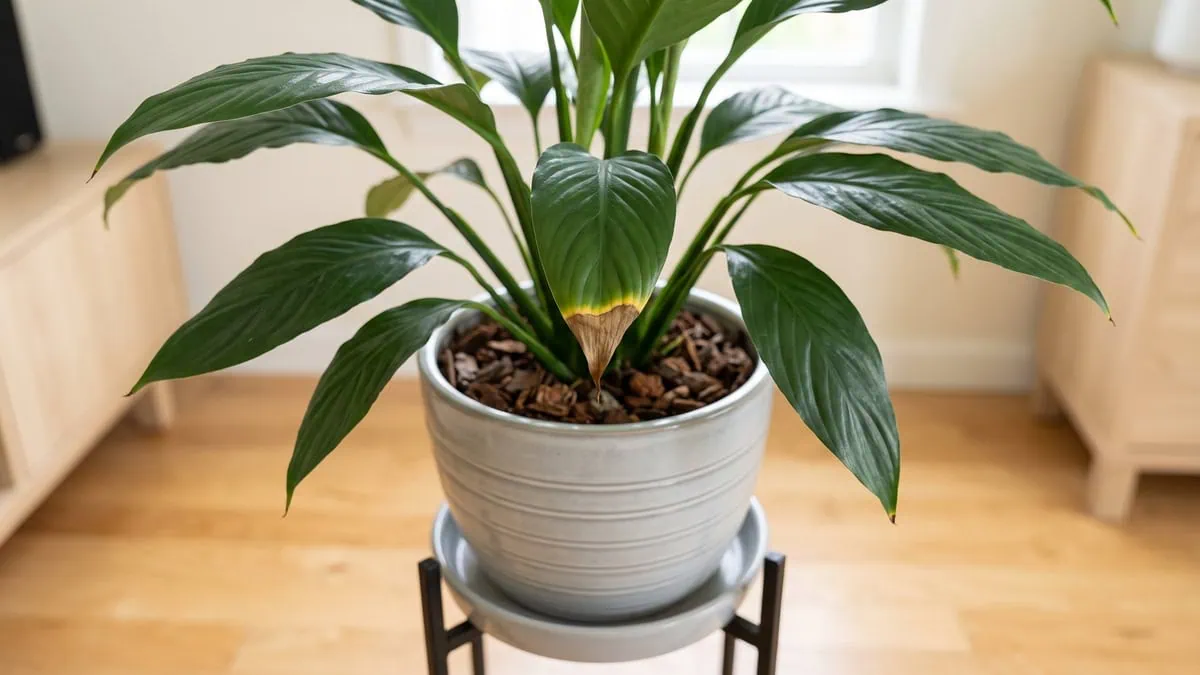
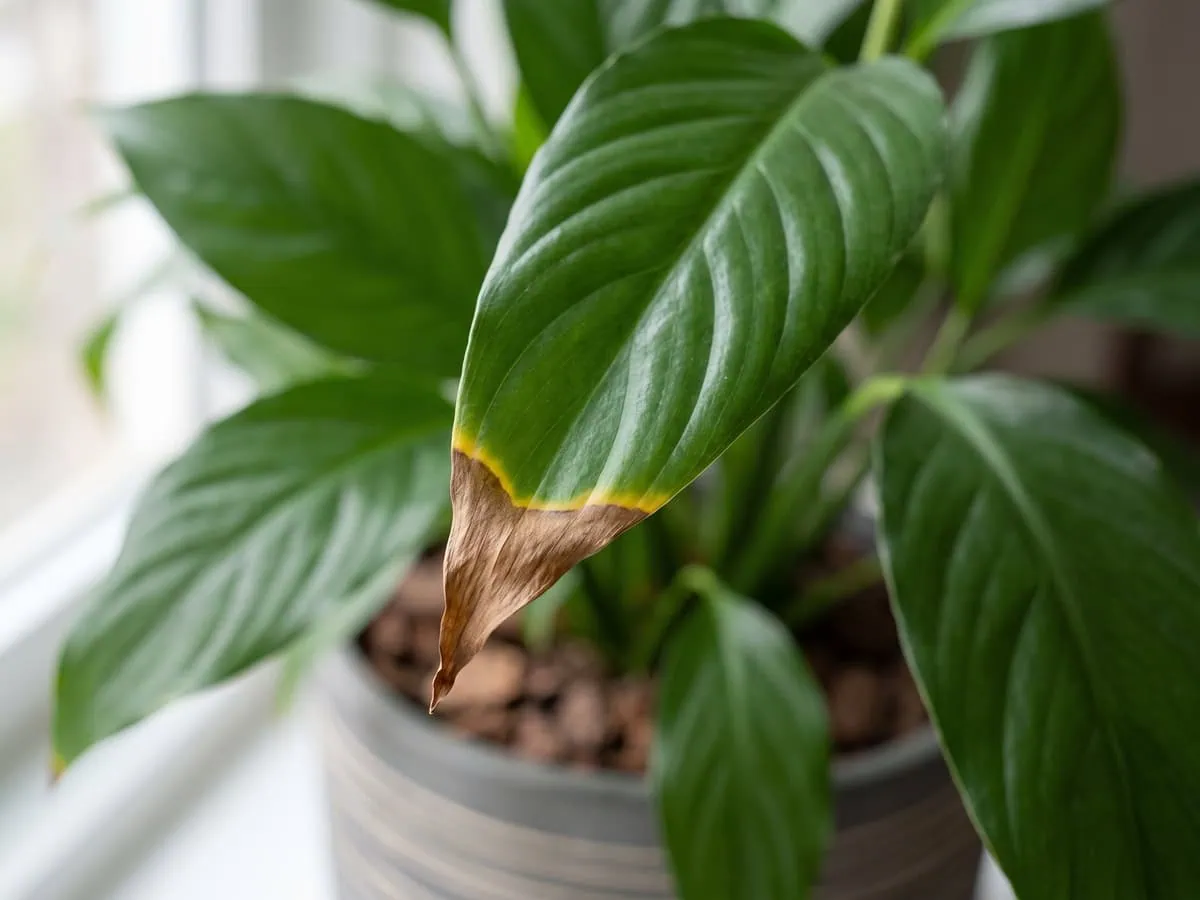
The tip of the newest leaf goes dry and papery first, and a thin yellow band separates the dead edge from the still-green blade. I took an online tip’s word for it, ran a leaching flush, and lost two more leaf tips before I thought to check the newest one first.
Rather than something spreading in from the outside, I discovered that marginal browning on this plant is an abiotic plant disorder — a supply failure at the leaf edge, not an invader.
There is no thick, water-storing tissue anywhere on this plant — its leaves are thin and non-succulent, so soluble salts and dry air both bite at the margin long before they reach the middle of the blade.
So the fix is upstream. Not on the leaf. Name the pattern on the leaf, correct the driver behind it, then trim — the routine that stops it starting again is the maintenance rhythm behind clean foliage.
The edge is not the whole leaf, so put the scissors down for now. The following table sets the four numbers behind an edge-first failure, and the one cut rule that follows.
Why does my peace lily have brown tips: the four numbers and the one cut rule
| Peace lily specs | What to hold it to |
|---|---|
| Air moisture target for clean tips | 40-50% relative humidity indoors |
| Water-quality risk behind edge burn | Cumulative soluble salts; softened water avoided |
| Feed-salt leach | At least 2-3 container volumes, every 4-6 months |
| Light ceiling before scorch | Bright filtered light, never direct sun |
| Cut into the living green tissue? | No; take the dry brown edge only |
Tap the button below to get more plant fixes in your Google Search results

Table of Contents
Read the leaf first: three looks that name the cause
Three looks name the cause of a brown mark: which leaf carries it, where on the blade it sits, and whether it is still moving. Typing “is my peace lily leaf spot fungal or a watering problem” into a search bar returns a list of causes, not a route through them. Run them in order.
Stop trimming until all three looks are done. Cut tissue never grows back, so a blade taken to the leaf before the cause is named removes the evidence and leaves the driver running.
The following sections take the looks in order. First, though, the four marks and where each one sits (they do not share a fix).
| What you see, and where | What it points to |
|---|---|
| Dry brown tip, thin yellow band, running back from the edge | Supply side: dry air, salts, or a wet-dry swing |
| Circular tan-to-black spot inside the blade, green all round | An open question, not a named disease |
| Pale bleached patch on the window side, going brittle | Direct sun |
| Blackening from tip and edge inward at room warmth | Chilling, just above 32F to 59F |
Verdict: Start at the tip row. That pattern points upstream at supply — air, water and feed salts — and never at an organism.
Start with the newest leaf
Find the newest leaf, the one still unfurling, and look at its tip. Clean signals it stopped. A browned tip on that youngest blade, still soft and half-rolled, signals the driver that marked the older leaves is running today and will mark this one too.
The question “why are my peace lily leaf tips turning brown and crispy” splits in two right here. Old leaves brown as they age, one at a time. I check the newest blade first (ten seconds, no tools).
Browned tips against discrete blade spots
A browned tip runs back from the edge and stops. A spot does not. Bounded, sitting inside the blade with green all round it.
But brown or black spots spreading on peace lily leaves are a separate question, and the descriptions diverge: fungal lesions run tan to reddish brown to black and roughly circular, merging into larger irregular ones, while bacterial spots look watery and angular with a yellow margin. Neither is established on this plant. Photograph one leaf, compare it a week later.
Sun-struck patches look different
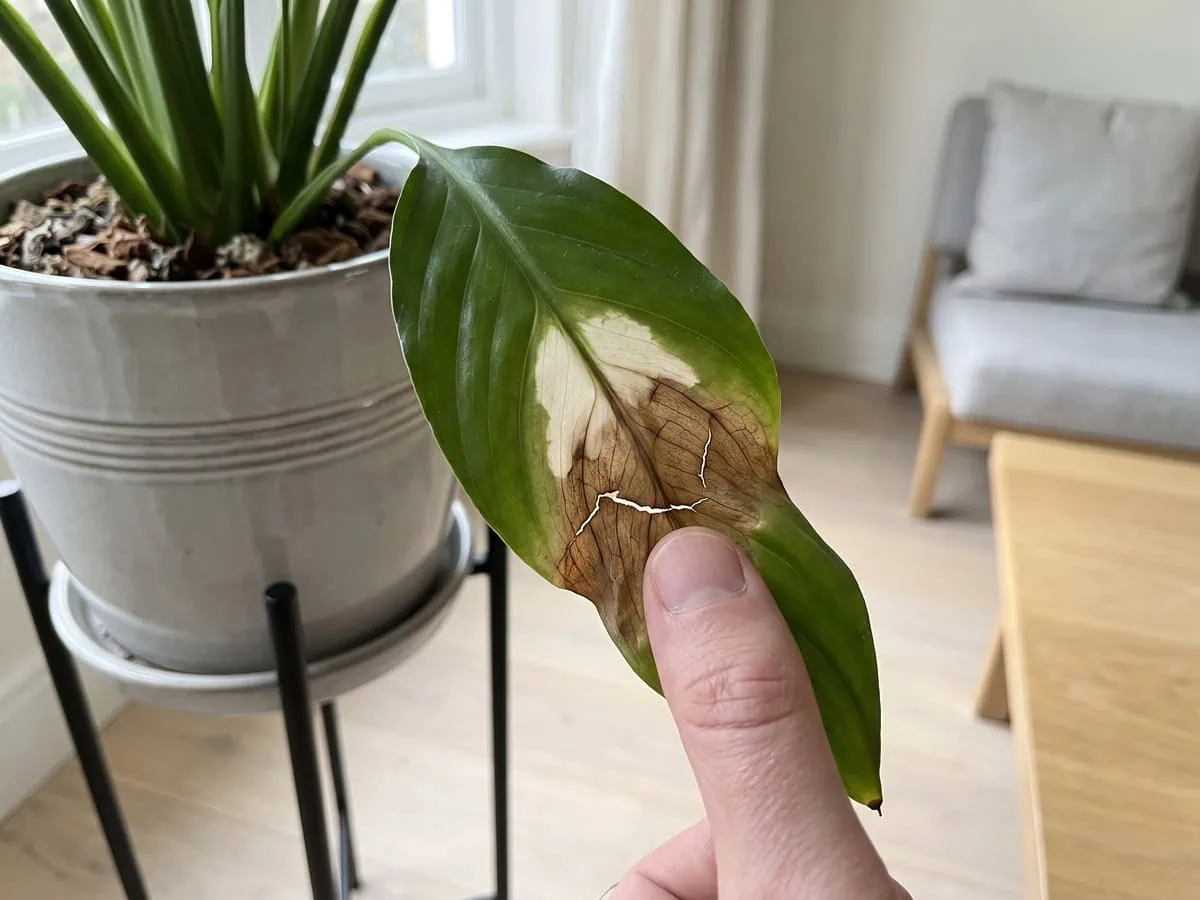
Sun damage does not start at the tip. It starts as a pale, bleached or faded patch on the side facing the window, and those areas eventually become brown and brittle. Strong sun on a dry growing medium makes it worse.
So peace lily leaf sunburn from too much direct sunlight reads as a patch, not a rim. Press one: it gives way brittle under the thumb, cracking rather than bending, which a fresh tip burn never does. Move the pot back from the window the beam comes through.
Tap the button below to get more plant fixes in your Google Search results

Dry air, tap water and feed salts
Three supply-side drivers brown a tip: dry air, salts riding in with the water, and feed salts left in the pot. The University of Missouri Integrated Pest Management sets out leaf tipburn — browning that starts at the tip and runs back along the margin — as a disorder of feeding, watering and water chemistry. Not an infection.
The following sections take the three in turn. Two settle today (the third wants a jug).
Air that is too dry, and how to check it
Hold the air at 40-50% relative humidity. A heated room often sits at 10-20 percent, and on this plant dry air alone browns the leaf edges. A small hygrometer — an instrument that reads air moisture — beside the pot for a week settles it.
Moving air speeds it up: a vent or a radiator pulls more moisture out through the leaf than the roots can replace in time, and cold glass adds chilling injury anywhere from just above 32F to 59F. Step the pot back from the pane. Group it, or stand it on damp gravel.
What tap water leaves in a closed pot
The search “peace lily brown tips from tap water or fertilizer salt” weights its two culprits wrongly. Salt is the driver. What accumulates in a container that never flushes itself is sodium from a softener and calcium from hard water.
So start with the report your utility already publishes. Rainwater is what this plant’s own guidance prefers, and softened water is the one source to avoid outright. Cadence is a separate question, and how the watering habit is set belongs with it.
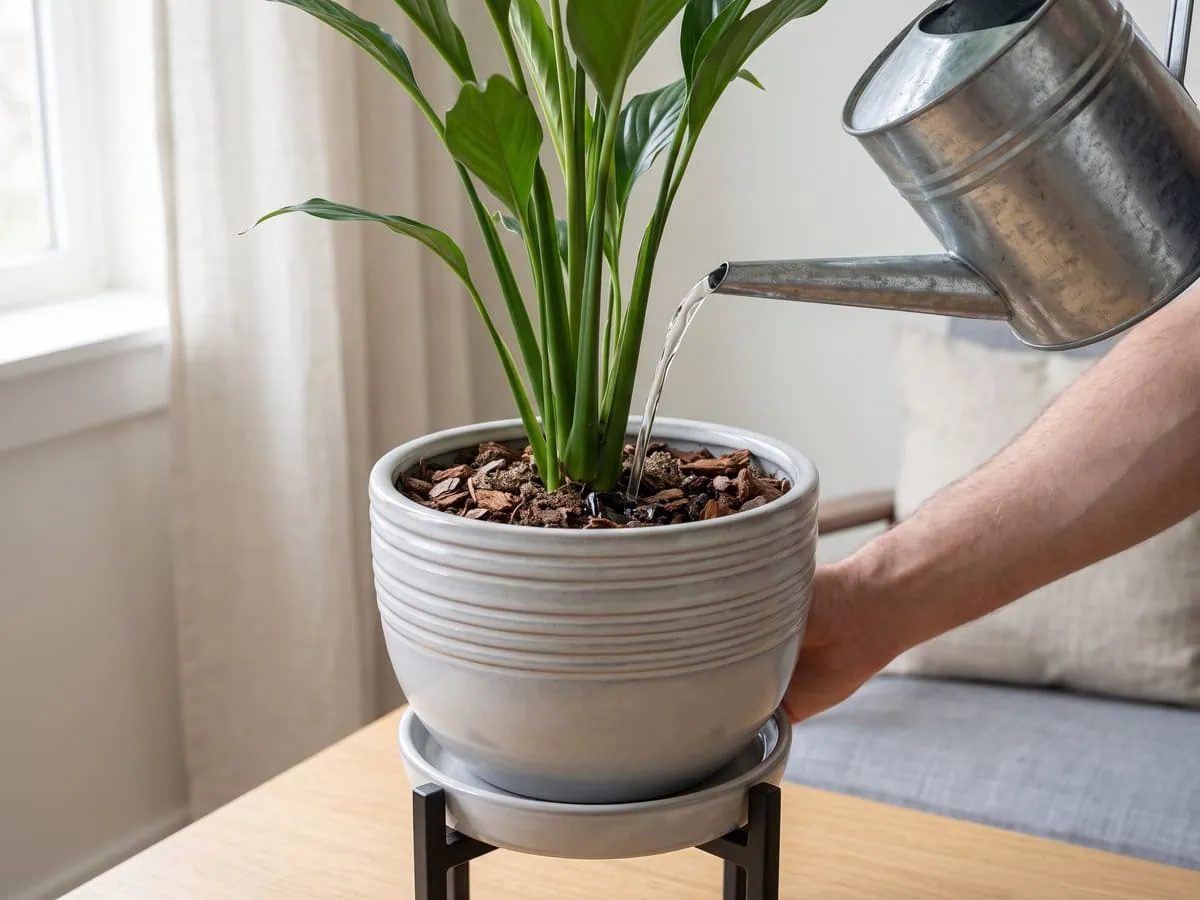
Leaching the pot: volume, not seconds
A crust gives the salt away before the leaf does. Run a fingernail along the rim: a fine white grit that lifts and comes back within weeks is mineral and fertilizer residue. I look there first (rim before blade, every time).
Scrape that crust and the top half-inch of mix off before you rinse, or the water carries it down into the root ball. Then pour at least two to three container volumes through, let it drain fully, and repeat every four to six months.
Fifteen seconds under a tap is a different operation. A blade going yellow all over rather than browning at the edge is a whole leaf yellowing rather than an edge browning.
Trimming the damage and testing whether the fix held
Correct the cause first, then cut. A blade takes the mark off and changes nothing upstream, so the next leaf browns the same way. Of twelve care guides on this symptom, one puts those two steps in that order.
The following sections take the cut, the myths and the test in turn. Until the cause is named, the scissors stay down.
Where to stop the cut
Stop at the dead tissue and leave a hairline of brown standing. Growers report that cutting into living green lets the browning advance from the new edge (an owner observation rather than an extension finding, and the only cut-depth guidance published).
Wipe or dip the blade in alcohol once dirt and sap are off. No long soak. Run a thumb down a leaf that is more brown than green — papery, slack, none of the springy stiffness a healthy one snaps back with.
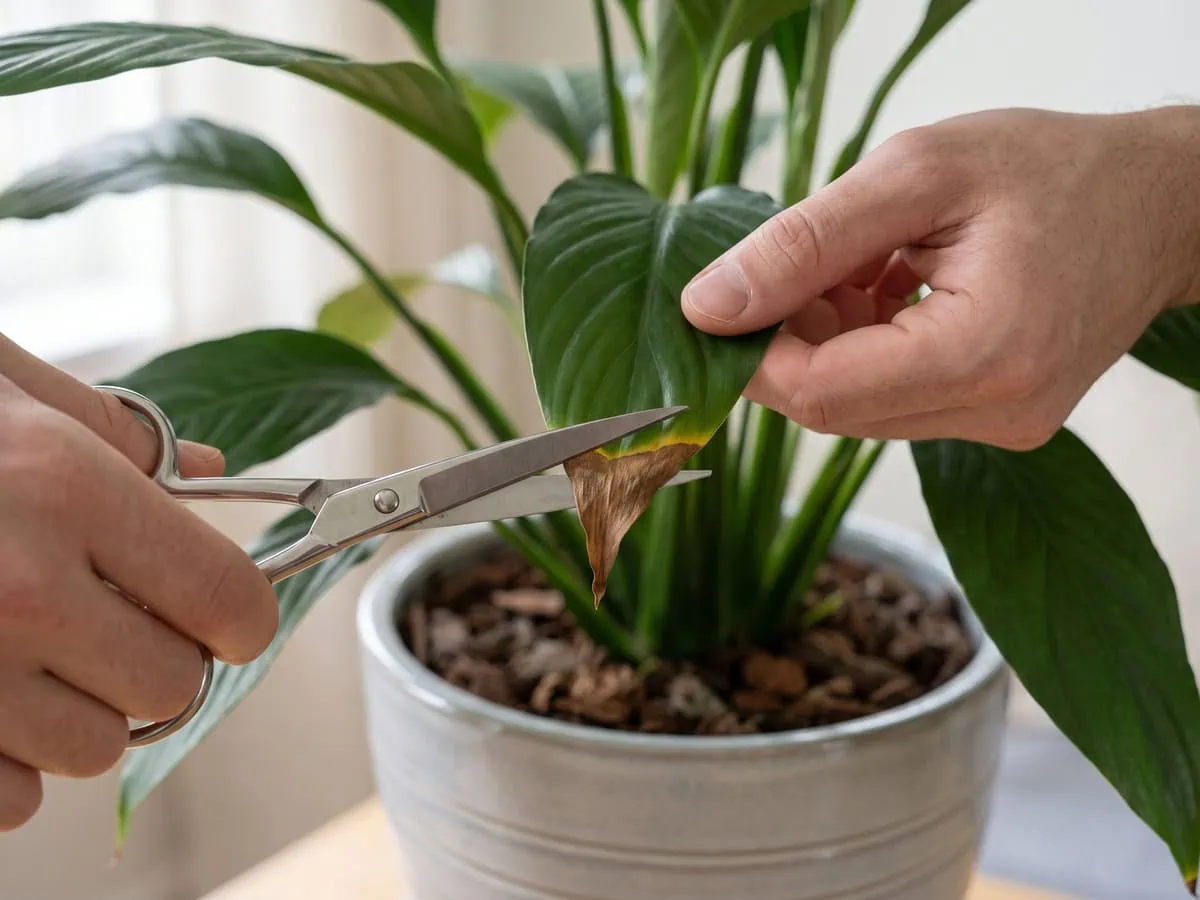
That leaf comes off at the base of its own stalk. How much to take at once is unsettled: one guide caps removal at a third of the plant, another at a fifth of the affected leaves (different denominators, not two readings of one figure).
A base gone soft and dark is salvage once the root zone is lost, not a trimming job.
Mistakes and myths that keep tips browning
Standing tap water overnight does not fix this. It lets chlorine dissipate and leaves fluoride, hard-water minerals and chloramine where they were, which is the fraction that accumulates in a closed pot. Six of twelve guides still recommend it.
Misting is the second. It changes the air at the leaf surface for a few minutes rather than the room, and one guide recommends it and then concedes exactly that a sentence later.
The next leaf is the verdict
The next leaf settles it, not the ones you trimmed. Necrosis never turns green again, and no care guide states how long to wait before judging the correction — the marker to watch is simply new growth.
Watch the newest blade unfurl. A clean tip means the driver stopped; a marked one means it is still running. Whole leaves sagging instead are leaves that collapse over the pot rim, a different question.
Frequently asked questions about peace lily brown tips
Should I cut the brown tips off my peace lily?
Yes, once the cause has been corrected. Cutting first removes the evidence and leaves the driver running, so the next leaf browns the same way.
Use sharp scissors on tips that are already dry or brown, and stop at the dead tissue rather than slicing into living green. Growers report that a cut into green lets the browning advance from the new edge, though that is an owner observation rather than an extension finding.
How to fix brown tips on peace lily naturally?
Correct the three supply-side drivers: air moisture, water quality and accumulated feed salts. None of the three needs a product.
Hold indoor air near 40-50% relative humidity using a gravel tray and grouped pots, which are the two no-device methods the extension sources support. Switch to collected rainwater, which this plant is documented to prefer, and leach the pot with at least two container volumes of water every four to six months.
How do I get rid of brown tips on leaves?
Remove the marked tissue only after the driver behind it has been changed. Removal is cosmetic; the correction is what decides the next leaf.
Scrape any white crust off the substrate surface before you rinse, or the water carries the salt down into the root ball instead of out of it. Then trim the dead tip with a blade wiped in alcohol, and take a leaf at the base of its stalk when it is more brown than green.
Can a plant recover from brown tips?
The plant recovers; the marked tissue does not. Necrosis never turns green again, so the browned area stays exactly as it is for the life of that leaf.
Recovery shows up on new growth instead. Watch the newest blade unfurl and check its tip: clean shows the driver has stopped, and marked shows it is still running. The leaf is the marker rather than the calendar.
What does it mean when the tips of my peace lily leaves turn brown?
It means a supply problem at the leaf margin, not an infection. Tip and edge browning tracks dry air, water chemistry or salts accumulating in a closed pot.
Position on the leaf is what separates the causes. Browning that runs back from the tip and stops is supply-side; a bounded spot sitting inside the blade with green all round it is a separate and unsettled question. Blackening that starts at the tip and moves inward at room warmth points to chilling instead.
Should I cut off the brown tips?
Only the dry brown edge, and only after the cause is fixed. Leave a hairline of brown standing rather than cutting into the green blade.
How much to take at once is genuinely unsettled: one guide caps removal at a third of the plant and another at a fifth of the affected leaves, which are different denominators rather than two readings of one number. Where a leaf is only tip-burned, trimming the tip and keeping the leaf preserves working leaf area.
Read the leaf, act on the cause, win a clean tip
You already have everything this needs: one look at the newest leaf, one look at the pot rim, and a jug of the right water. The correction is unglamorous. It works, and it asks nothing but attention.
The next question most readers reach is what the watering rhythm behind all three drivers should actually be, and that is where the cadence itself is settled rather than here. Remember that this species has nowhere to store a reserve, so the margin is always the first tissue to pay for a supply gap.
Knowing why does my peace lily have brown tips is worth nothing until the next leaf comes in clean, so change one driver this week and read the blade that follows. A brown edge is a finished record, not a live wound, so change what the air and the water are doing before you reach for the scissors.
Tap the button below to get more plant fixes in your Google Search results